Introduction
This article describes how to apply custom fonts in a Silverlight 2.0 application. Just follow these steps and you will be on your way.
I have created this application using Visual Studio 2008 and have used existing custom font files.
Getting Started
Step 1. Create a Silverlight Project
First of all create a new project in silverlight using Visual Studio 2008. Select New Project and select Silverlight Application from the list of Templates in the right side pane as it is shown below.
Figure 1.
On next step, you will see two options. Keep the first option selected as shown below.
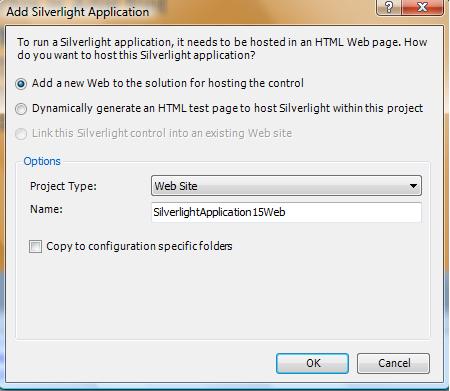
Figure 2.
Step 2. Add a Custom File
A custom font file is a file with extension (.ttf), you may have downloaded from somewhere else which are not already a part of your system. In this sample, I used existing Georgia and Courier New fonts.
Let's add a font file to the project.
Right click on the Project and select Add Existing Item option and go to your location where you have downloaded a font file. Remember a font file has .ttf extension.

Figure 3.
Most important thing is to set Build Action to that font file. Right click on the font file you just added to the project and select the Properties menu item and set Build Action Resource but default build action property is none as shown below.

Figure 4.
If you double click on your font file name, the file contents look like following.

Figure 5.
Step 3. Applying Custom Fonts
Now let's add some controls to your page. Add some controls from Toolbox to your XAML file. I add a StackPanel and a few TextBlock controls to the page.
When you apply a custom font, you need to specify the file name and the font name in following format. As you can see from here, I am applying georgia.ttf file with font name Georgia seperated by a hash symbol. This you need to replace with your font file name and font name.
FontFamily="georgia.ttf#Georgia"
My final XAML code looks like below. As you can see from this code, I have added a StackPanel and several TextBlock controls and set their font family properties.
<!--These are example of default fonts -->
<UserControl x:Class="SilverlightCustomFonts.Page"
xmlns="http://schemas.microsoft.com/winfx/2006/xaml/presentation"
xmlns:x="http://schemas.microsoft.com/winfx/2006/xaml"
Width="500" Height="300">
<Grid x:Name="LayoutRoot" Background="DarkOrange">
<StackPanel Orientation="Vertical" Margin="20">
<TextBlock Text="This is Arial font" FontFamily="Arial"
FontSize="24"></TextBlock>
<TextBlock Text="This is Arial Black font" FontFamily="Arial Black"
FontSize="24"></TextBlock>
<TextBlock Text="This is Verdana font" FontFamily="Verdana"
FontSize="24"></TextBlock>
<!--These are example of custom fonts -->
<TextBlock FontFamily="georgia.ttf#Georgia" FontSize="24"
Text="This is georgia custom font"></TextBlock>
<TextBlock FontFamily="courbi.ttf#Courier New" FontSize="24"
Text="This is courier new custom font"></TextBlock>
</StackPanel>
</Grid>
</UserControl>
Step 4. Build and Run
Now build and run your application. The output looks like below.
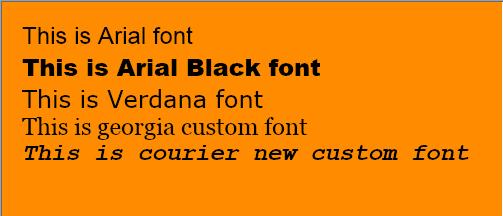
Figure 6.
Summary
In this article, I discussed how you can use an existing custom font file to your project and apply to the controls in a Silverlight 2.0 application.