

Introduction
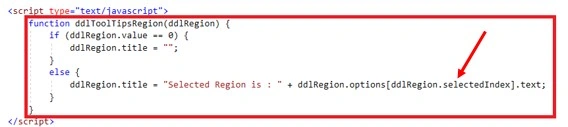
In this blog, we will learn how to add a tooltip for a drop-down selected text on the mouseover event.
By setting the Title attribute for a control/element, we can show the tooltip or any additional information for that control. Here, I’ll take an example of the drop-down list.
Let’s get started.
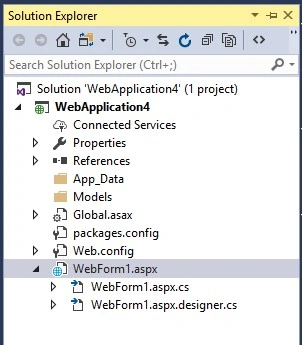
Step 1 - Create an empty web application.
An example is shown below.
Step 2 - Add a drop-down list
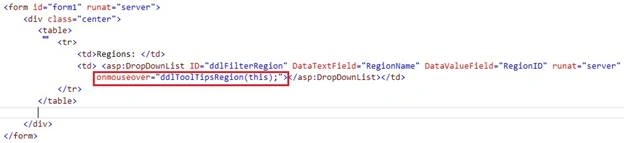
In WebForm1.aspx, add a div with DropdownList as shown below.
- <asp:DropDownListID="ddlFilterRegion"runat="server" DataTextField="RegionName"DataValueField="RegionID">
- </asp:DropDownList>
Step 3 - Fill this drop-down list with data
You can create a table and bind with the data in the code-behind file, as shown below.
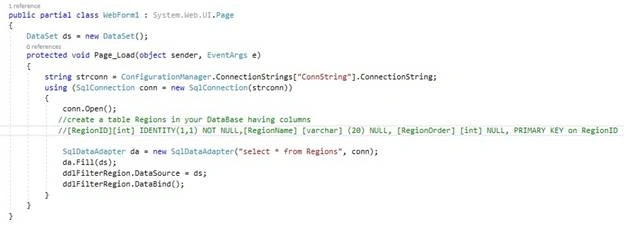
- public partial class WebForm1: System.Web.UI.Page {
- DataSet ds = new DataSet();
- protected void Page_Load(object sender, EventArgs e) {
- string strconn = ConfigurationManager.ConnectionStrings["ConnString"].ConnectionString;
- using(SqlConnection conn = new SqlConnection(strconn)) {
- conn.Open();
- //create a table Regions in your DataBase having columns and bind dropdownlist with that data
- //[RegionID][int] IDENTITY(1,1) NOT NULL,[RegionName] [varchar] (20) NULL, [RegionOrder] [int] NULL, PRIMARY KEY on RegionID
- SqlDataAdapter da = new SqlDataAdapter("select * from Regions", conn);
- da.Fill(ds);
- ddlFilterRegion.DataSource = ds;
- ddlFilterRegion.DataBind();
- }
- }
- }
The drop-down is filled with values in your database.
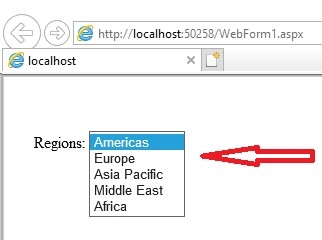
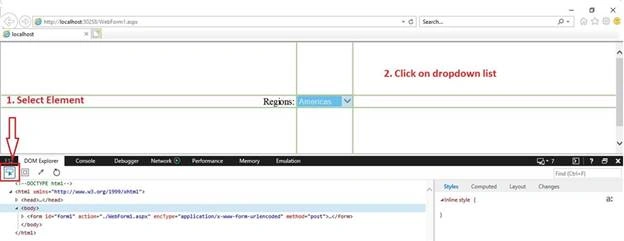
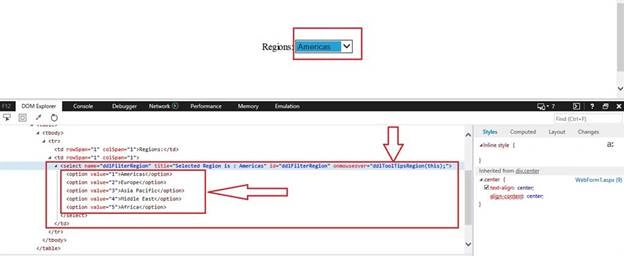
Now, press F12 [or right-click on the page and select “Inspect element”]. The DOM Explorer opens, as shown below. Let us now analyze the DOM Explorer.
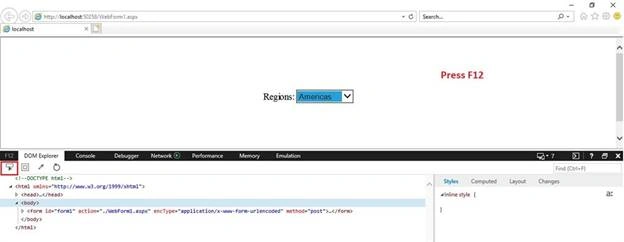
In order to see how the drop-down looks in DOM [Document Object Model] Explorer, select the element and click on the drop-down list as shown below.

Join the conversation! Your thoughts help the community grow.