

Introduction
In this article we will create a Backbone application for creating various shapes. Here we create a rectangle and circle and we can change the color and drag these shapes around.
In this article we need to create the three files "main.js"," main.css" and "index.html". We will now start to create the application.
- First we create a web application as in the following:
- Start Visual Studio 2013. From the Start window select "New Project".
- Select "Installed" -> "Template" -> "Visual C#" -> "Web" -> "Visual Studio 2012" and select "Empty Web Application".

- Click on the "OK" button.
- Now add the HTML page.
- In the Solution Explorer.
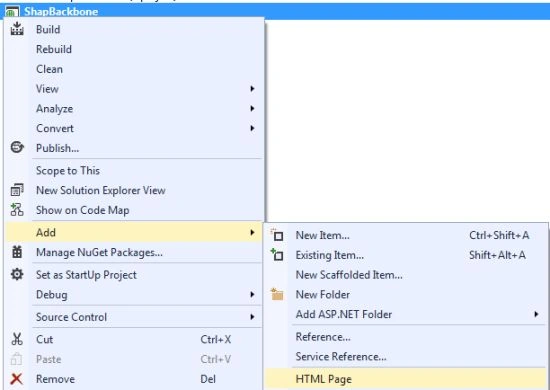
- Right-click on the project then select "Add" -> "HTML page".
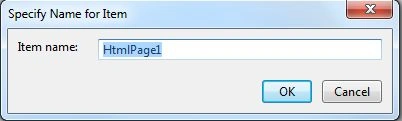
- Change the name of the page.
- Click on the "Add" button.
Add the following code:
<!doctype html>
<html>
<head>
<title>Create Shape using backbone js</title>
<link rel="stylesheet" type="text/css" href="main.css">
<script type="text/javascript" src="http://cdnjs.cloudflare.com/ajax/libs/jquery/1.7/jquery.min.js"></script>
<script type="text/javascript" src="http://cdnjs.cloudflare.com/ajax/libs/underscore.js/1.2.2/underscore-min.js"></script>
<script type="text/javascript" src="http://cdnjs.cloudflare.com/ajax/libs/backbone.js/0.5.3/backbone-min.js"></script>
<script type="text/javascript" src="main.js"></script>
</head>
<body>
<div id="page" style="width:1000px;height:1000px;">
<button id="new-rectangle">Add Rectangle</button>
<button id="new-circle">Add Circle</button>
</div>
</body>
</html>
- Now in the project we add the "stylesheet".
- Right-click on the project.
- Select "New Item" and then "Stylesheet".
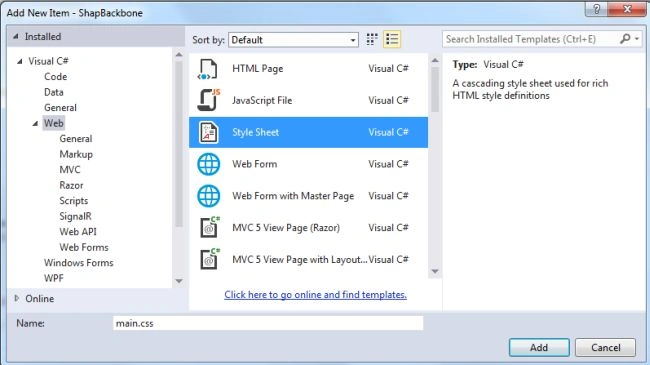
- Click on the "Ok" button.
Add the following code to this stylesheet:
.shape{
height: 100%;
width: 100%;
}
.circle {
border-radius: 50%/50%;
-moz-border-radius: 50%/50%;
-webkit-border-radius: 50%/50%;
}
.hide {
display: none;
}
.control {
width: 16px;
height: 16px;
position: absolute;
bottom: 2px;
cursor: pointer;
}
.change-color {
background: top left no-repeat url(color_wheel.png);
right: 47px;
}
body {
font: 14px Arial;
}
button {
margin: 3px;
background: #e89696;
border:2px solid #000000;
text-align:center;
color: #eee;
padding: 3px;
font: bold 16px Arial;
border-radius: 5px;
box-shadow:
3px 3px 6px rgba(0, 0, 0, .5),
0px 0px 3px rgba(0, 0, 0, .3)
}
button:hover {
background:#888;
color:#000;
}
- Add the JavaScripts to the project.
Now we need to add a different JavaScript file to our application. First we add our own script file in this project.
- Right-click on the Scripts folder and select "Add".
- Select "New Item" -> "JavaScript".
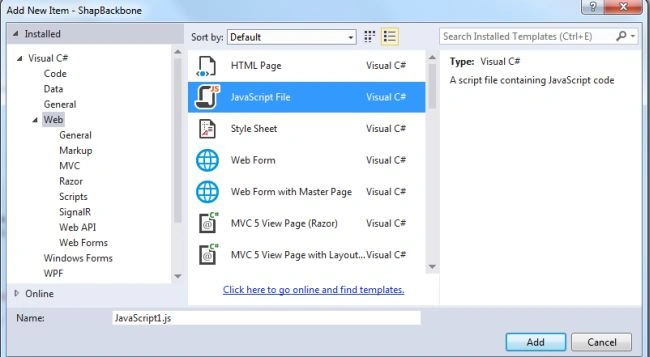
- Click on the "OK" button.
Add the following code:
//Define The Model
$(function () {
var Shape = Backbone.Model.extend({
defaults: { x: 40, y: 40, width: 100, height: 100, color: 'brown' },
setTopLeft: function (x, y) { this.set({ x: x, y: y }); },
setDim: function (w, h) { this.set({ width: w, height: h }); },
isCircle: function () { return !!this.get('circle'); }
});
var Collect = Backbone.Collection.extend({ model: Shape });
var CollectView = Backbone.View.extend({
id: 'page',
views: {},
initialize: function () {
this.collection.bind('add', function (model) {
this.views[model.cid] = new ShapeView({ model: model, id: 'view_' + model.cid }).render();
}, this);
},
render: function () {
return this;
}
});
//Define Shape View
var ShapeView = Backbone.View.extend({
initialize: function () {
$('#page').mousemove(this, this.mousemove).mouseup(this, this.mouseup);
this.model.bind('change', this.updateView, this);
},
render: function () {
$('#page').append(this.el);
$(this.el).html('<div class="shape"/>'
+ '<div class="control change-color hide"/>'
)
.css({ position: 'absolute', padding: '10px' });
if (this.model.isCircle()) {
this.$('.shape').addClass('circle');
}
this.updateView();
return this;
},
updateView: function () {
$(this.el).css({
left: this.model.get('x'),
top: this.model.get('y'),
width: this.model.get('width') - 10,
height: this.model.get('height') - 10
});
this.$('.shape').css({ background: this.model.get('color') });
},
events: {
'mouseenter .shape': 'hoveringStart',
'mouseleave': 'hoveringEnd',
'mousedown .shape': 'draggingStart',
'mousedown .change-color': 'changeColor',
},
hoveringStart: function (e) {
this.$('.control').removeClass('hide');
},
hoveringEnd: function (e) {
this.$('.control').addClass('hide');
},
draggingStart: function (e) {
this.dragging = true;
this.initialX = e.pageX - this.model.get('x');
this.initialY = e.pageY - this.model.get('y');
return false; // prevents text selection
},
changeColor: function (e) {
this.model.set({ color: prompt('Enter Color', this.model.get('color')) });
},
mouseup: function (e) {
if (!e || !e.data) return;
var self = e.data;
self.dragging = false;
},
mousemove: function (e) {
if (!e || !e.data) return;
var self = e.data;
if (self.dragging) {
self.model.setTopLeft(e.pageX - self.initialX, e.pageY - self.initialY);
}
}
});
var collect = new Collect();
var collectView = new CollectView({ collection: collect });
collectView.render();
$('#new-rectangle').click(function () {
collect.add(new Shape());
});
$('#new-circle').click(function () {
collect.add(new Shape({ circle: true }));
});
});
In the code above we defined the default property for Backbone for using values/properties in model as defaults. Here we defined the three default values height, width and color.
In the Shape View the code of the view will go through the ShapeModel. The code of the view is for managing the elements of the HTML, these elements represent the shape itself and control the elements that decorates the shapes.
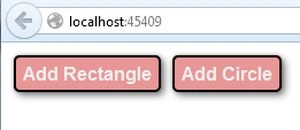
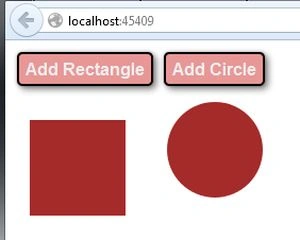
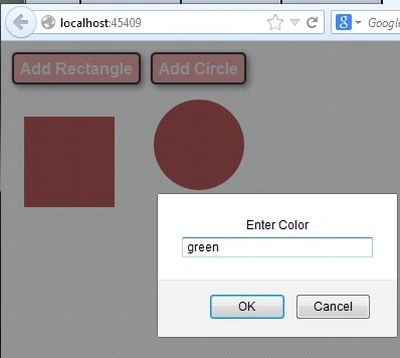
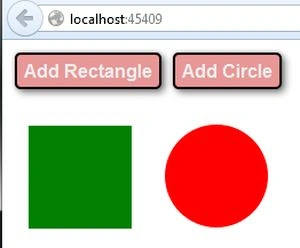
- Now execute the application; it will display two buttons, one for adding the rectangle and another for adding the circle. When we click on these buttons it displays the shapes with default values. We can also change the color of these shapes.
Join the conversation! Your thoughts help the community grow.