

This service helps to convert documents into web pages. This article explains how to configure a document conversion service in SharePoint and how to use it.
Open Central Administration.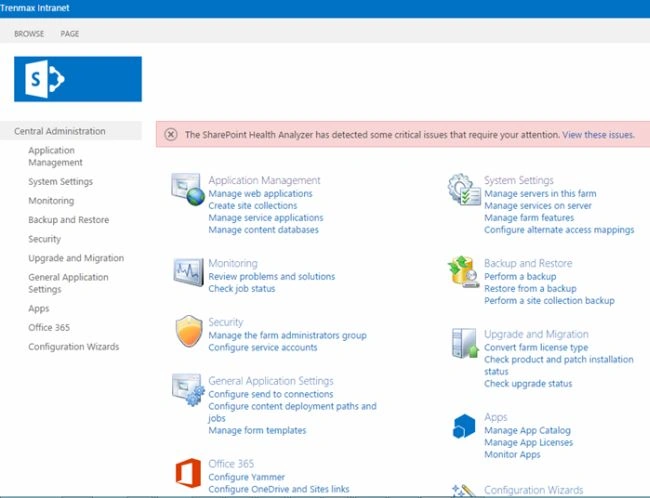
Go to "System Settings" and click "Manage services on server".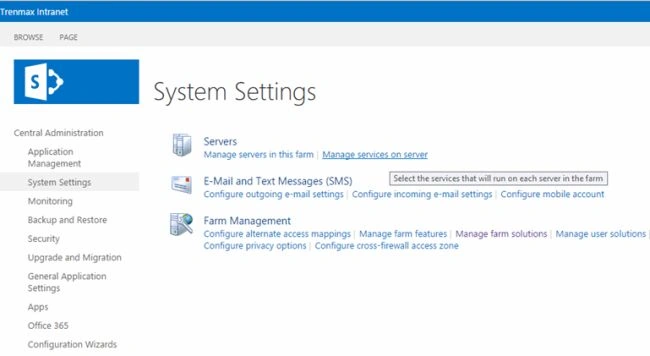
Let's start the following two services.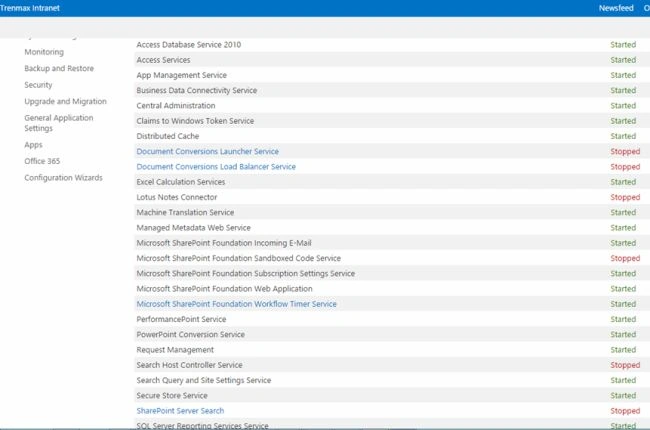
Click on Document Conversions Load Balancer Service, then click Start.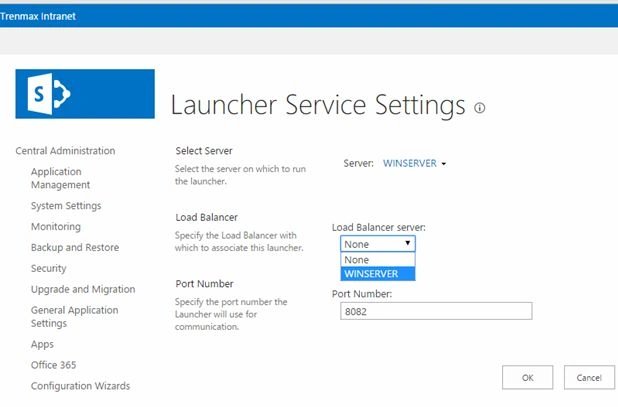
Now click on Document Conversions Launcher Service.
Select your "Load Balanced server".
Click OK.
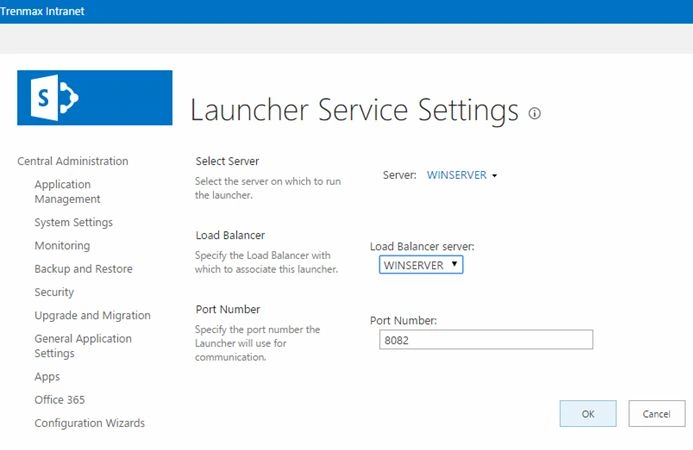
Now this service has been started successfully.
Click on "General Application Settings" in "Central Administration".
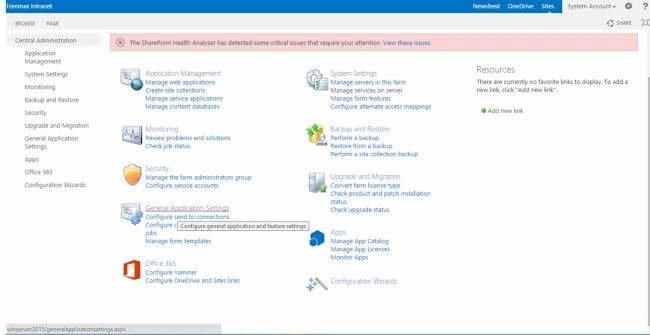
Click "Configure document conversions".
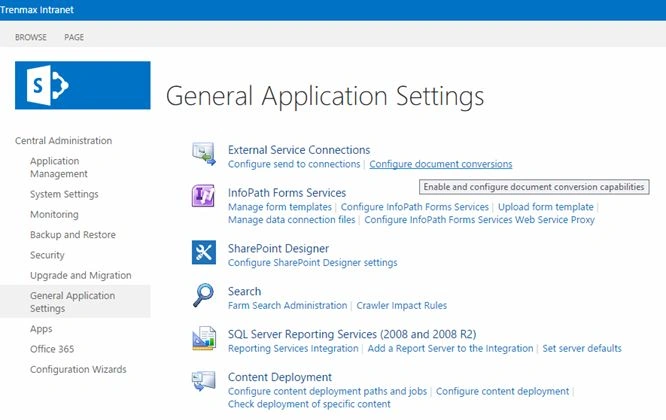
Now it will look like this.
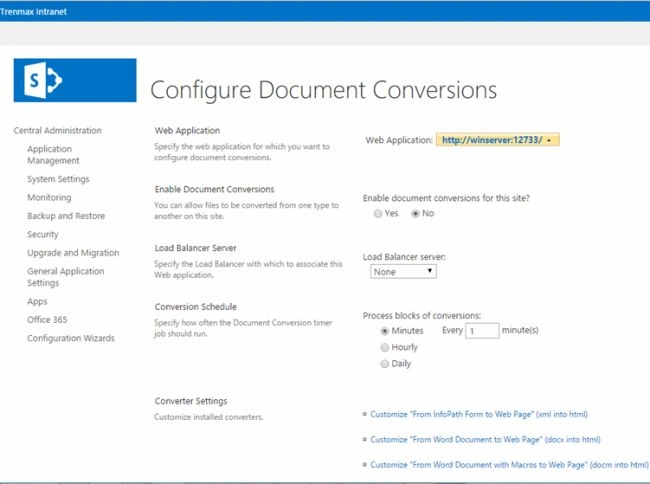
Select your web application.
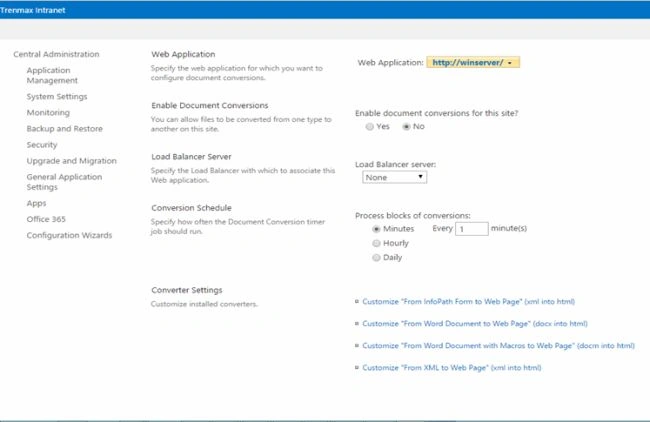
Enable document conversions for this site and click Yes.
Select "Load Balanced server".
Click Apply, then click OK to complete this configuration.
Open the site and create the Document Library.
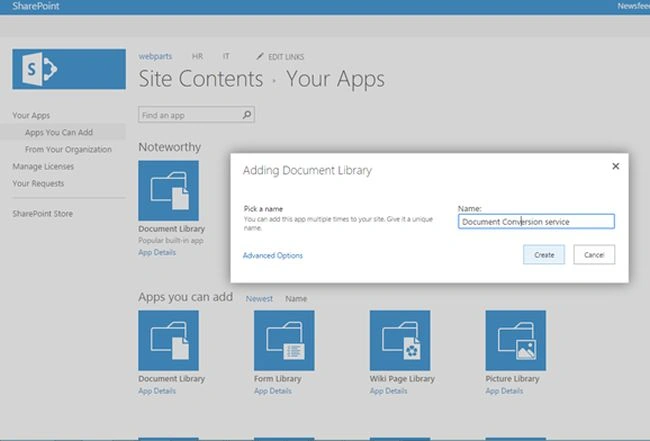
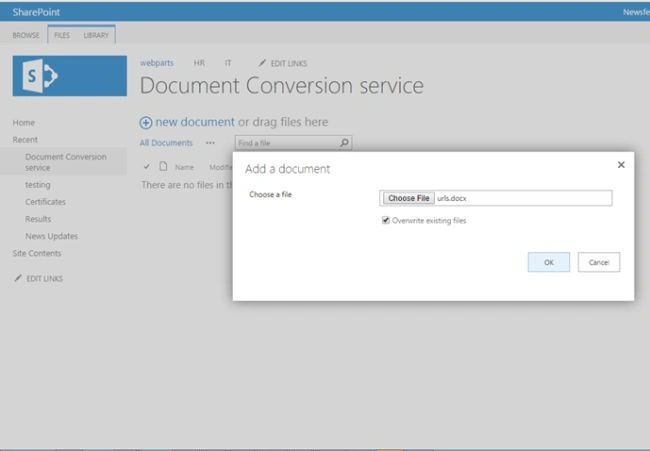
Upload the Word document now.
Here you can see the converted document to the webpage option.
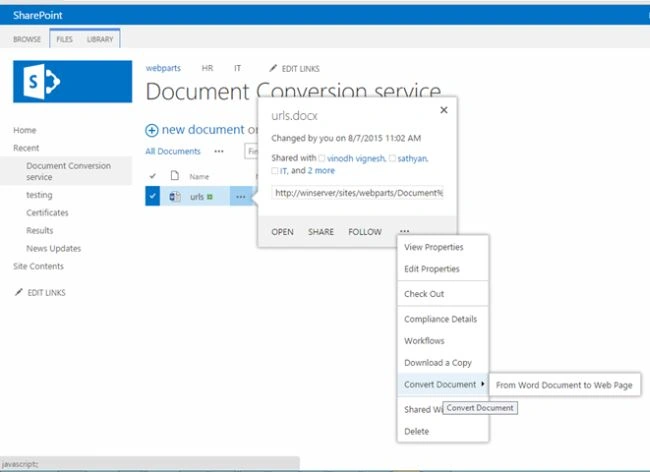
Click on it.
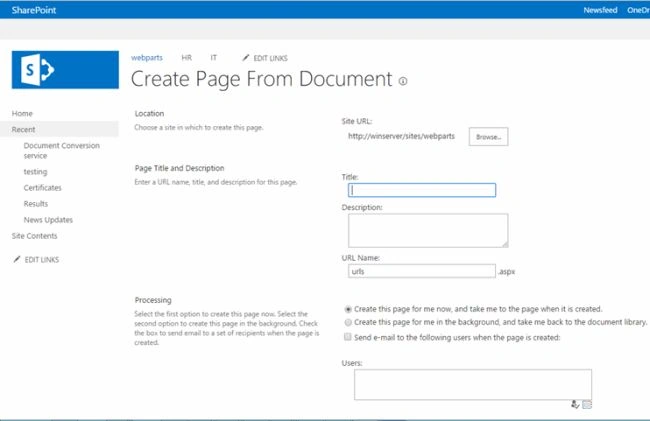
Set the title for the page.
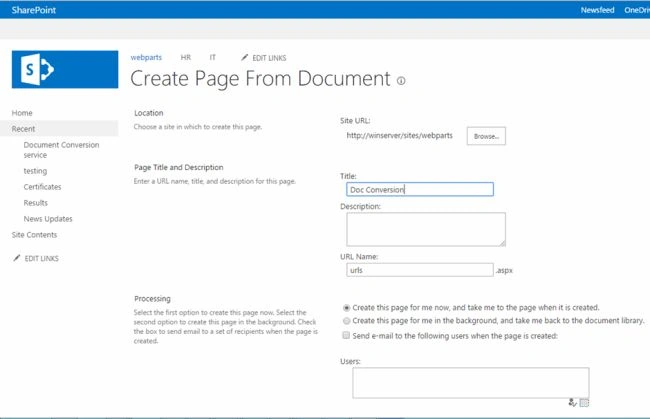
Click Create.

Abhay ShankerPosted Aug 8, 2015, 2:00 PM
nice article...
Vinodh NarayananPosted Aug 8, 2015, 2:33 AM
Thank u guys
Vinodh NarayananPosted Aug 8, 2015, 2:33 AM
Santhakumar Munuswamy Thanks sir
Chervine BhiwooPosted Aug 8, 2015, 2:19 AM
Good article!
Santhakumar MunuswamyPosted Aug 8, 2015, 2:01 AM
Good article. Thanks for sharing
RakeshPosted Aug 7, 2015, 1:18 PM
Good Explain
Vinodh NarayananPosted Aug 7, 2015, 12:59 PM
Than. U friends
Pankaj Kumar ChoudharyPosted Aug 7, 2015, 12:58 PM
Good One Sir.......
Vinodh NarayananPosted Aug 7, 2015, 9:50 AM
Thank you guys
Nilesh JadavPosted Aug 7, 2015, 9:44 AM
Great work sir, Thanks for sharing this article
Sibeesh VenuPosted Aug 7, 2015, 8:21 AM
Nice Share!.
Neeraj KumarPosted Aug 7, 2015, 7:21 AM
Good
Ankit BansalPosted Aug 7, 2015, 7:02 AM
good..thanks for sharing...