Prologue:
In this article, we shall discuss about Screen Layouts in LightSwitch Beta 2.
This is important to know if you are developing a good looking Screen in
LightSwitch.
What is Screen Layout in LightSwitch?
Screen Layouts are as like template for screen which is used to place and align
the controls in screen. In this article we shall discuss four types of Screen
Layouts in LightSwitch.|
The Screen Layouts,
- Row Layout
- Column Layout
- Table Layout
- Tabs Layout
We shall see that how to use these layouts in
our demo LightSwitch application. Let us start with preparation of the solution.
Preparing the Solution:
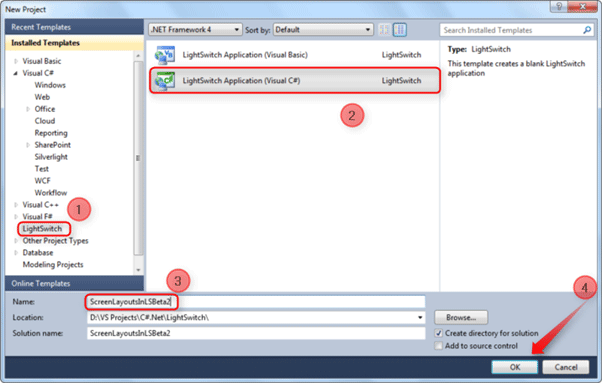
Fire up the VS 2010; create a LightSwitch Desktop application with the name
"ScreenLayoutsInLSBeta2" as shown in the figure.
Follow the [No: #] to prepare a solution for our demo application.
Quick Note:
In this demo application we are going to create an application for saving the
Persons details like name, address, phone number and etc.,
After the successful creation of the solution, just create a table for the
person details.

As shown in the above picture you can create a table using the LightSwitch
entity designer or you can connect with the external storage. To connect with
the external storage please read this Article.
Person Table:

For our demo application we have used the LightSwitch Entity designer to create
the Person table. Add the following fields in the created table Person.
Designing the Screen:
There are two way to create a screen. One of the options is by selecting the
Screen... button on the Entity Designer screen top.

Another way is right-click on Screens section in Solution Explorer.
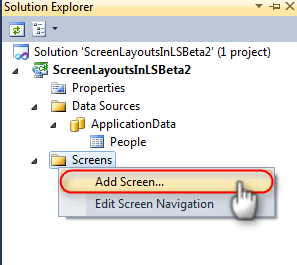
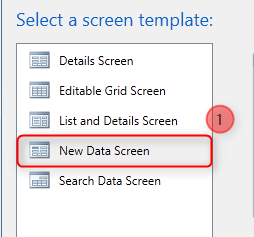
After clicking the Add screen option we will be having the Screen Template
window. In the Screen Template windows select the New Data Screen template.
For more details about how to create and use a new data screen please read this
Article.
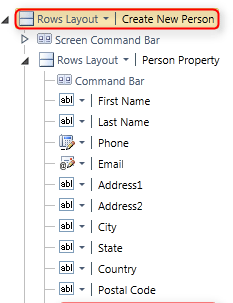
After creating the new data screen you will be having the screen layout editor
i.e. Screen Designer.
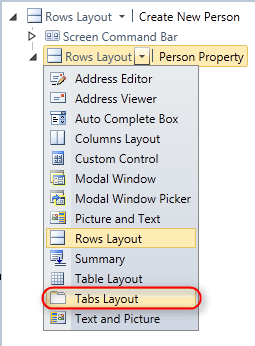
By default the Screen Layout will be in Rows layout as shown in the figure
below.
Let us change the default layout.
Tabs Layout:
The tabs layout displays the each field as tab items. It will be useful when we
are having huge no of fields to show up the user.
Quick Note:
In our demo application we are going design a screen in such a way the Tabs
layout holds the other all layouts. The tabs layout will have the Table, Row and
Columns layouts as Tab items.
Now we have added the Tab layout as Root layout. Let us add Table layout as a
Tab item of Tabs layout.
Before adding the Table layout we need to delete the entire field from the tab
layouts.
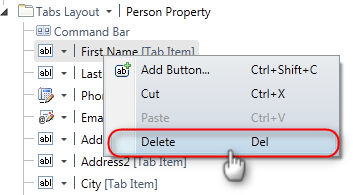
Just delete all the field as like shown in the figure.
The Table Layout:
After deleting the fields from tabs layout add a new group. If you select the
Tabs layout then you will have an Add button at the end of Tab layout tree. As
shown in the below figure [No: 1].
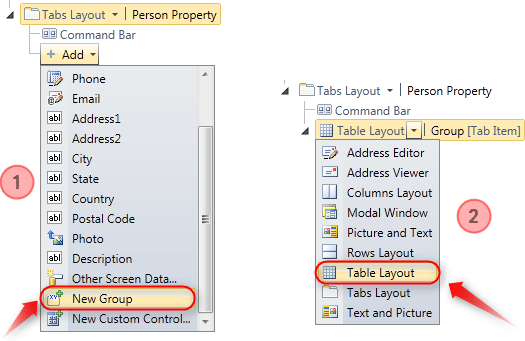
Now change the Default row layout of the newly added group to Table layout. The
above figure [No: 2] shows how to add the table layout in screen.
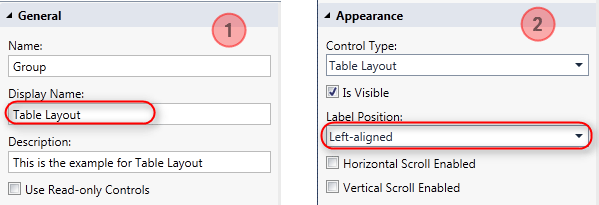
Change the Display name [No: 1] and Label position [No: 2] of the Table Layout
as shown in the below figures.
Now we have added the Table layout. For the layout added, it needs to add the
field right. Let us add some fields to the table layout.
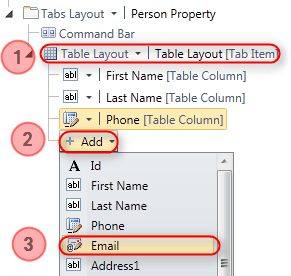
[No: 1] – To add the fields to Table layout, select the Table layout.
[No: 2] – Now you will have the Add button at the end of the Table layout tree
Click on the Add button.
[No: 3] – Select the fields that you want to add into the Table layout. In this
demo application we have selected the first four fields for the Table layout.
The Table Layout is ready now.
The Column Layout:
The Column layout and Table layout are more or less same layouts. To add the
Column layout into the Tabs layout as Tab item, select the Tabs layout then you
will have an Add button at the end of the Tabs layout tree.
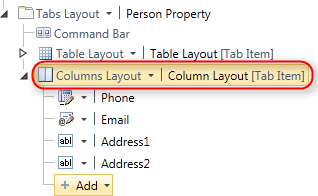
Add a new group using Add button. Add some fields that you want and change the
Display name as Column Layout as like in Table Layout. And also change the Label
position of the control.
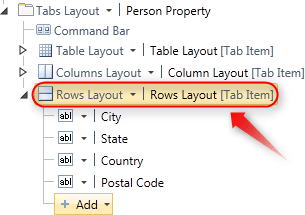
The Rows Layout:
As like Column layout just add the Rows Layout.
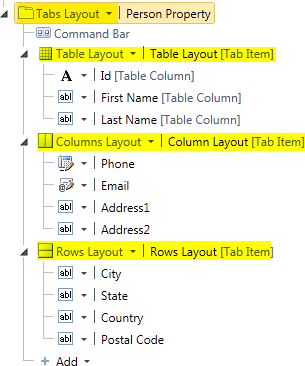
Now we have added the all four layouts in our sample application screen. The
complete layout design is given below.
Hit the Play button [F5] to see the layouts of our screen.
Application in Action:
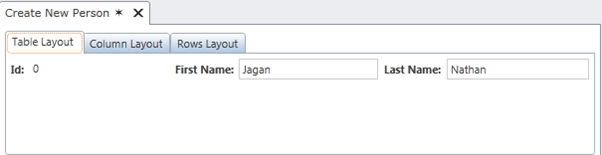
The above output screen shows the complete screen as Tabs Layouts. All other
layouts we created as its Tab item.
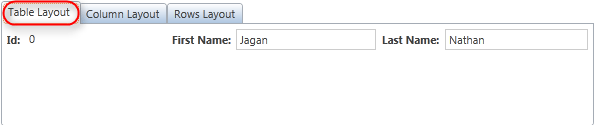
Above figure shows the how the table layout will be.
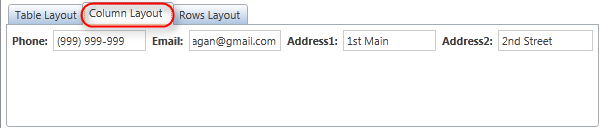
You can see the Table layout and the Column layout has the more or less same
layout structure.
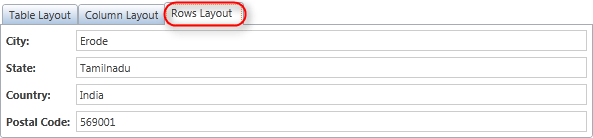
In the Rows layout the all fields are laid as the Rows.
Quick Note:
The Layouts added in the demo application is basic. We can design the complex
screens using the Screen layouts.
Summary:
In this article, we have seen about the Screen Layouts available for grouping
the fields for the Screen.
Thanks for spending your precious time here. Please provide your valuable
feedbacks and comments, which make me to give a better article next time.
Thanks.