

Introduction
Whenever we turn on Azure VM it turn on time cost us, so it is best practice to turn on azure virtual machine only the specific time duration, when we are working on. Generally we start and stop azure virtual machine by using Azure management portal, which required rapidly login and follow some required steps. We can also do this process by using PowerShell that save our time because it not required every time to login into management portal and follow some steps. We can also perform automation by using these PowerShell commands.
Steps to start and stop Azure Virtual machine:
Login Azure account on PowerShell
Before performing our action with PowerShell, first we have to add our Azure account in PowerShell. Execute the following command for it.
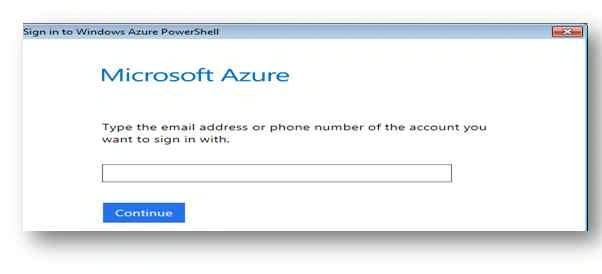
Type Add-AzureAccount command in PowerShell, a window will open, enter your email address here which has the subscription.

- On the next page, enter your credentials to log in to your Azure account.
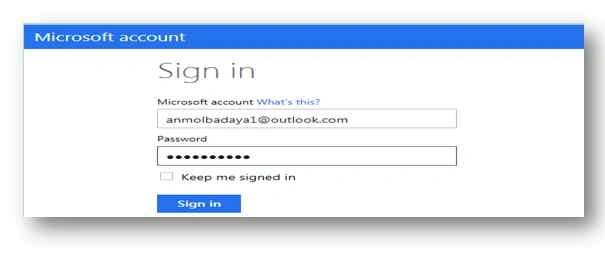
- Now you can use PowerShell to work with your account.
Get the subscriptions details
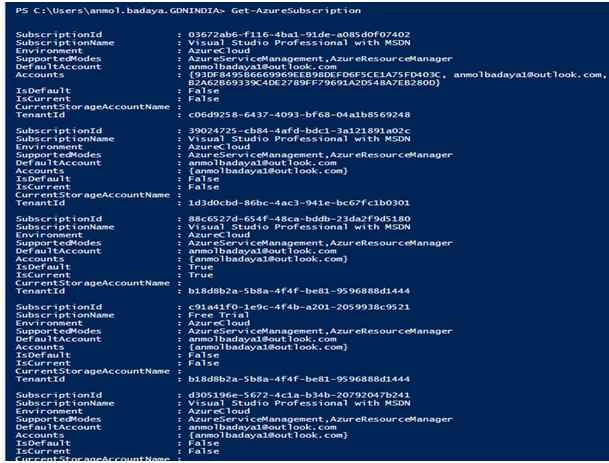
Get-Azure Subscription: This command list all subscriptions which are associated with your email:
Get the current Subscription
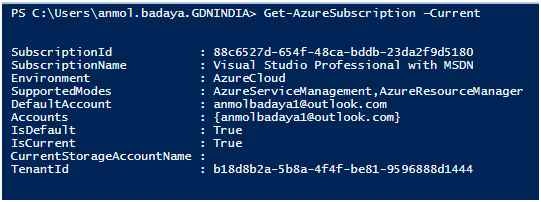
- Get-AzureSubscription: Current: If you have more than one subscription to get the current one execute the following command:
Get the current subscription id:
(Get-AzureSubscription -Current).SubscriptionId
Set current Subscription
If you have more than one subscription, and your current subscription is different from your required subscription, then set your desire subscription as current subscription:
By Name:
Select-AzureSubscription -SubscriptionName anmolbadaya –Current
Here anmolbadaya is my Subscription Name
By ID:
Select-AzureSubscription -SubscriptionId 03672ab6-f116-4ba1-91de-a085d0f07402 –Current
Here 03672ab6-f116-4ba1-91de-a085d0f07402 is my subscription id.
For more details refer link.
List all virtual machine in current Subscription:
Get-AzureVM
It will display all VMs with service name and VM name. Please check VM which you want to migrate should exist here.

Start Azure VM
Start-AzureVM-ServiceName "anmolwin8vs" -Name "anmolwin8vs"
anmolwin8vs is my respective Azure cloud service and VM name.
Stop Azure VM
Stop-AzureVM -ServiceName "anmolwin8vs" -Name "anmolwin8vs"
Start Windows Azure Virtual Machines on a Schedule.
Stop Windows Azure Virtual Machines on a Schedule
Please note, on schedule script will work only on Windows Server 2012 R2 and Windows 8.1 version.
Santhakumar MunuswamyPosted Sep 17, 2015, 10:26 AM
Thanks for nice article:)
Ankit BansalPosted Sep 17, 2015, 4:34 AM
thanks for share..
Sibeesh VenuPosted Sep 16, 2015, 4:07 AM
Nice Share
Vinodh NarayananPosted Sep 16, 2015, 12:53 AM
good one
Harshad PansuriyaPosted Sep 16, 2015, 12:01 AM
Nice one
Karthikeyan KPosted Sep 15, 2015, 11:15 PM
Nice share
Mohammed IbrahimPosted Sep 15, 2015, 8:05 PM
nice
Shridhar SharmaPosted Sep 15, 2015, 2:26 PM
nice info.