

Add an Item in LightSwitch Visual Studio 2012
This article describes how to add an item using Light Switch in Visual Studio 2012.
Procedure for adding an item
Step 1
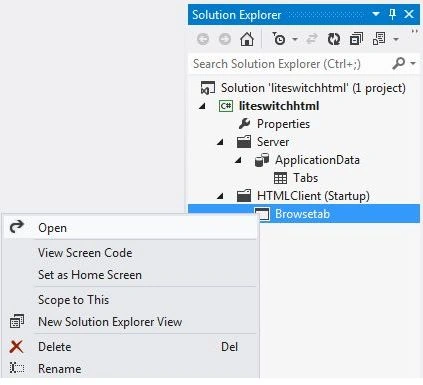
Open the Solution Explorer.

Step 2
In Solution Explorer, right-click to open the HTML client screen.
Step 3
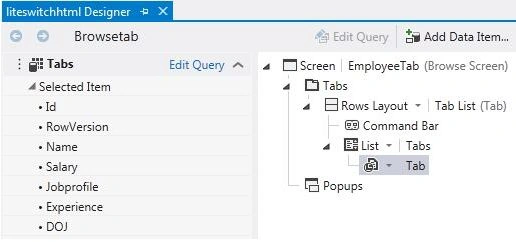
The Screen Designer appears.
Step 4
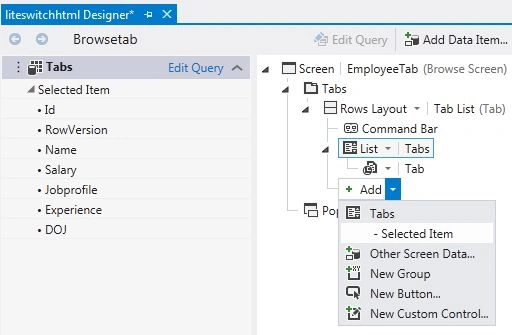
In the Screen designer, choose "Add List".
Step 5
In the Screen Designer the drop down list appears.

Step 6
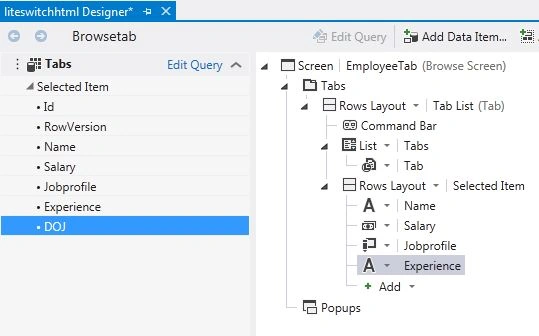
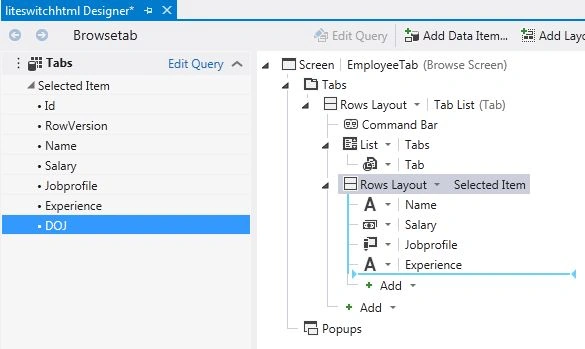
From the Screen Members List of the Screen Designer, choose an item (for example, DOJ) and drag it to the specific location in the Screen Designer.
Step 7
As you drag the item to the Screen Designer, a pointer appears that indicates the location where you want to place the item in the list.
Note: If the pointer changes to a circle then you can't drop the item to that particular location.
Step 8
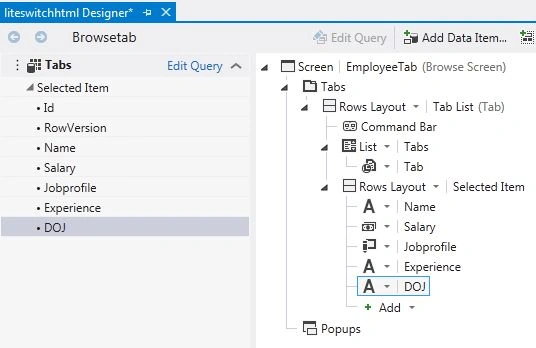
The DOJ item is added to the list.
Join the conversation! Your thoughts help the community grow.