

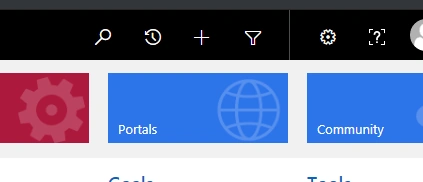
Post setting up Add-On portal as shared in the previous article, certain new tiles will be created in Dynamics CRM Instance which can be divided majorly into two segments which include the following.
- Portals
This is the base sitemap for all the entities
- Community
This tile keeps on changing based upon the theme which is selected for setting up the portal since I selected the community so it appears as a community for me.
Now, let's proceed with something specific, that is, the creation of a new form in the Portal. We don’t actually create any new form in the portal.. the concept is that we configure an existing form in Dynamics CRM to be an Entity Form and then, map this configured Entity Form to a web page in the Add-On portal.
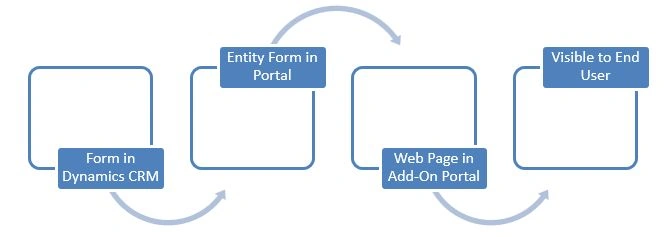
Let's proceed with the implementation of an existing form from Lead Entity in Dynamics CRM over the configured portal as a Web Page.
Step 1
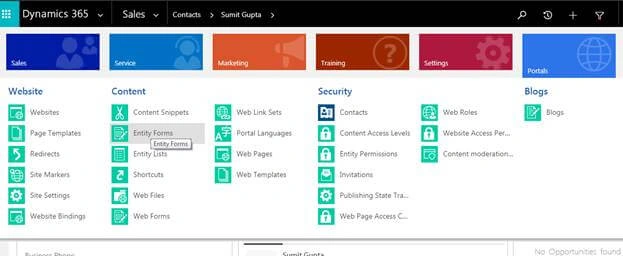
Select the Entity Form tile under the Portals sub-section on the ribbon.
Step 2
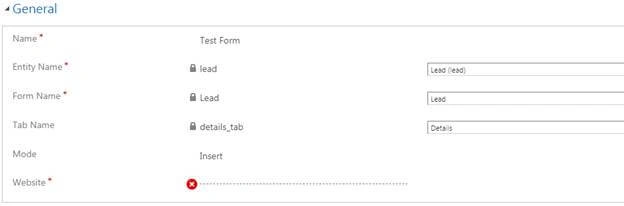
Now, click on the Entity Form tile to create a new record and we need to link the same with a web page and definitely with a navigation bar too in order to enable the same on the web portal.
While creating a basic simple Entity Form, we have multiple options to select in the form and the major ones include the following.
- You want to show all the tabs
- You want only a specific tab to be enabled
- You want to convert and represent the tabs as steps on the web portal
- You want it to have enabled for security permissions so only specific users with specific roles will be able to access the same
- You wish it to be either only a read-only or an editable form
- You wish to add catch
- You can add addition specific CSS to that specific web page
Step 3
Post creation of the Entity Form in Dynamics CRM, now we need to proceed towards integrating the form with a web page in Portal and there are two ways out of it.
- Creating a web page in through the DIY ( Do It Yourself) utility over the portal
- Creating a record, one more in the Dynamics CRM under the Web Page entity which, in turn, will create a record and will present it over the portal
We will be implementing the same through the Add-On Portal feature and functionality as it gives us the ease of implementing the same
The Tool Bar will be available for access to you, only if you are login to the portal with required permissions and role of ADMIN.
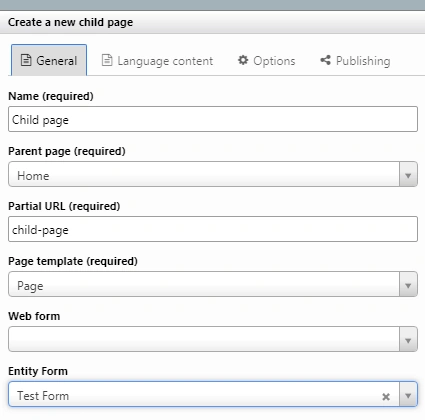
Kindly see, that I have linked my Entity form created in the previous step to a web page!!
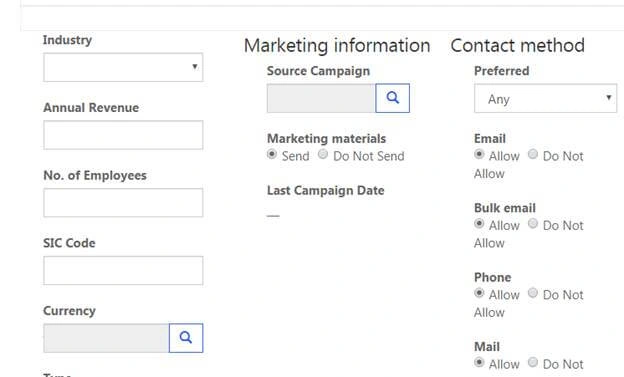
Entity form from Lead Entity is now created and is now visible to the end-users over the portal. Thanks for your time and patience. Feel free to keep in touch in case of any query or concerns!
Join the conversation! Your thoughts help the community grow.