

📌 Overview
This guide walks you through building a scheduled sync that reads users from Microsoft Entra ID (Azure AD) via Microsoft Graph and upserts them into a Dataverse table. It covers:
App registration and Graph permissions
Power Automate HTTP authentication (client credentials)
Parsing results and mapping to Dataverse columns
Idempotent insert/update (upsert) using List Rows + Update/Create (supported)
Optional: True Upsert via Dataverse Web API
Pagination, performance, and error handling
❗ Note: The older Azure AD/Entra connector “List users” action is no longer available. Use Microsoft Graph via HTTP.
🧱 Prerequisites
Dataverse Environment with appropriate maker/admin permissions.
Dataverse table to store AD users (e.g.,
AAD Users).Azure App Registration (client credentials flow).
Admin consent for Microsoft Graph application permissions.
Power Automate (Cloud) access with HTTP premium action.
🗃️ Dataverse Table Design
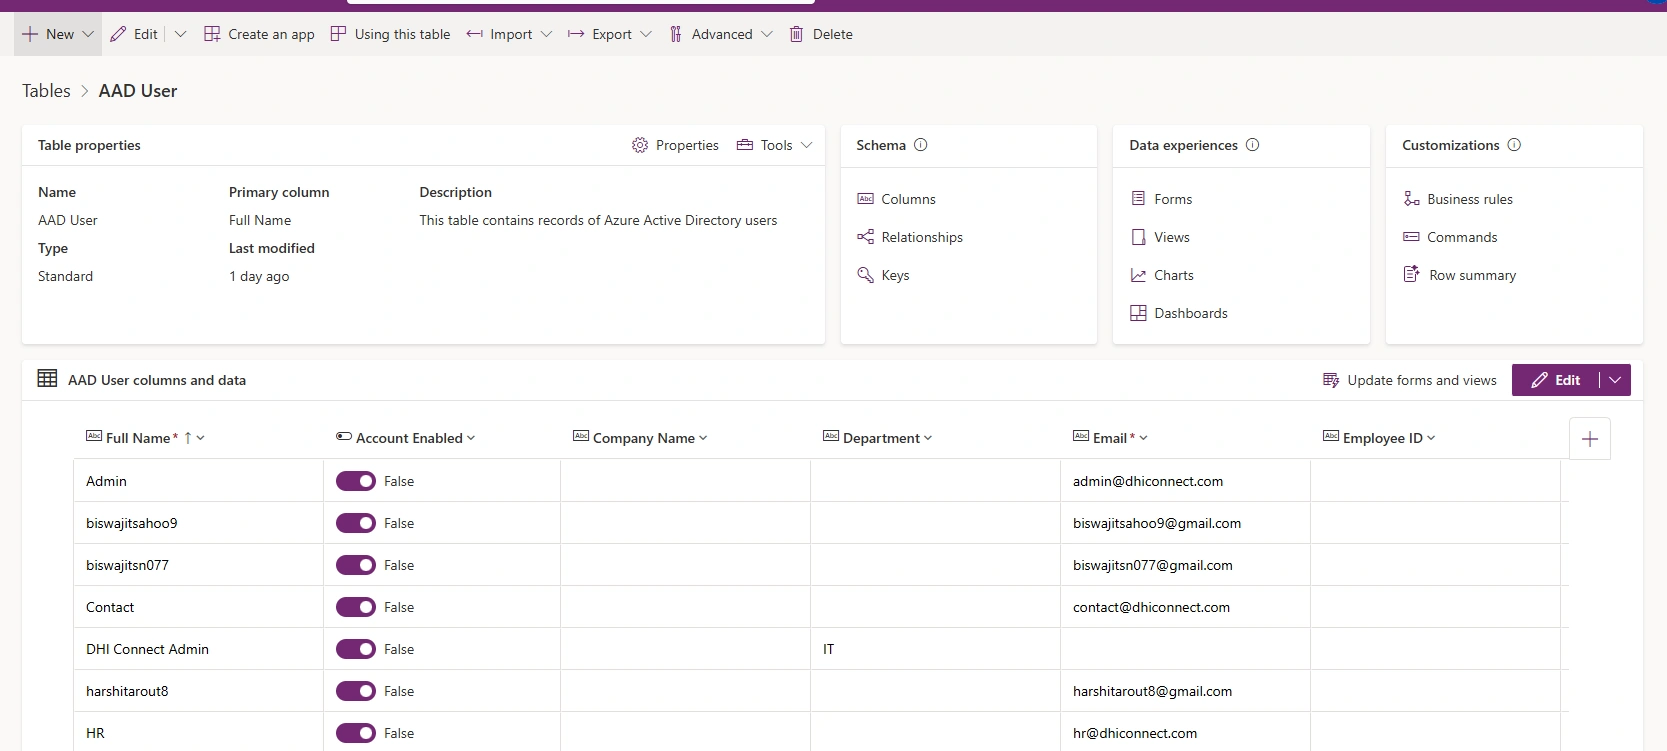
Table: AAD Users (logical name e.g., contoso_aadusers)
Recommended columns (logical names shown as examples):
contoso_azureadobjectid(Text) — Azure AD Object ID (Unique key candidate)contoso_userprincipalname(Text) — UPN (Alternative key candidate)contoso_fullname(Text) — displayNamecontoso_email(Text) — mailcontoso_jobtitle(Text)contoso_department(Text)contoso_employeeid(Text)contoso_mobilephone(Text)contoso_companyname(Text) — companyNamecontoso_usertype(Choice) — e.g., Member=1, Guest=2contoso_accountenabled(Two options / Boolean)contoso_lastsynceddate(DateTime)
✅ Create an Alternate Key on either
contoso_azureadobjectid(preferred) orcontoso_userprincipalnameto maintain data integrity and prevent duplicates.
🔐 Azure App Registration (Microsoft Entra ID → App registrations)
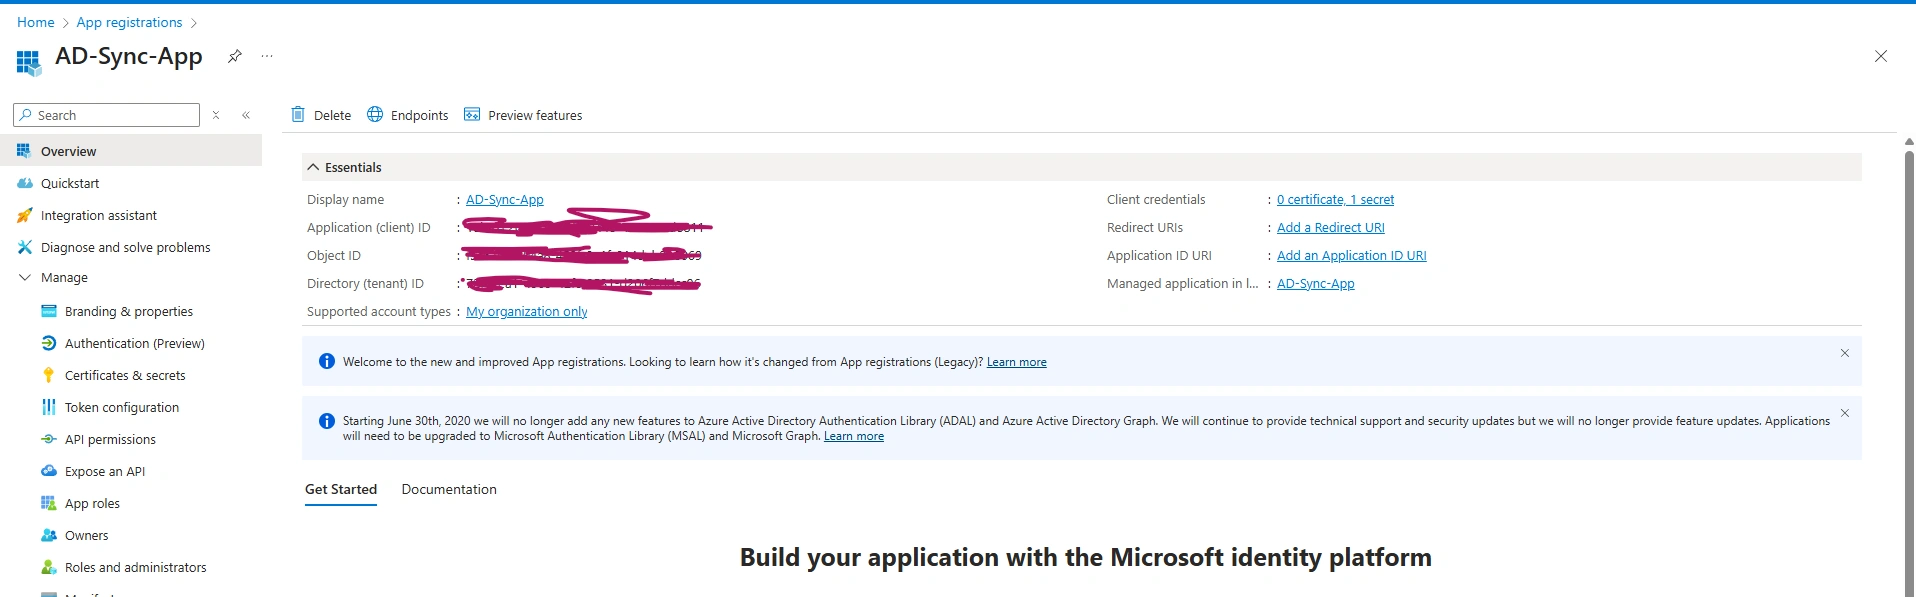
Register app
Name:
AD-User-Sync-AppSupported account types: Single tenant.
Client secret
Certificates & secrets → New client secret.
Copy Client ID, Tenant ID, and Secret (store securely—never paste in chat or logs).
Permissions (Application)
Microsoft Graph → Application permissions
User.Read.AllDirectory.Read.All
Click Grant admin consent and ensure status is Granted.
🛠️ Step-by-Step: Build the Scheduled Flow
1) Create a Scheduled Cloud Flow
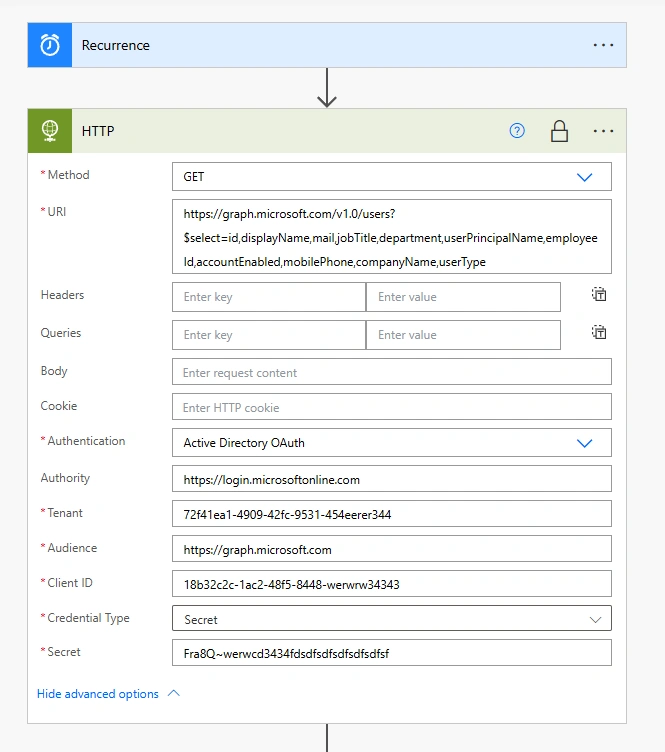
Trigger: Recurrence
Frequency: Daily / 6 hours / as per your needs.
2) Add HTTP action (Premium)
Authentication:
Active Directory OAuthAuthority:
https://login.microsoftonline.comTenant:
<your-tenant-guid>Audience:
https://graph.microsoft.comClient ID:
<app-client-id>Credential Type: Secret
Secret:
<client-secret>(enable Secure Inputs/Outputs in action settings)
Method:
GET
URI (single line):
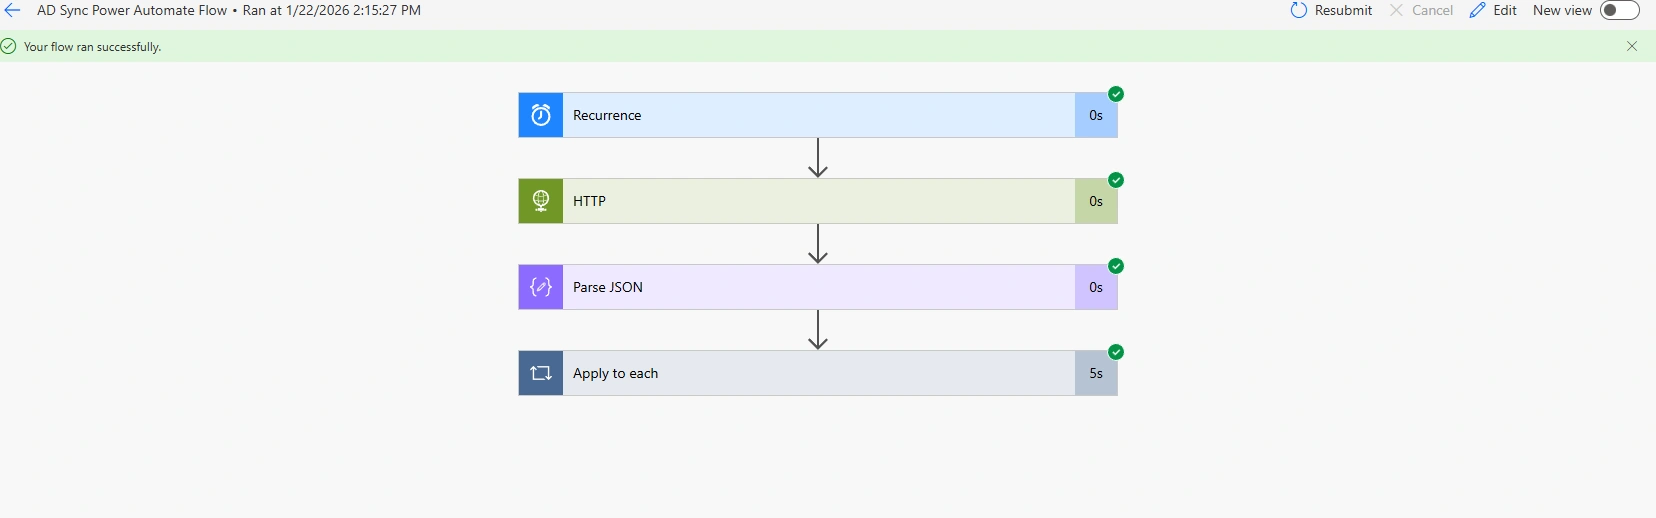
3) Add Parse JSON
Content:
@body('HTTP')Schema (object with value array):
{
  "type": "object",
  "properties": {
    "value": {
      "type": "array",
      "items": {
        "type": "object",
        "properties": {
          "id": { "type": "string" },
          "displayName": { "type": ["string","null"] },
          "mail": { "type": ["string","null"] },
          "jobTitle": { "type": ["string","null"] },
          "department": { "type": ["string","null"] },
          "userPrincipalName": { "type": "string" },
          "employeeId": { "type": ["string","null"] },
          "accountEnabled": { "type": "boolean" },
          "mobilePhone": { "type": ["string","null"] },
          "companyName": { "type": ["string","null"] },
          "userType": { "type": ["string","null"] }
        }
      }
    }
  }
}
4) Add Apply to each
Items:
@body('Parse_JSON')?['value']
5) Dataverse → List rows (check if record exists)
Table name:
AAD UsersFilter rows (pick your key):
Option A (preferred: AAD Object ID)
contoso_azureadobjectid eq '@{items('Apply_to_each')?['id']}'
Option B (UPN)
contoso_userprincipalname eq '@{replace(items('Apply_to_each')?['userPrincipalName'],'''','''''')}'
Top Count:
1Select columns: include the primary key column (e.g.,
contoso_aaduserid) and mapped fields for performance.
6) Condition: record exists?
Expression:
length(body('List_rows')?['value'])Operator: is greater than 0
7) YES → Update a row
Row ID:
@first(body('List_rows')?['value'])?['contoso_aaduserid']Replace with your table’s primary key logical name.
Field mappings (examples):
contoso_azureadobjectid→@{items('Apply_to_each')?['id']}contoso_userprincipalname→@{items('Apply_to_each')?['userPrincipalName']}contoso_fullname→@{coalesce(items('Apply_to_each')?['displayName'],'')}contoso_email→@{coalesce(items('Apply_to_each')?['mail'],'')}contoso_companyname→@{coalesce(items('Apply_to_each')?['companyName'],'')}contoso_jobtitle→@{coalesce(items('Apply_to_each')?['jobTitle'],'')}contoso_department→@{coalesce(items('Apply_to_each')?['department'],'')}contoso_employeeid→@{coalesce(items('Apply_to_each')?['employeeId'],'')}contoso_mobilephone→@{coalesce(items('Apply_to_each')?['mobilePhone'],'')}contoso_accountenabled→@{items('Apply_to_each')?['accountEnabled']}contoso_usertype(Choice mapping):switch( toLower(items('Apply_to_each')?['userType']), 'member', 1, 'guest', 2, 0 )contoso_lastsynceddate→@{utcNow()}
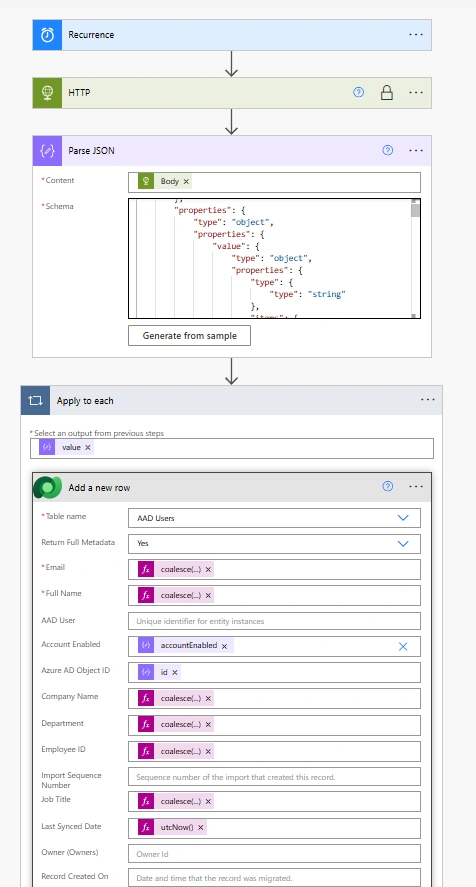
8) NO → Add a new row
Use the same field mappings as above.
💡 Performance: Turn on Concurrency in “Apply to each” (e.g., 10–20) if your environment permits.
🔁 Handling Pagination (Large Tenants)
Microsoft Graph returns results in pages with an @odata.nextLink. For full sync:
Start with initial
GET /usersIf
@odata.nextLinkexists, loop until exhausted.Aggregate all pages into a collection (Compose/Variable/Array) and then iterate.
Simple approach: Loop with Do until on nextLink and re‑issue HTTP GET with the nextLink URL, appending the accumulated value array.
🔐 Security & Governance
Keep client secret in a Power Automate Connection Reference or Environment Variable (not hardcoded).
Enable Secure Inputs/Outputs on the HTTP action.
Restrict the flow’s run‑only users and environment access.
💡 Notes & Best Practices
Prefer AAD Object ID as your unique key; it’s immutable.
If using UPN as key, be aware it can change in some orgs (rename scenarios).
For very large directories, prefer Delta query instead of full load every run.
Consider writing simple audit logs (e.g., counts of created/updated) to a Dataverse “Sync Run” table for observability.
Establish error notification (e.g., Teams/Email) when the flow fails.
Join the conversation! Your thoughts help the community grow.