
Introduction
In this article, I would like to inform you of the usage of the Content Editor Web Part for CSS style manipulations.
The Content Editor Web Part provides Formatted HTML Content for your web page. You can add a content editor web part using the following procedure:
What is Content Editor Web Part?
- Open the Page
- Choose Site Actions > Edit Page
- Click on Add Web Part
- Choose Content > Content Editor Web Part
- Save changes
You need to have a Designer permission level to edit pages. Please ensure you consult your Governance Committee before making changes.
Your customer might require changes in the layout of SharePoint pages. Editing the master page would be a choice but it is much more costly in terms of effort & performance.
The customization requirements will be:
Why we need CSS style changes?
- Hiding the Quick Launch from the left side
- Highlighting the Page Elements
- Modifying the Calendar items display format
- Modifying other common style elements
Little about CSS
Cascading Style Sheets allow us to modify the Look & Feel of HTML elements as a whole. For modifying a single element we can use the id property of the element.
For modifying items as a whole, we can use the class property of the element.
Hiding Quick Launch
In this example we can try hiding the Quick Launch from a page. The following are the steps involved:
- Find the Quick Launch bar Division Id
- Add code to hide the Division in the Content Web Part
- Hide the Content Web Part too
To start, open your site that is Okay to be played with:
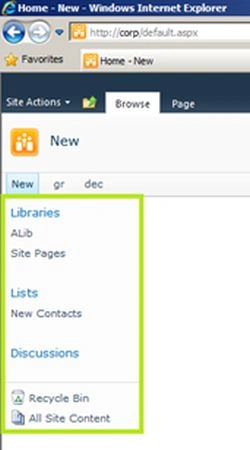 Now you will see the Quick Launch on the page above. We need to find the Division Element Id of the Quick Launch Bar. For this click on the F12 button or open Developer Tools from Internet Explorer. Move the cursor over the Quick Launch bar & click on it. You will get the class name highlighted as in the following:
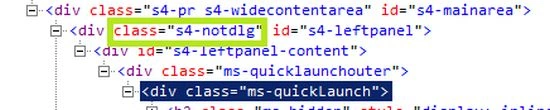 We are taking the CSS class name highlighted in Green Color. Now edit the Content Editor Web Part and choose the HTML source from the toolbar.
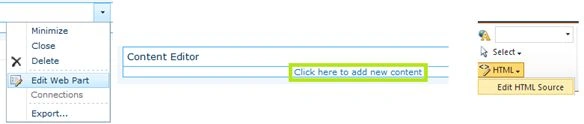 Add the following code in the HTML Source:
- <style>
- . s4-notdlg
- {
- display: none;
- }
- </style >
Please note that the code above hides the Quick Launch Bar by hiding the Division Class. Now save the changes to the page & you will see the Quick Launch is hidden.
But Wait! The solution is not complete. You will see that there is a space where the old quick launch was. We can remove that by using the margin-left property of division.
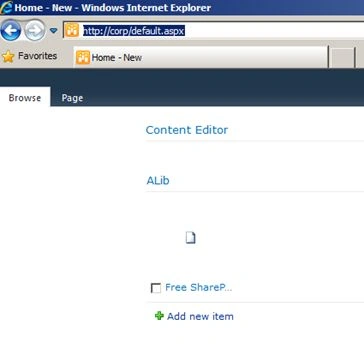 For the last step, we needed to hide the Content Editor Web Part as well. Choose the edit web part and choose the Hidden option from the Layout category.
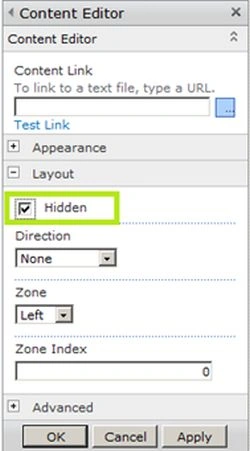 Click the OK button & now you will see that the Quick Launch is hidden.
Ghosting is the state on which pages are rendered from the File System. Unghosting is the stage where the edited pages reside in the database and are rendered from there.
Unghosted pages should reduce performance, but is negligible based on network traffic.
Click the OK button & now you will see that the Quick Launch is hidden.
Ghosting is the state on which pages are rendered from the File System. Unghosting is the stage where the edited pages reside in the database and are rendered from there.
Unghosted pages should reduce performance, but is negligible based on network traffic.
 References
Ghosting & Unghosting
Summary
- The Content Editor Web Part allows us to include HTML, CSS, JavaScript
- We can add CSS code to modify page elements
- The Content editor web part can be hidden
- Customizing Pages involve slight performance overheads
- Unghosting occurs while editing pages
- Get approval from the SharePoint Governance committee before applying page modifications
Sam ThapaPosted Jul 5, 2018, 2:10 PM
Hi Jean,how can we retrieve the javascript file link that is hidden in the content editor webpart.Thanks
Vipin TyagiPosted May 12, 2015, 1:42 AM
Thanks Sir. I want to know that if I display a announcement list in a content editor and I want to do some custom changes how I can do that for end user.Is XSLT plays a role in between.
Jean PaulPosted May 11, 2015, 7:50 AM
Viipiin, the same web part is available in SP 2013 too. We need to activate the feature if required.
Vipin TyagiPosted May 11, 2015, 7:39 AM
How i do the same in SP2013
Dede OublierPosted Apr 28, 2014, 6:41 AM
Thank you very much !I changed the space in Survey subquestions with this help. Just put the following between the <style> .ms-gridT1 { padding-top: 10px; padding-bottom: 10px; }