

Introduction
In the earlier post, we have seen all the steps to convert speech to text using Azure AI speech service. Converting text to speech is simpler. In this post, we will see all the simple steps to convert speech from text.
Azure AI Speech is a cloud-based service provided by Microsoft as part of its Azure Cognitive services. It enables developers to integrate speech processing capabilities into their applications, services, and devices. The Azure AI Speech service offers various speech capabilities including speech recognition, text-to-speech, speech translation, and speaker recognition.
Here’s an overview of the key features of Azure AI Speech service:
1. Speech-to-Text (STT)
- Real-Time Speech Recognition: Converts spoken audio into text in real-time. Useful for applications like voice assistants, transcription services, and more.
- Batch Transcription: Allows for the processing of pre-recorded audio files in batch mode.
- Customization: Enables customization of the speech recognition models to better understand domain-specific terminology.
- Different Languages and Dialects: Supports a wide range of languages and dialects.
2. Text-to-Speech (TTS)
- Realistic Voices: Converts text into lifelike spoken audio in various languages.
- Custom Voice: Allows for the creation of a unique voice font for your brand.
- Style Control: Adjusts the speaking style of the voice to suit different scenarios or emotions.
3. Speech Translation
- Real-Time Translation: Supplies real-time translation of spoken language into another spoken language.
- Wide Range of Languages: Supports many languages and dialects.
4. Speaker Recognition
- Speaker Verification: Confirms whether a given piece of audio matches a specific speaker's voice.
- Speaker Identification: Shows who is speaking from a group of known speakers.
- Voice Enrollment: Process of registering a user's voice for later recognition.
5. Speech Analytics
- Sentiment Analysis: Analyzes spoken language to figure out the speaker's sentiment.
- Keyword Spotting: Shows specific words or phrases in spoken language.
Use Cases
- Voice Assistants and Bots: Enhance customer service with voice-enabled assistants.
- Transcription Services: Automatically transcribe audio from meetings, lectures, or interviews.
- Accessibility: Make applications more accessible with voice interfaces.
- Language Learning: Help in language learning with speech recognition and translation.
- Security: Use speaker recognition for biometric authentication.
Azure AI Speech continues to evolve, and Microsoft constantly adds new features and capabilities to improve the service and extend its functionality.
Create an Azure AI Speech service in Azure portal
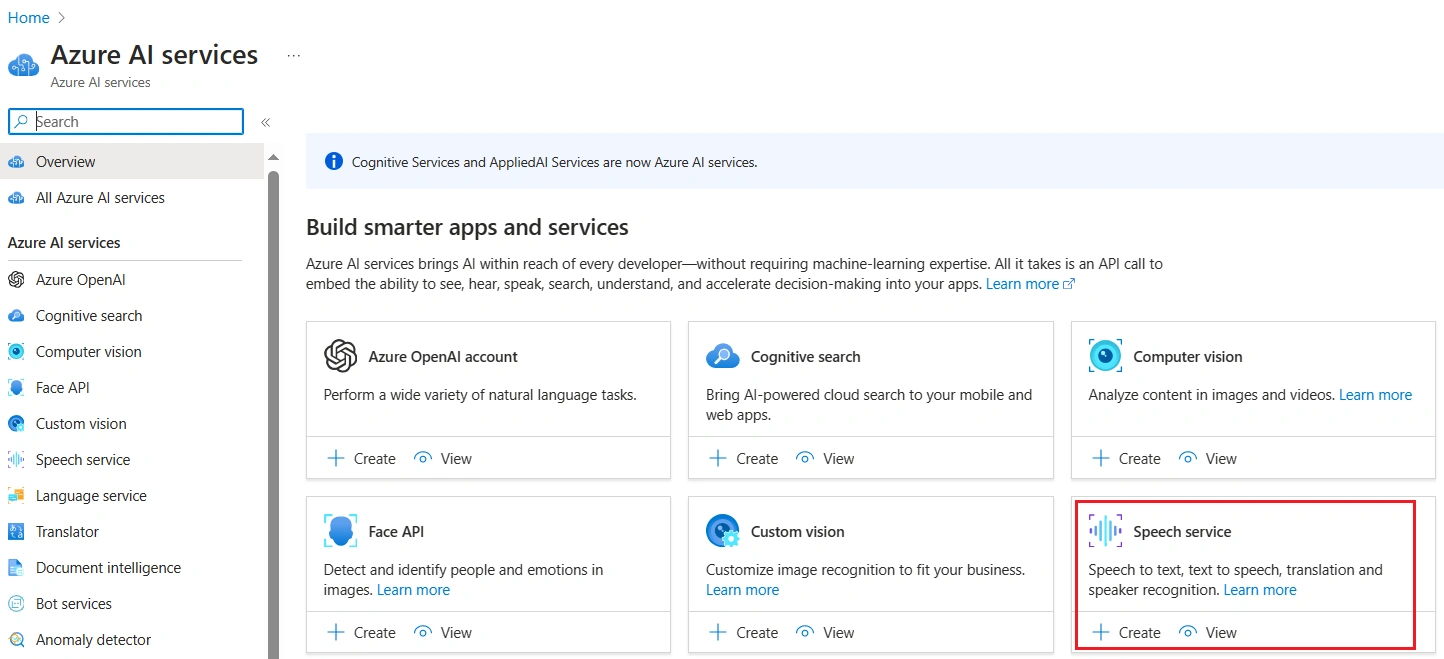
We can choose Azure AI services blade and select Speech service in Azure portal.
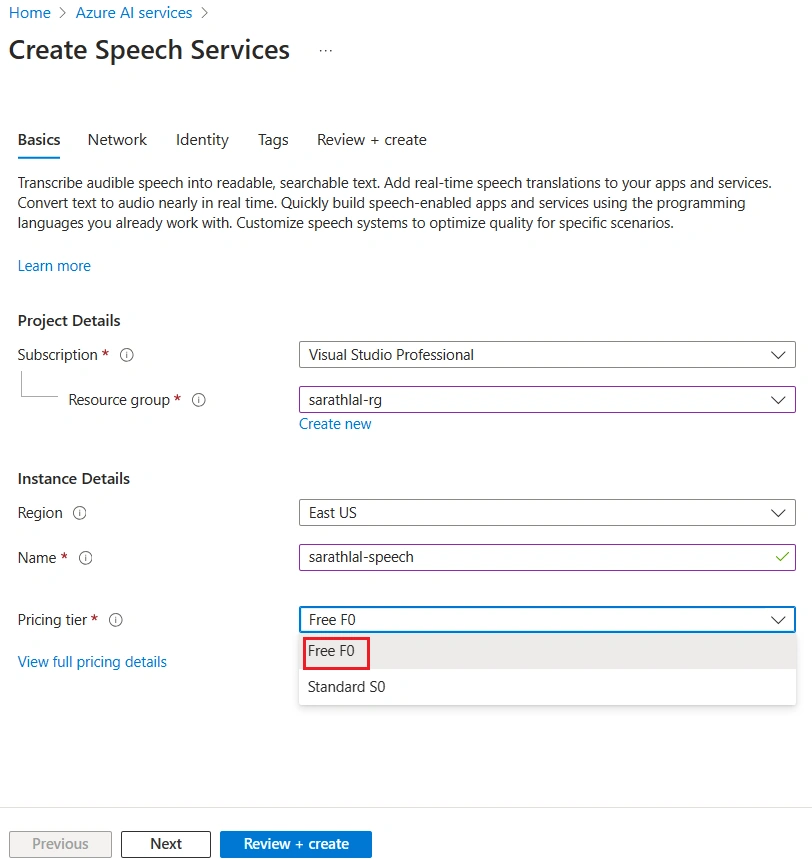
Please choose an existing resource group / create a new resource group. We can choose the Free F0 plan for testing purposes. Please note that, per subscription, only one free tier plan is available.
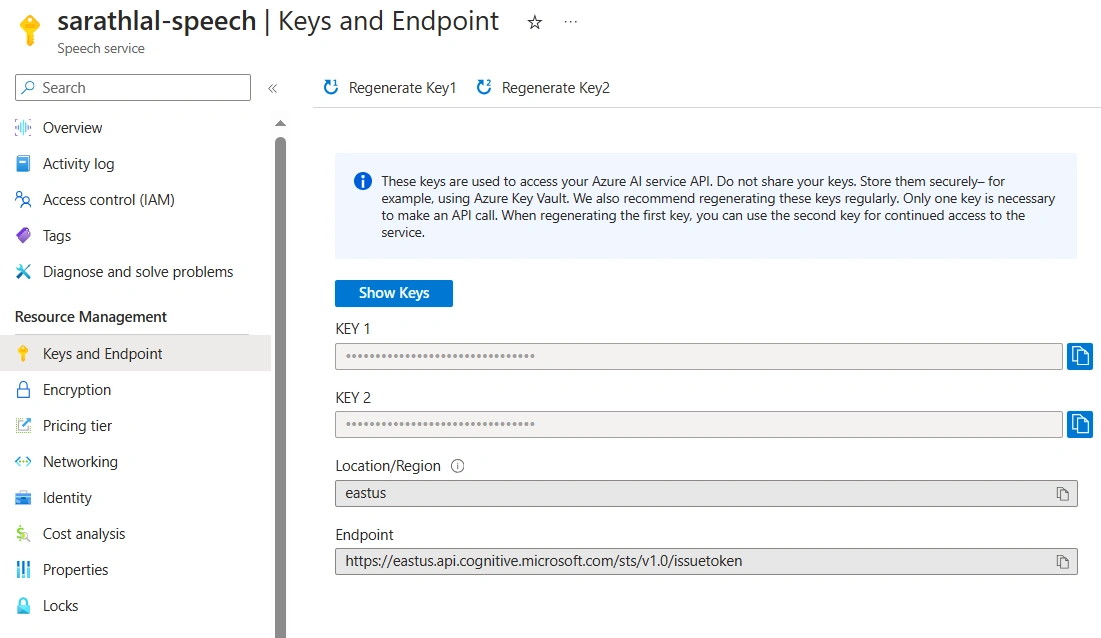
After creating the speech resource, we can go to the Keys and Endpoint tab and get the key. We will be using this key later in our .NET 6 Web API project.
Create .NET 6 Web API with Visual Studio 2022
We can create .NET 6 Web API with Visual Studio 2022.
Please add the NuGet library below into the project.
- Microsoft.CognitiveServices.Speech
Create a model TextRequest and add the properties below inside it. It will be used to get text value, language, and voice gender from Angular.
TextRequest.cs
namespace TextToSpeech.NET6;

public class TextRequest
{
    public string? Text { get; set; }
    public string? Language { get; set; }
    public string? VoiceGender { get; set; }

}
We can create a static Helper class and add GetSpeechSynthesisVoiceName method inside it.
This method will decide the speech synthesis voice name for each language from user input. Microsoft give both male and female voice for all the languages.
Please refer to the URL below for more details about locale and voices supported for text to speech.
Helper.cs
namespace TextToSpeech.NET6;

public static class Helper
{
    public static string GetSpeechSynthesisVoiceName(string language, string voiceGender)
    {
        switch (language)
        {
            case "en-IN":
                if (voiceGender == "M")
                    return "en-IN-PrabhatNeural";
                else
                    return "en-IN-NeerjaNeural";
            case "hi-IN":
                if (voiceGender == "M")
                    return "hi-IN-MadhurNeural";
                else
                    return "hi-IN-SwaraNeural";
            case "ml-IN":
                if (voiceGender == "M")
                    return "ml-IN-MidhunNeural";
                else
                    return "ml-IN-SobhanaNeural";
            case "ta-IN":
                if (voiceGender == "M")
                    return "ta-IN-ValluvarNeural";
                else
                    return "ta-IN-PallaviNeural";
            case "te-IN":
                if (voiceGender == "M")
                    return "te-IN-MohanNeural";
                else
                    return "te-IN-ShrutiNeural";
            case "kn-IN":
                if (voiceGender == "M")
                    return "kn-IN-GaganNeural";
                else
                    return "kn-IN-SapnaNeural";
            default:
                return "en-IN-NeerjaNeural";
        }

    }
}
Create the TextToSpeechController and add the code below.
TextToSpeechController.cs
using Microsoft.AspNetCore.Http;
using Microsoft.AspNetCore.Mvc;
using Microsoft.CognitiveServices.Speech;

namespace TextToSpeech.NET6.Controllers;

[Route("api/[controller]")]
[ApiController]
public class TextToSpeechController : ControllerBase
{
    private readonly string SubscriptionKey = "342fdfe6715d469f9b64359275fc97df";
    private readonly string ServiceRegion = "eastus";

    [HttpPost("synthesize")]
    [Consumes("application/json")]
    public async Task<IActionResult> SynthesizeSpeech([FromBody] TextRequest request)
    {
        var speechConfig = SpeechConfig.FromSubscription(SubscriptionKey, ServiceRegion);
        speechConfig.SpeechSynthesisVoiceName = Helper.GetSpeechSynthesisVoiceName(request.Language, request.VoiceGender);
        var synthesizer = new SpeechSynthesizer(speechConfig, null);

        var result = await synthesizer.SpeakTextAsync(request.Text);
        if (result.Reason == ResultReason.SynthesizingAudioCompleted)
        {
            var audioData = result.AudioData;
            return File(audioData, "audio/wav");
        }
        else if (result.Reason == ResultReason.Canceled)
        {
            var cancellation = SpeechSynthesisCancellationDetails.FromResult(result);
            return BadRequest(cancellation.ErrorDetails);
        }
        return BadRequest("Speech synthesis failed.");

    }
}
We have added a synthesize method inside the above controller. Please note that we have initialized synthesizer variable with null. If you do not give null value, SpeakTextAsync method will always give an auto play voice.
We have converted the input text to an audio and returned this audio as a File result. We will consume this File output from Angular application and play the audio. We can add CORS details in Program.cs class. So that Angular application can consume API end point without any issues.
Program.cs
builder.Services.AddCors(options =>
{
    options.AddDefaultPolicy(
        builder =>
        {
            builder.WithOrigins("http://localhost:4200")
                   .AllowAnyHeader()

                   .AllowAnyMethod();
        });
});

........
app.UseAuthorization();
app.UseCors()
We have completed the Backend code. We can create Angular code now.
Create Angular 16 application using Angular CLI
We can create an Angular 16 application using Angular CLI.
ng new TextToSpeechAngular16
Please choose default routing and styling options and continue.
After creating the new project, open project in Visual Studio Code.
Create TextRequest model class.
textRequest.ts
export class TextRequest {
    text!: string;
    language!: string;
    voiceGender!: string;

    constructor(txt: string, lan: string, vg: string) {
        this.text = txt;
        this.language = lan;
        this.voiceGender = vg;
    }
}
This model will be used to pass input text, language code, and voice gender to Web API.
Create a new TextToSpeech angular service.
ng generate service TextToSpeech
text-to-speech.service.ts
import { Injectable } from '@angular/core';
import { HttpClient, HttpHeaders } from '@angular/common/http';
import { Observable } from 'rxjs';
import { TextRequest } from './textRequest';

@Injectable({
  providedIn: 'root'
})
export class TextToSpeechService {
  private readonly apiUrl = 'https://localhost:5000/api/TextToSpeech';

  constructor(private http: HttpClient) {}

  synthesizeText(request: TextRequest): Observable<Blob> {
    const headers = new HttpHeaders({ 'Content-Type': 'application/json' });
    return this.http.post<Blob>(this.apiUrl + '/synthesize', request , { headers, responseType: 'blob' as 'json' });
  }
}
Create loading service and add code given below.
ng generate service Loading
loading.service.ts
import { Injectable } from '@angular/core';
import { BehaviorSubject } from 'rxjs';

@Injectable({
  providedIn: 'root'
})
export class LoadingService {
  private _isLoading = new BehaviorSubject<boolean>(false);

  get isLoading$() {
    return this._isLoading.asObservable();
  }

  showLoader() {
    this._isLoading.next(true);
  }

  hideLoader() {
    this._isLoading.next(false);
  }
}
Now, we can create loading component.
ng generate component loading
Copy the code below to component class, template and style files.
loading.component.ts
import { Component } from '@angular/core';
import { LoadingService } from '../loading.service';

@Component({
  selector: 'app-loading',
  templateUrl: './loading.component.html',
  styleUrls: ['./loading.component.css']
})
export class LoadingComponent {
  isLoading$ = this.loadingService.isLoading$;

  constructor(private loadingService: LoadingService) { }
}
loading.component.html
<div *ngIf="isLoading$ | async" class="loader-overlay">
    <div class="small progress">
        <div></div>
    </div>
</div>
loading.component.css
.loader-overlay {
    position: fixed;
    top: 0;
    left: 0;
    right: 0;
    bottom: 0;
    display: flex;
    align-items: center;
    justify-content: center;
  }

  .progress {
      position: relative;
      width: 5em;
      height: 5em;
      margin: 0 0.5em;
      font-size: 12px;
      text-indent: 999em;
      overflow: hidden;
      -webkit-animation: progress_ani 1s infinite steps(8);
      animation: progress_ani 1s infinite steps(8);
    background: none;
  }

  .small.progress {
      font-size: 8px;
  }

  .progress:after,
  .progress:before,
  .progress > div:after,
  .progress > div:before {
      content: "";
      position: absolute;
      top: 0;
      left: 2.25em;
      width: 0.5em;
      height: 1.5em;
      border-radius: 0.2em;
      background: #eee;
      box-shadow: 0 3.5em #eee;
      -webkit-transform-origin: 50% 2.5em;
      transform-origin: 50% 2.5em;
  }

  .progress:before {
      background: #555;
  }

  .progress:after {
      -webkit-transform: rotate(-45deg);
      transform: rotate(-45deg);
      background: #777;
  }

  .progress > div:before {
      -webkit-transform: rotate(-90deg);
      transform: rotate(-90deg);
      background: #999;
  }

  .progress > div:after {
      -webkit-transform: rotate(-135deg);
      transform: rotate(-135deg);
      background: #bbb;
  }

  @-webkit-keyframes progress_ani {
      to {
          -webkit-transform: rotate(1turn);
          transform: rotate(1turn);
      }
  }

  @keyframes progress_ani {
      to {
          -webkit-transform: rotate(1turn);
          transform: rotate(1turn);
      }
  }
Import FormsModule and HttpClientModule in App Module.
app.module.ts
import { NgModule } from '@angular/core';
import { BrowserModule } from '@angular/platform-browser';

import { AppComponent } from './app.component';
import { LoadingComponent } from './loading/loading.component';
import { HttpClientModule } from '@angular/common/http';
import { FormsModule } from '@angular/forms';

@NgModule({
  declarations: [
    AppComponent,
    LoadingComponent
  ],
  imports: [
    BrowserModule,
    FormsModule,
    HttpClientModule
  ],
  providers: [],
  bootstrap: [AppComponent]
})
export class AppModule { }
Replace App Component class, template and stylesheet files with below code.
app.component.ts
import { Component } from '@angular/core';
import { TextToSpeechService } from './text-to-speech.service';
import { LoadingService } from './loading.service';
import { TextRequest } from './textRequest';

@Component({
  selector: 'app-root',
  templateUrl: './app.component.html',
  styleUrls: ['./app.component.css']
})
export class AppComponent {
  textToSynthesize: string = '';
  selectedLang!: string;
  voiceGender!: string;

  languageOptions = [
    { value: 'en-IN', label: 'English' },
    { value: 'hi-IN', label: 'Hindi' },
    { value: 'ml-IN', label: 'Malayalam' },
    { value: 'ta-IN', label: 'Tamil' },
    { value: 'te-IN', label: 'Telugu' },
    { value: 'kn-IN', label: 'Kannada' }
  ];

  constructor(private textToSpeechService: TextToSpeechService, private loadingService: LoadingService) {
    this.voiceGender = "F";
  }

  synthesizeText(): void {
    this.loadingService.showLoader();
    this.textToSpeechService.synthesizeText(new TextRequest(this.textToSynthesize, this.selectedLang, this.voiceGender)).subscribe({
      next: (audioBlob) => {
        const audioUrl = URL.createObjectURL(audioBlob);
        const audio = new Audio(audioUrl);
        audio.play();
        this.loadingService.hideLoader();
      },
      error: (err) => {
        console.error('Error synthesizing text', err);
        this.loadingService.hideLoader();
      },
      complete: () => console.info('Request completed')
    }
    );
  }
}
app.component.html
<div class="row">
  <h1 class="title">
    Convert Text to Speech using Azure AI Speech with Angular 16 and .NET 6
  </h1>
</div>
<div class="content" role="main">

  <div class="radio-button-group">
    <legend>Choose a Voice Gender :</legend>
    <label for="option1">
      <input type="radio" id="option1" name="options" [(ngModel)]="voiceGender" value="F">
      Female
    </label>
    <label for="option2">
      <input type="radio" id="option2" name="options" [(ngModel)]="voiceGender" value="M">
      Male
    </label>
  </div>
  <div class="row  dropdown-container">
    <label for="myDropdown">Choose a Language :</label>
    <select [(ngModel)]="selectedLang" class="dropdown">
      <option *ngFor="let lang of languageOptions" [value]="lang.value">
        {{ lang.label }}
      </option>
    </select>
  </div>
  <p>Give the text for conversion:</p>
  <textarea [(ngModel)]="textToSynthesize" class="text-area"></textarea>
  <button (click)="synthesizeText()" class="custom-button">Convert Text to Speech</button>
</div>

<div class="container mt-3" style="max-width:1330px;padding-top:30px;" role="main">
  <app-loading></app-loading>
</div>
app.component.css
.content {
    display: flex;
    margin: 82px auto 32px;
    padding: 0 16px;
    max-width: 960px;
    flex-direction: column;
    align-items: center;
}

.title {
    text-align: center;
}

.text-area {
    width: 500px;
    height: 100px;
}

.custom-button {
    background-color: #4CAF50;
    /* Green background */
    border: none;
    /* Remove borders */
    color: white;
    /* White text */
    padding: 15px 32px;
    /* Add some padding */
    text-align: center;
    /* Center the text */
    text-decoration: none;
    /* Remove underline from text */
    display: inline-block;
    /* Display inline-block */
    font-size: 16px;
    /* Set font size */
    margin: 4px 2px;
    /* Add some margin */
    transition-duration: 0.4s;
    /* 0.4 second transition effect to hover state */
    cursor: pointer;
    /* Add a mouse pointer on hover */
    border-radius: 4px;
    /* Add rounded corners */
}

.dropdown-container {
    display: flex;
    flex-direction: column;
    margin: 10px;
}

/* Style the label */
label {
    margin-bottom: 5px;
    font-size: 16px;
    color: #333;
}

/* Style the dropdown */
.dropdown {
    padding: 8px 12px;
    border: 1px solid #ccc;
    border-radius: 4px;
    font-size: 14px;
    color: #333;
    background-color: #fff;
    cursor: pointer;
}

/* Optional: Style the dropdown when it's focused */
.dropdown:focus {
    border-color: #66afe9;
    outline: none;
    box-shadow: inset 0 1px 1px rgba(0, 0, 0, 0.075), 0 0 8px rgba(102, 175, 233, .6);
}

.textbox {
    width: 500px;
    margin: -10px;
    height: 150px;
    text-align: center;
    padding: 0px;
}

.custom-button:hover {
    background-color: white;
    /* White background */
    color: #4CAF50;
    /* Green text */
    border: 1px solid #4CAF50;
    /* Add green border */
}

.radio-button-group {
    border: 1px solid #ccc;
    padding: 10px;
    margin: 10px 0;
    font-size: 14px;
}

.radio-button-group legend {
    padding: 0 5px;
    font-size: 1.1em;
}

.radio-button-group label {
    display: block;
    margin-bottom: 5px;
    cursor: pointer;
}

.radio-button-group input[type="radio"] {
    margin-right: 5px;
}

/* your-component.component.css */
:host {
    position: relative;
    /* This is required for the absolute positioning of the pseudo-element */
    display: block;
    /* or 'flex', 'inline-block', etc., depending on your layout */
    min-height: 100px;
    /* or whatever height you need */
    z-index: 0;
}

:host::after {
    content: '';
    background-image: url(../assets/texttospeech.webp);
    background-size: cover;
    background-position: center center;
    opacity: 0.2;
    /* Adjust your opacity here */
    top: 0;
    left: 0;
    bottom: 0;
    right: 0;
    position: absolute;
    z-index: -1;
    height: 550px;
}

/* Responsive Styles */
@media screen and (max-width: 767px) {

    .card-container>*:not(.circle-link),
    .terminal {
        width: 100%;
    }

    .card:not(.highlight-card) {
        height: 16px;
        margin: 8px 0;
    }

    .card.highlight-card span {
        margin-left: 72px;
    }

    svg#rocket-smoke {
        right: 120px;
        transform: rotate(-5deg);
    }
}

@media screen and (max-width: 575px) {
    svg#rocket-smoke {
        display: none;
        visibility: hidden;
    }
}
We have completed the Angular coding part also. Run both .NET 6 Web API and Angular 16 projects.
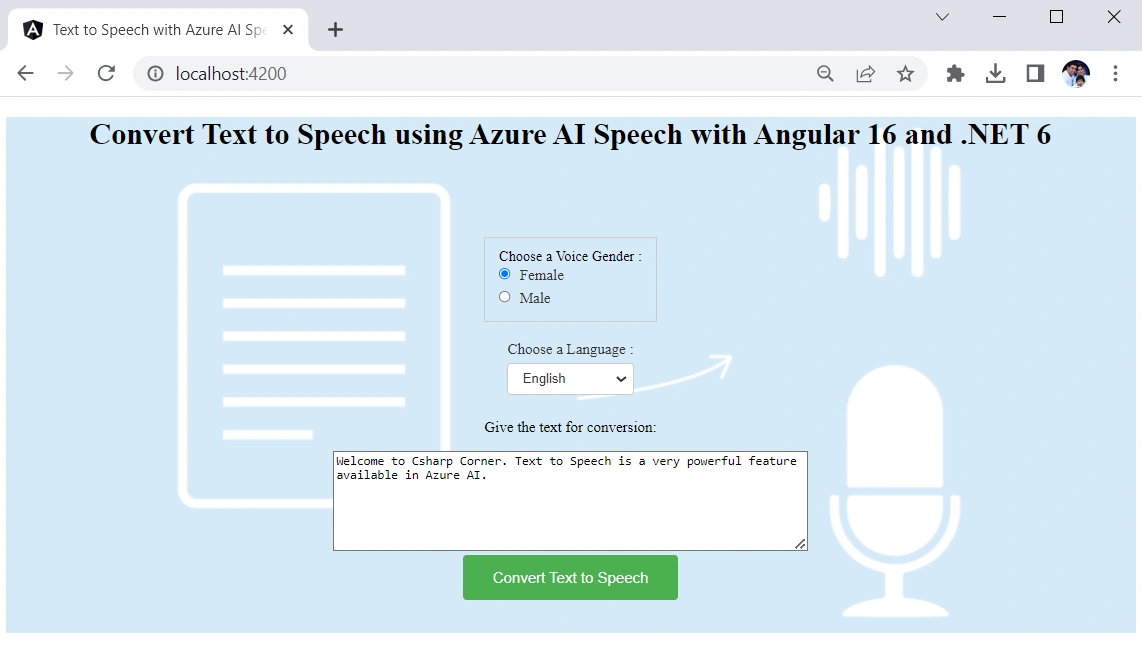
We can give any input in the textbox and choose desired language and voice gender. I have chosen English as language and Female as voice gender.
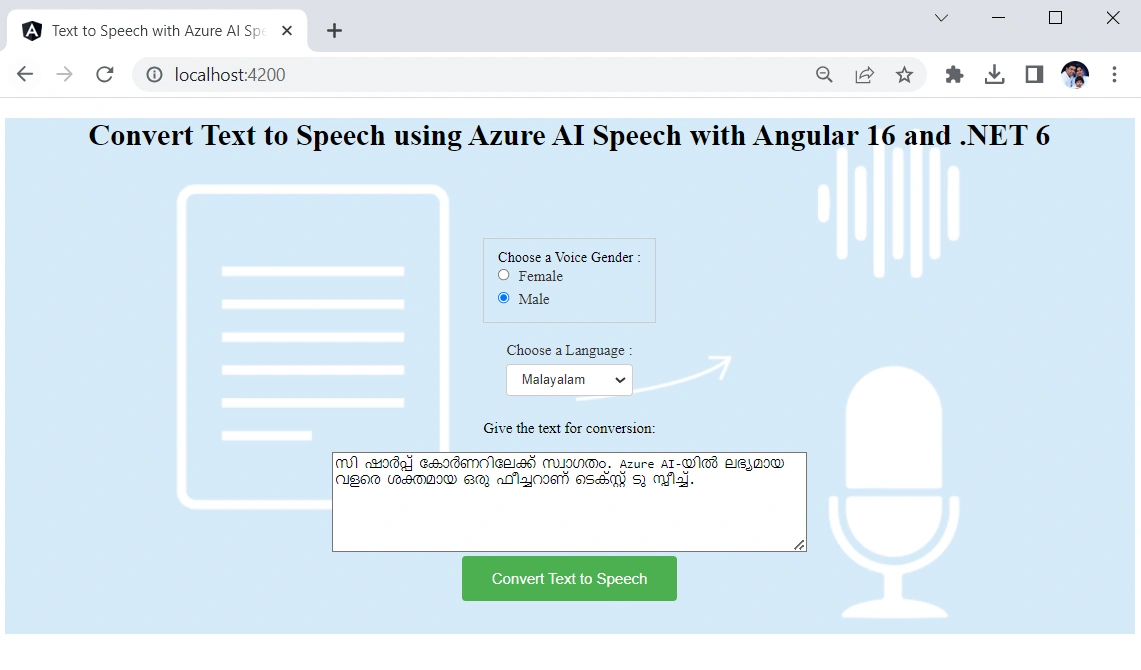
This time, I have selected Malayalam as language and Male as voice gender. Please note that if you select a native language, you should give the text also in the same language. Otherwise, the speech synthesizer will not recognize it correctly.
We can again choose Hindi as language and Female as gender.
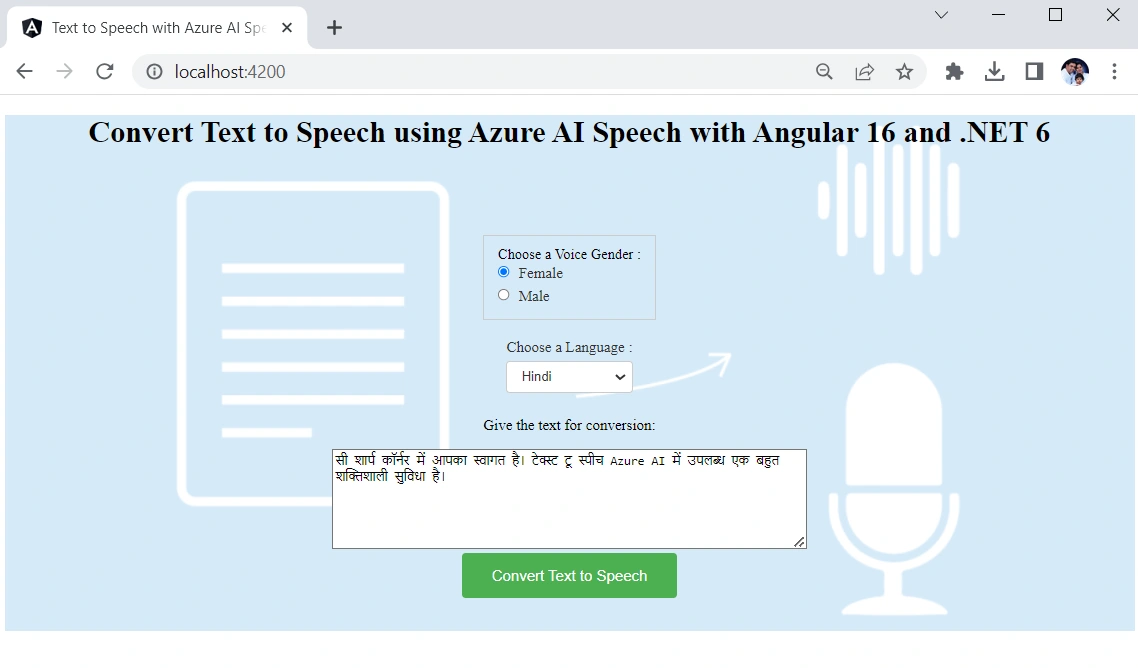
This is quite a simple implementation of text to speech feature of Azure AI speech service. We can easily use this feature in our real-life applications to get more benefits.
Conclusion
In this post, we have seen all the steps to convert text to speech using Azure AI speech service. We have used Angular 16 front end application and .NET 6 backend application to achieve this. We used Microsoft.CognitiveServices.Speech NuGet package to convert text to speech.
Join the conversation! Your thoughts help the community grow.