

Nintex Workflows- Part 4
Before reading this article, I highly recommend the previous part of this series:
- Create a New Item in SharePoint 2013 and Office 365 Using Nintex Workflows ( Nintex Workflows- Part 1)
- Check-In Item In SharePoint 2013 and Office 365 Using Nintex Workflows ( Nintex Workflows- Part 2)
- Check-Out Item In SharePoint 2013 And Office 365 Using Nintex Workflows ( Nintex Workflows- Part 3 )
Welcome to an article on how to copy a new item to a different library in SharePoint 2013 and Office 365 using Nintex Workflows. This article will display the action “Copy Document” so that all my developer friends don’t have to spend much time and effort while using this function in their projects.
- Create two Document Libraries, Dev Document and Dev Document 1.
- In Dev Document, click on the Library tab on the top ribbon and click on Nintex Workflows.

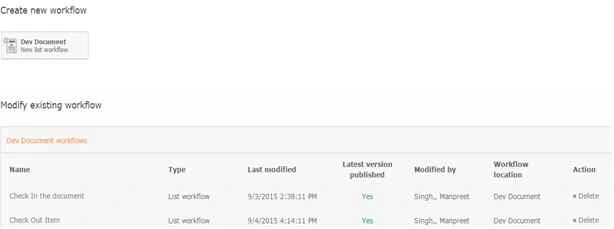
- You will see the following screen, to create a new workflow.
- Click “Create new workflow”.
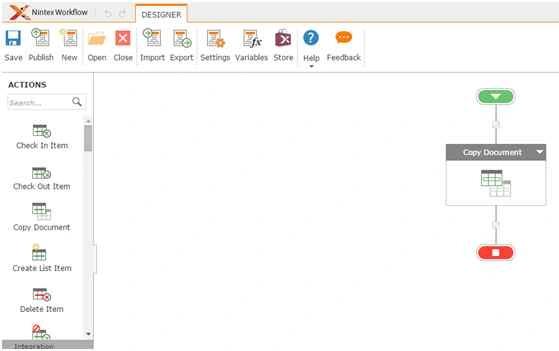
- You will come to the design phase of the Nintex workflows.
- Add the action, “Copy Document” either by right clicking on the workflow or by dragging and dropping from the left toolbox.
- Now let’s configure it.
- When you double click on the action the following screen opens up.
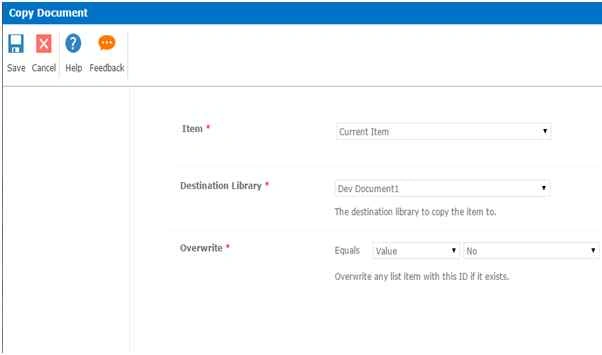
- Item: Choose the item as in the current item or any item from other library.
- Destination Library: Choose which library do you want to copy the document.
- Overwrite: Select Yes/ No or apply a condition if you want to overwrite the document.
- Now we have configured our workflow, let’s go and publish it to use it.
- Click Publish on the left corner of the ribbon of Nintex Designer.

- You will see the following screenshot:
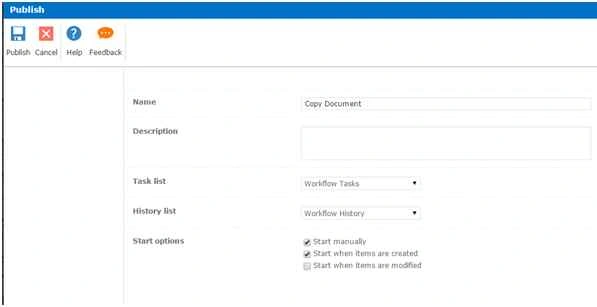
- Give your workflow a name.
- Description.
- Choose your task list where it should store the tasks, it will be Workflow Tasks by default.
- Choose your history list where it should store the history logs, It will be Workflow History by default.
- Start Options:
- You can either start your workflow manually.
- Or you can start your workflow automatically when an item is created, I will select this option to create automatically when a document is uploaded, it will create a copy.
- Or you can start your workflow automatically when an item is modified.
- Click Publish.
- Your workflow will get published.
Upload a document in the first library “Dev Document” as in the following screenshot:
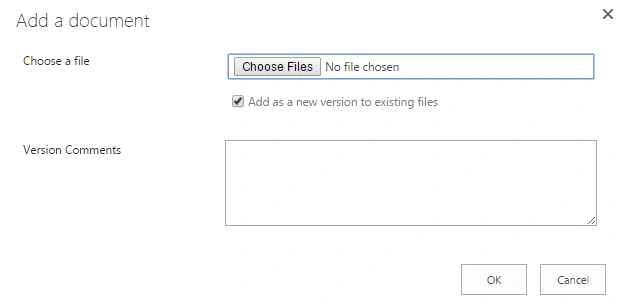
A document gets created.
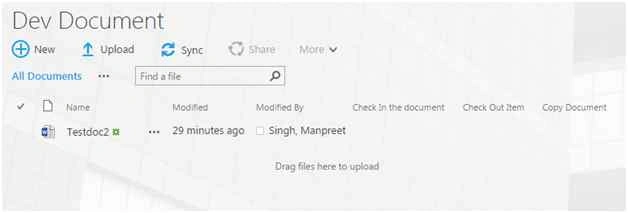
Once the document gets created in “Dev Document”, it triggers a copy document workflow through Nintex and creates a copy of the document in the library “Dev Document 1” automatically as in the following screenshot:
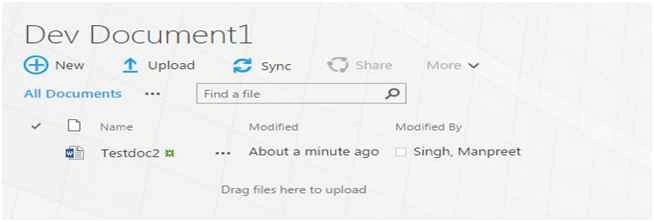
Not only the document, it will also copy all the column values thereby saving your time and effort.
So in this article we saw how to copy a new item to a different library in SharePoint 2013 and Office 365 using Nintex Workflows. We will see more new articles on the actions of Nintex Workflows in the other parts of the article. Till then, keep learning!
Santhakumar MunuswamyPosted Sep 17, 2015, 10:31 AM
Thanks for nice article:)
Pankaj Kumar ChoudharyPosted Sep 14, 2015, 9:41 PM
Nice Explain Sir...........
Mohammed IbrahimPosted Sep 14, 2015, 1:06 PM
nice information