
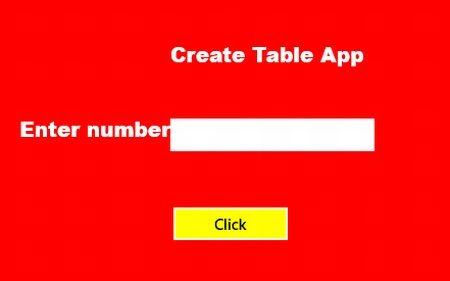
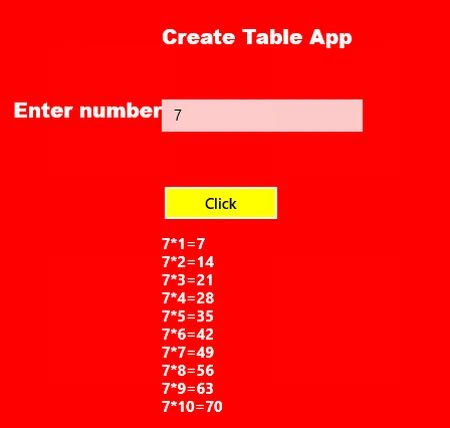
In this article you will learn how to create a table of a particular number entered by you. Just like the counting table that we saw in earlier classes. Now the table logic is implemented in a Windows Store app.
Use the following procedure to create the table in a Windows Store app.
Step 1
First of all you have to create a New Window Store Application, as in the following:
- Open Visual Studio 2012
- "File" -> "New" -> "Project..."
- Choose Template: "Visual C#" -> "Window Store app"
- "Blank App (XAML)", then rename the application

Step 2
Write the following simple XAML code for "Mainpage.Xaml" (that is available in Solution Explorer):
<Page
x:Class="table_app.MainPage"
xmlns="http://schemas.microsoft.com/winfx/2006/xaml/presentation"
xmlns:x="http://schemas.microsoft.com/winfx/2006/xaml"
xmlns:local="using:table_app"
xmlns:d="http://schemas.microsoft.com/expression/blend/2008"
xmlns:mc="http://schemas.openxmlformats.org/markup-compatibility/2006"
mc:Ignorable="d">
<Grid Background="Red">
<Grid.ColumnDefinitions>
<ColumnDefinition Width="461*"/>
<ColumnDefinition Width="905*"/>
</Grid.ColumnDefinitions>
<Grid.RowDefinitions>
<RowDefinition Height="97*"/>
<RowDefinition Height="52*"/>
<RowDefinition Height="50*"/>
<RowDefinition Height="46*"/>
<RowDefinition Height="523*"/>
</Grid.RowDefinitions>
<TextBlock Text="Create Table App" FontSize="20" FontFamily="Arial" FontWeight="ExtraBold" Foreground="White" Grid.Column="1" Grid.Row="1"/>
<TextBlock Text="Enter number" FontSize="20" FontFamily="Arial" FontWeight="ExtraBold" Foreground="White" Grid.Column="0" Grid.Row="2" TextAlignment="Right"></TextBlock>
Join the conversation! Your thoughts help the community grow.