

Overview
In this article, we will talk about how we can create VM using Azure Portal. Most of the times, especially when we are newer to Azure technology, we wonder how we can create a VM. Trust me, creating a VM is not a big deal when using Azure.
I just want to inform you that we can get a free Azure subscription for 1 month using the Azure portal. Use the below URL for an Azure subscription.
https://azure.microsoft.com/en-in/free/
Microsoft also provides 12-months free subscription as a part of Visual Studio Dev Essentials program. You can register yourself for Visual Studio Dev Essentials program for free. Using Visual Studio Dev Essentials, we get $300 credit for 1 year. Every month, we get $25 credit.
For more information on registering yourself using Visual Studio Dev Essentials, visit one of the best articles of C# Corner, mentioned below.
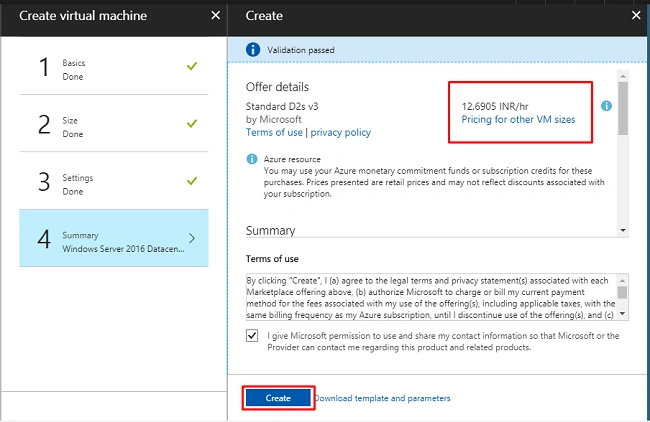
One more thing that I want to share with you is that sometimes when we check prices for Azure VM, we think we don’t have enough credit to purchase the VM. But the fact is that Azure provides a feature “Pay only for what you use”. Suppose, I have 2500 INR in my Azure subscription credit and my VM price is 12,500 INR, then when I create the VM it charges me on per hour basis.
Suppose my rate per hour is 12 INR., then I will have deducted 12 INR. per hour. It will cost other charges. For more information and conditions, visit the official Azure portal.
So now, let’s get started!
Step 1
Login using Azure Portal - https://portal.azure.com/
Step 2
From Virtual Machines, create a new Virtual Machine.
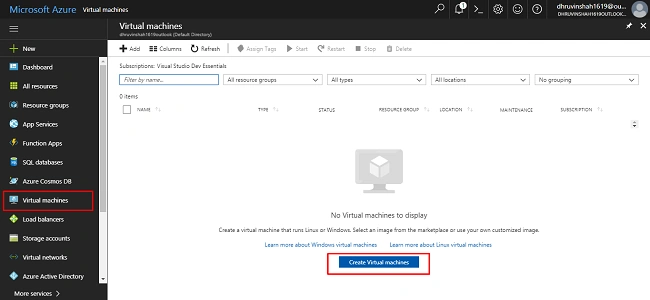
Step 3
Select Windows Server.
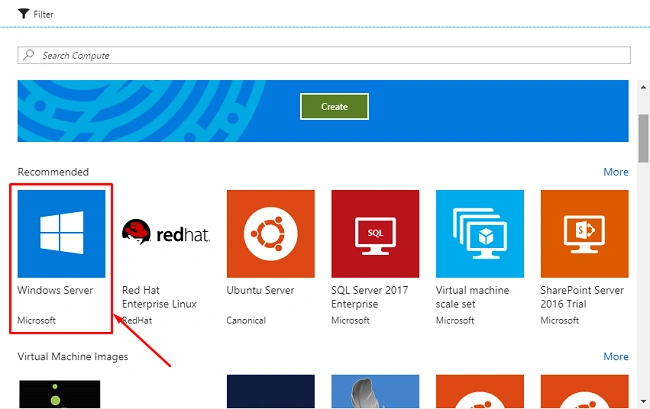
Step 4
I want to create an Azure VM for Windows Server 2016. So, I will choose Windows Server 2016 Datacenter. As per your requirement, you can choose Windows Server.
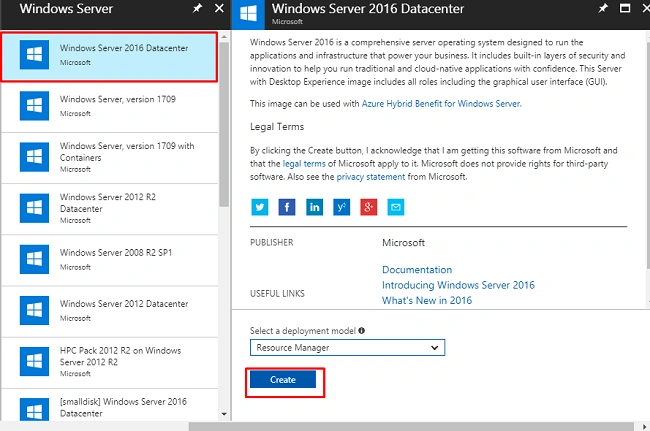
Step 5
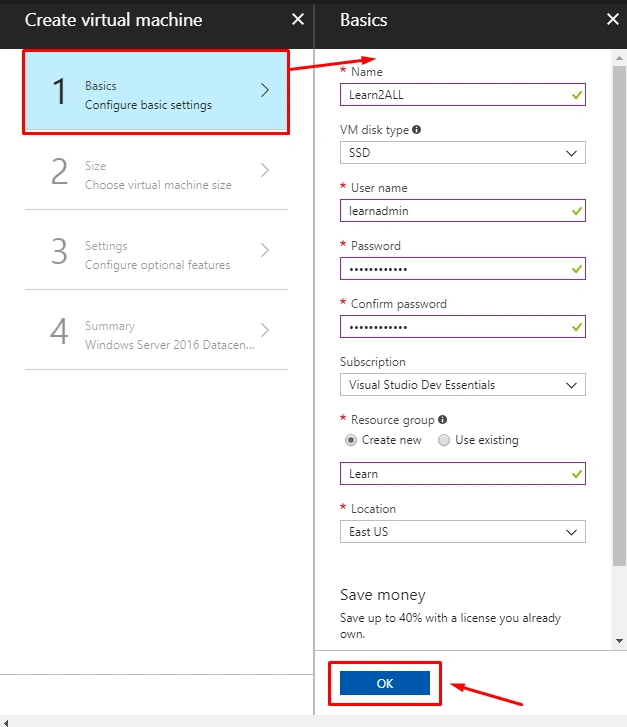
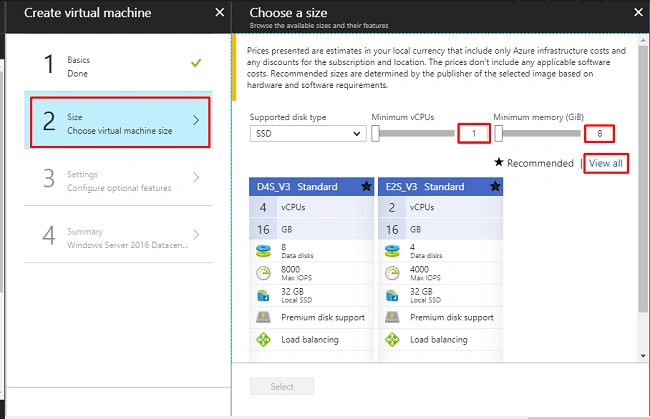
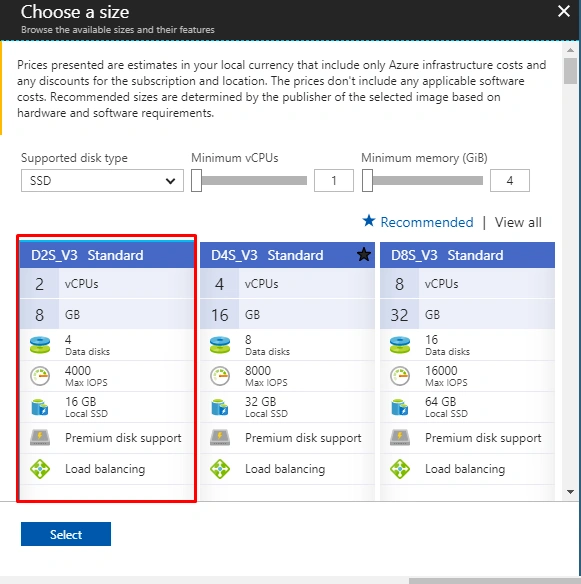
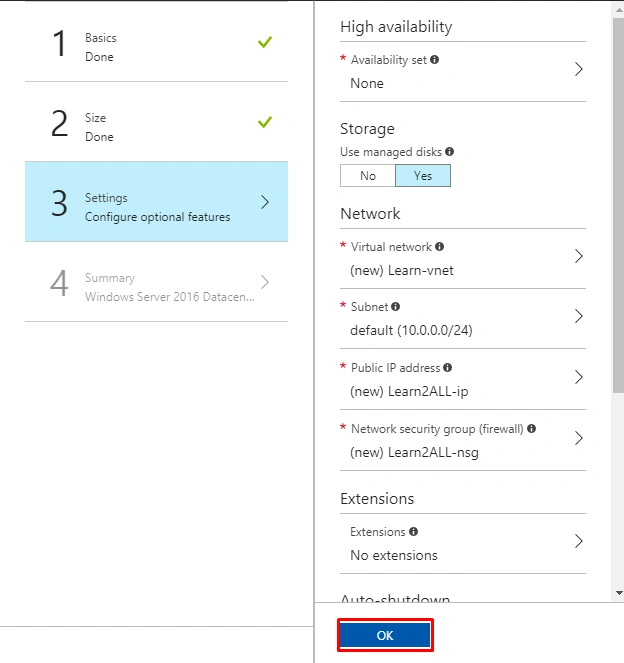
Now, there is a first step to fill all the information.
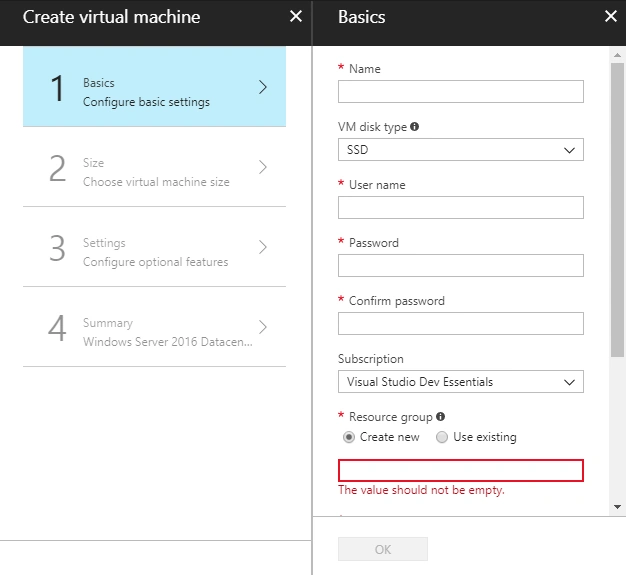
Rathrola Prem KumarPosted Jan 9, 2018, 5:27 AM
Thanks for sharing :)
Sagar Pandurang KapPosted Dec 29, 2017, 12:34 AM
Well done.Nice article