

In this article, we will be creating a mini browser using Visual Studio.
STEP 1
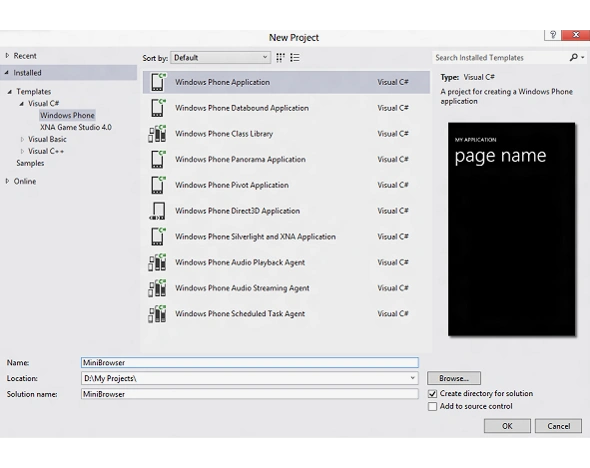
In the "New Project" window, expand the installed Visual C# or Visual Basic templates and then select the Windows Phone templates. At the bottom of the New Project window, type MiniBrowser as the project’s Name.
In the "New Project" window, expand the installed Visual C# or Visual Basic templates and then select the Windows Phone templates. At the bottom of the New Project window, type MiniBrowser as the project’s Name.
STEP 2
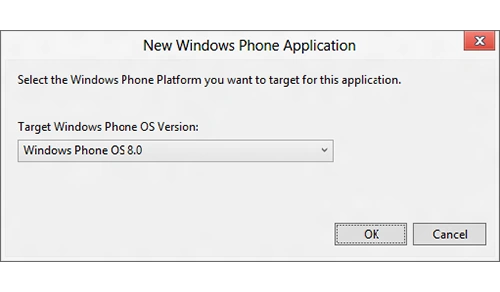
Click OK. In the "New Windows Phone Application" dialog box, select Windows Phone OS 8.0 as the target Windows Phone OS Version.
STEP 3
Click OK. The new project is created and opens in Visual Studio. The designer displays MainPage.xaml which contains the user interface for your app.
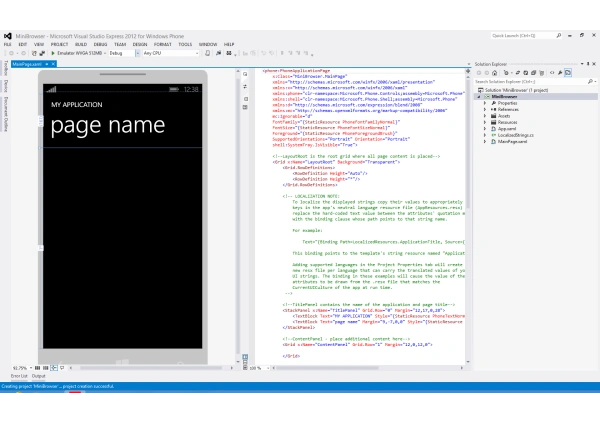
Click OK. The new project is created and opens in Visual Studio. The designer displays MainPage.xaml which contains the user interface for your app.
STEP 4
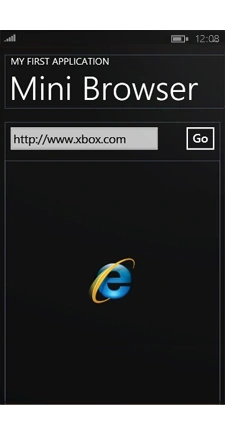
The next step is to lay out the controls that make up the UI of the app, using the Visual Studio Designer. After you add the controls, the final layout will look somewhat similar to the following screenshot.
The next step is to lay out the controls that make up the UI of the app, using the Visual Studio Designer. After you add the controls, the final layout will look somewhat similar to the following screenshot.
To create the UI -
- Open the Properties window in Visual Studio (if it’s not already open), by selecting the VIEW | Properties Window menu command. The Properties window opens in the lower right corner of the Visual Studio window.
- Change the app title.
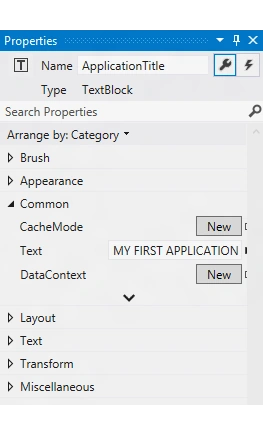
- In the Visual Studio Designer, click to select the MY APPLICATION TEXT BLOCK control. The properties of the control are displayed in the Properties window.
- In the TEXT property, change the name to MY FIRST APPLICATION to rename the app window title. If the properties are grouped by category in the Properties window, you can find TEXT in the Common category.
- Change the name of the page.
- In the Designer, click to select the page name TEXT BLOCK control.
- Change the property to Mini Browser to rename the app’s main page.
- Change the supported orientations.
- In the XAML code window, click the first line of the XAML code. The properties of the PHONE APPLICATION are displayed in the Properties window.
- Change the SUPPORTED ORIENTATION property to PORTRAIT landscape to add support for both portrait and landscape orientations. If the properties are grouped by category in the Properties window, you can fin in the Common category.
- Open the Toolbox in Visual Studio, if it’s not already open, by selecting the VIEW | Toolbox menu command. The Toolbox typically opens on the left side of the Visual Studio window and displays the list of available controls for building the user interface. By default, the Toolbox is collapsed when you’re not using it.
- Add a textbox for the URL.
- From the Common Windows Phone Controls group in the Toolbox, add TEXT CONTROL control to the Designer surface by dragging it from the Toolbox and dropping it onto the Designer surface. Place the TEXT BOX just below the Mini Browser text. Use the mouse to size the control to the approximate width shown in the layout image above. Leave room on the right for the "Go" button.
- In the Properties window, set the following properties for the new text box.
- Add Button.
- Add the WebBrowser control.
- using System;
- using System.Collections.Generic;
- using System.Linq;
- using System.Net;
- using System.Windows;
- using System.Windows.Controls;
- using System.Windows.Navigation;
- using Microsoft.Phone.Controls;
- using Microsoft.Phone.Shell;
- using MiniBrowser.Resources;
- namespace MiniBrowser {
- public partial class MainPage: PhoneApplicationPage {
- // Constructor
- public MainPage() {
- InitializeComponent();
- }
- private void Go_Click(object sender, RoutedEventArgs e) {}
- }
- }
When you double-click the "Go" button, Visual Studio also updates the XAML in MainPage.xaml to connect the button’s Click event to the Go_Click event handler.
XAML
- <Button x:Name="Go" Content="Go" HorizontalAlignment="Right" Margin="346,10,0,0" VerticalAlignment="Top" Click="Go_Click"/>
- private void Go_Click(object sender, RoutedEventArgs e)
- {
- string site = URL.Text;
- MiniBrowser.Navigate(new Uri(site, UriKind.Absolute));
- }
Now, you’ve finished your first Windows Phone app! Next, let's build, run, and debug the app.
Before you test the app, make sure that your computer has Internet access to be able to test the web browser control.
To run your app in the emulator -
- Build the solution by selecting the BUILD | Build Solution menu command. If any error occurs, it's listed in the Error List window. You can open the Error List window, if it’s not already open, by selecting the VIEW | Error List menu command.
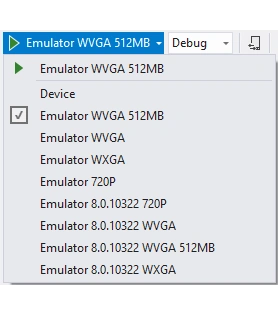
- On the Standard toolbar, make sure the deployment target for the app is set to one of the values for the Windows Phone Emulator; for example, Emulator WVGA 512MB.
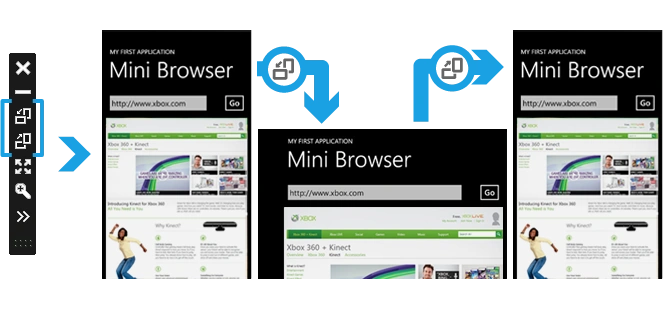
- Run the app by pressing F5 or by selecting the DEBUG | Start Debugging menu command. This opens the emulator window and launches the app. If this is the first time you’re starting the emulator, it might take a few seconds for it to start and launch your app.
Menaka Priyadharshini BPosted May 16, 2018, 9:39 PM
Thanks brother for your comment
Vignesh ManiPosted May 16, 2018, 2:08 PM
Good article. Keep on writing.
Upendra Pratap ShahiPosted Sep 9, 2017, 8:00 AM
After button click button code in not added in XAML file in my IDE.
Vidyadharran GPosted Sep 8, 2017, 11:22 AM
Nice.....keep sharing menaka :)
Munish APosted Sep 7, 2017, 8:30 AM
Nice article, keep sharing