
Introduction
Drawing and Painting is a common aspects which everyone likes to do something
different at any time. With this article, you can learn how to create a WPF
application that enables you to draw pictures. Creating a WPF application is
like creating a Windows Forms application. You choose controls from the
Toolbox on the design window and then write code to
handle the events of the controls.
Now, lets create a simple application using
following steps
Step 1 : Open Microsoft Visual Studio 2010.
Step 2 : Select File->New->Project.
Step 3 : Select WPF Browser Application and then click Ok.
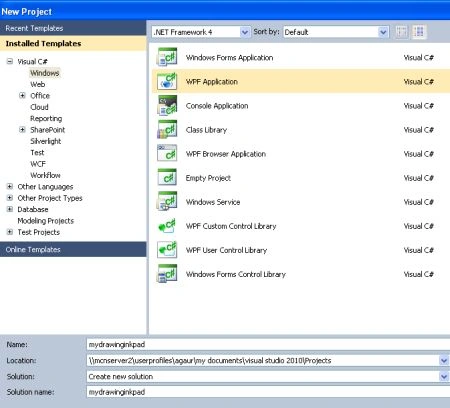
Step 4 : Set the Background, height, width property of the design window.
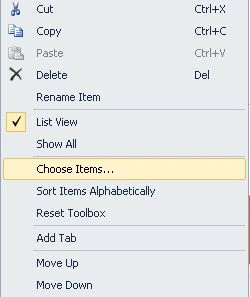
Step 5 : Right-click the Toolbox, and then
click Choose Items.
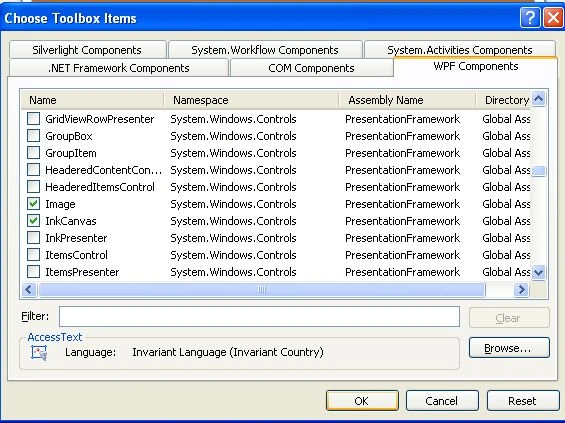
Step 6 : On the WPF
Components tab of the Choose Toolbox Items
dialog box, scroll down to InkCanvas and select it
so that a check appears in the check box.
Step 7 : Drag an InkCanvas Control from the Toolbox to the design
surface.
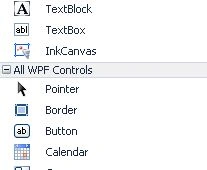
Step 8 : Set the Background, Height, Width, Margin property of the
InkCanvas Control.
Step 9 : Drag two Button controls and label control to the WPF window,
positioning them under the InkCanvas control.
Step 10 : Write the following code in the MainWindow.xaml file
<Window
x:Class="mydrawinginkpad.MainWindow"
xmlns="http://schemas.microsoft.com/winfx/2006/xaml/presentation"
xmlns:x="http://schemas.microsoft.com/winfx/2006/xaml"
Title="MainWindow"
Height="350"
Width="525"
Background="#FFB16C32">
<Grid>
<Grid.RowDefinitions>
<RowDefinition
Height="152*"
/>
<RowDefinition
Height="159*"
/>
</Grid.RowDefinitions>
<InkCanvas
HorizontalAlignment="Stretch"
Margin="9,9,9,68"
Name="inkCanvas1"
VerticalAlignment="Stretch"
Width="Auto"
Grid.RowSpan="2"
Gesture="inkCanvas1_Gesture"
/>
<Button
Content="Clear"
Height="23"
HorizontalAlignment="Left"
Margin="150,63,0,0"
Name="button1"
VerticalAlignment="Top"
Width="75"
Click="button1_Click"
Grid.Row="1"/>
<Button
Content="Close"
Height="23"
HorizontalAlignment="Left"
Margin="231,63,0,0"
Name="button2"
VerticalAlignment="Top"
Width="75"
Click="button2_Click"
Grid.Row="1"/>
<Label
Content="You
can draw any image by rotating the mouse"
Height="34"
HorizontalAlignment="Left"
Margin="27,12,0,0"
Name="label1"
VerticalAlignment="Top"
ContentStringFormat="Draw
any image by rotating the mouse."
Background="#FF9ED1B3"
FontSize="20"
FontFamily="Comic
Sans MS" />
</Grid>
</Window>
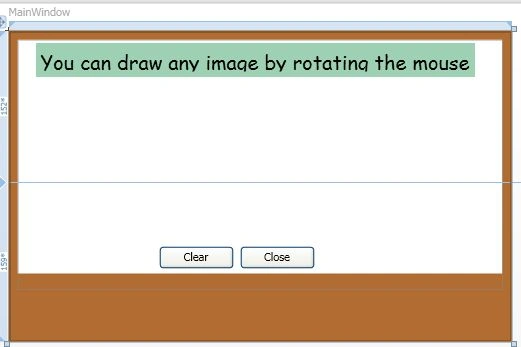
The design window looks like as
Step 11 : Write the following code in MainWindow.xaml.cs file
using
System;
using
System.Collections.Generic;
using
System.Linq;
using
System.Text;
using
System.Windows;
using
System.Windows.Controls;
using
System.Windows.Data;
using
System.Windows.Documents;
using
System.Windows.Input;
using
System.Windows.Media;
using
System.Windows.Media.Imaging;
using
System.Windows.Navigation;
using
System.Windows.Shapes;
namespace
mydrawinginkpad
{
public partial
class MainWindow
: Window
{
public MainWindow()
{
InitializeComponent();
}
private void
inkCanvas1_Gesture(object sender,
InkCanvasGestureEventArgs e)
{
}
private void
button1_Click(object sender,
RoutedEventArgs e)
{
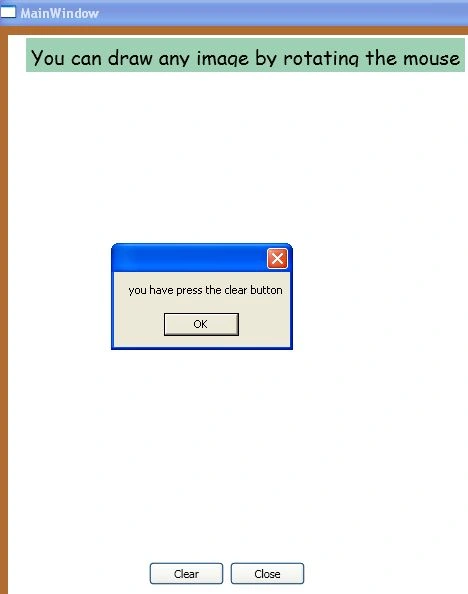
this.inkCanvas1.Strokes.Clear();
MessageBox.Show("you
have press the clear button");
}
private void
button2_Click(object sender,
RoutedEventArgs e)
{
MessageBox.Show("Now
the window will be closed thanx for using InkPad");
this.Close();
}
}
}
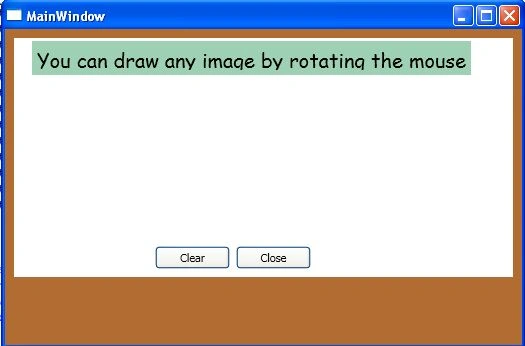
Step 12 : Now press F5 key to run
the application.
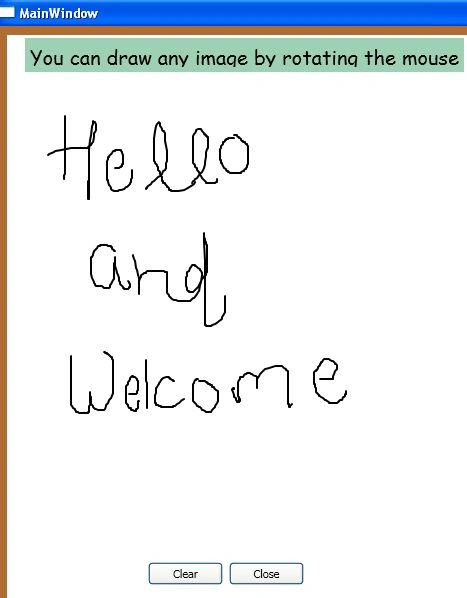
Output :
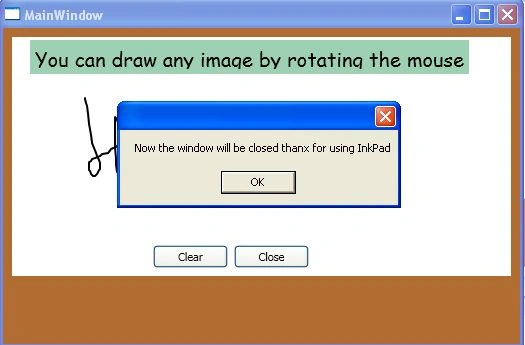
Here are some other useful resources which may help you
Paint Application In Silverlight 3 - Part I
Dynamic
and static Rectangle in WPF
WPF Drawing Brush
How to write a GDI+ Application
Join the conversation! Your thoughts help the community grow.