

In Xamarin.Forms, we can use different markup extensions. Let's now create our own markup extension.
Target Audience
People with basic knowledge of C# and XAML.
Tools
- Visual Studio or Xamarin Studio
- Windows or Mac OS
Installation
Download Visual Studio Installer from here.
You can install Visual Studio 2017 with Xamarin workload.
In this example, I am using VS 2017 on Windows OS with Xamarin workload installed in it and also, with Developer mode ON.
Uses of XAML Markup Extensions
- Used in Data Binding.
- Important for Sharing Objects.
- Referring constants can be used throughout the application.
- Custom Markup Extensions are also made.
- Markup Extensions implement IMarkupExtension Interface.
Creating a Markup Extension
Here, we are going to make a markup extension for images in XAML. By creating this markup extension, we can add images in Xamarin.Forms through XAML.
First, create an empty Xamarin.forms portable project and create a folder named “MarkupExtension”.
Right click on Project -> Add -> New Folder.
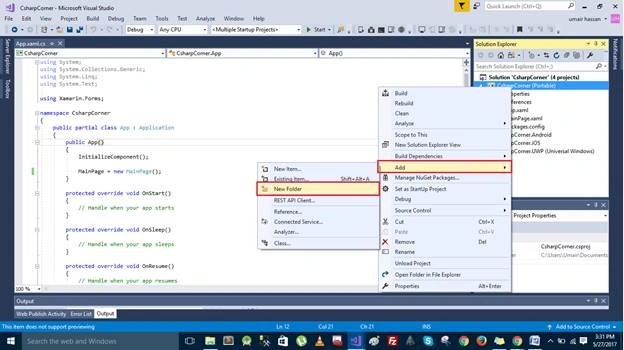
Name the folder as MarkupExtensions.
Right click MarkupExtensions folder -> Add -> New Class. Then, add a class named EmbeddedImage.cs.
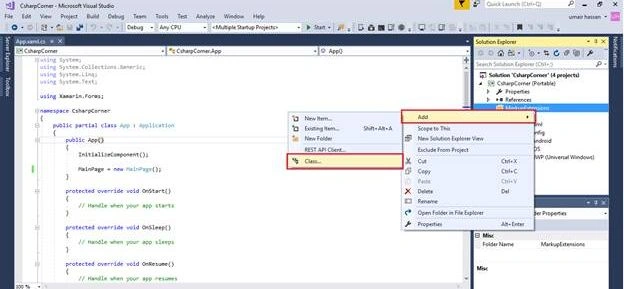
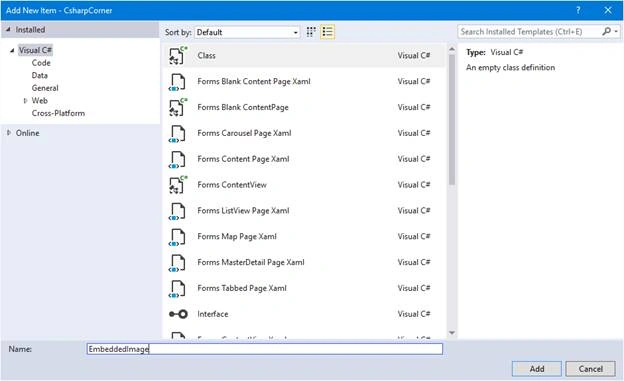
After adding a class, now let's implement IMarkupExtension to this class and make this class public.
Implementing IMarkupExtension
- public class EmbeddedImage : IMarkupExtension
- {
- public object ProvideValue(IServiceProvider serviceProvider)
- {
- throw new NotImplementedException();
- }
- }
This should be the code after implementing a Markup Extension.
Now, add a public property named ResourceId, which, we will use to add image source in XAML.
Code
- public string ResourceId { get; set; }
- public object ProvideValue(IServiceProvider serviceProvider)
- {
- if (String.IsNullOrWhiteSpace(ResourceId))
- return null;
- return ImageSource.FromResource(ResourceId);
- }
Here, we have set the ResourceId. If ResourceId is null or white space, then null will return; otherwise the image source is set to ResourceId.
Now, let's use it in XAML. First, we have to add project namespace.
- xmlns:local="clr-namespace:ProjectName.MarkupExtensions"
Now, add a folder named Resources and add images in it. After this, use <Image> Tag and set its source. And in its source, we will use our markup extension to set the image source.
- <Image Source="{local:EmbeddedImage ResourceId=ProjectName.Resources.Image.extension}"></Image>
Now, you can use this markup extension to add images through XAML.
Join the conversation! Your thoughts help the community grow.