

In this post I will show you how it is so easy in DotVVM to upload files to a local folder or even to a blob container in your Azure Storage Account using FileUpload control.
Uploading files to Local storage
- Create Empty DotVVM web project in Visual Studio.
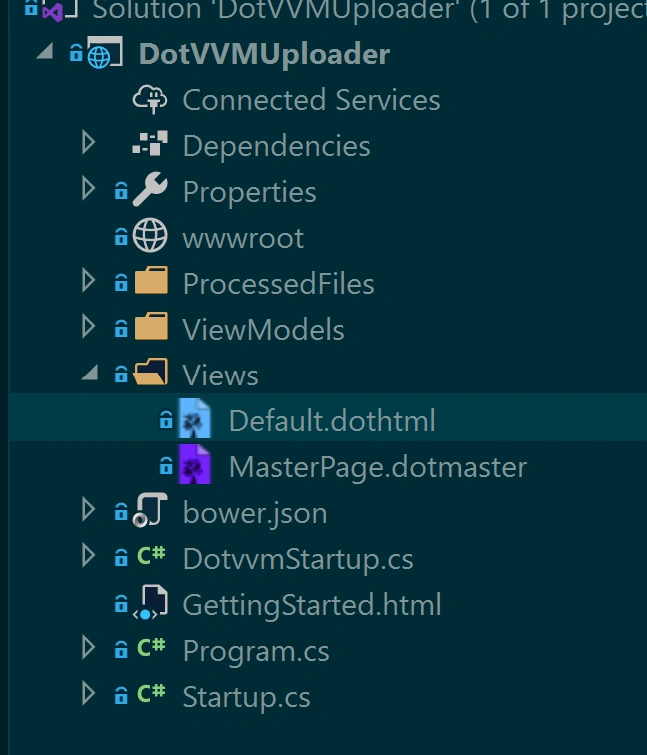
- Open DotvvmStartup.cs file and add the following line to ConfigureServices methods if it does not exist.
- options.AddDefaultTempStorages("temp");
This line is telling DotVVM to set the the default temporary storage to _temp_ folder. Once you try to upload any file DotVVM will create that folder in the root directory of your application. - Open ViewModels/DefaultViewModel file and replace its contents with the following code.
- using DotVVM.Framework.Controls;
- ....
- namespace DotVVMUploader.ViewModels
- {
- public class DefaultViewModel : MasterPageViewModel
- {
- public string Title { get; set; }
- public UploadedFilesCollection FilesCollection { get; set; }
- public DefaultViewModel()
- {
- Title = "Welcome to upload files sample";
- FilesCollection = new UploadedFilesCollection();
- }
- }
- }
We defined FilesCollection property as UploadedFilesCollection. This property will contain our uploaded files. - Open Views/Default.dothtml file and add the following code.
- <dot:FileUpload UploadedFiles="{value: FilesCollection}"
- AllowMultipleFiles="true"
- AllowedFileTypes=".png,.jpg"
- SuccessMessageText="Uploaded"
- UploadButtonText="Select Files to Upload">
- </dot:FileUpload>
Here, we are adding _FileUpload_ control and setting its properties as follows,- UploadFiles : set to FilesCollection collection we have defined in the ViewModel class.
- AllowMultipleFiles : set to true to be able to upload many files at once.
- AllowedFileTypes : set to restrict the file types you allow user to upload.
- SuccessMessageText : the message you want to display in the page to inform the user that the upload is finished with no error.
- UploadButtonText : the text you want to display as a text for upload button.
By default DotVVM will save your file with .tmp extension and keep it for 30 minutes then will be deleted automatically. - To save your files to a permanent location/storage you need to do that by yourself.
In the FileUpload control markup will set UploadCompleted attribute with the name of the event that will be triggered once the upload is completed.
- <dot:FileUpload UploadedFiles="{value: FilesCollection}"
- AllowMultipleFiles="true"
- AllowedFileTypes=".png,.jpg"
- SuccessMessageText="Uploaded"
- UploadButtonText="Select Files to Upload"
- UploadCompleted="{command: SaveMyFilesLocally()}">
- </dot:FileUpload>
- You need to inject IUploadedFileStorage to DefaultViewModel class.
- private readonly IUploadedFileStorage _uploadedFileStorage;
- ...
- public DefaultViewModel(IUploadedFileStorage uploadedFileStorage)
- {
- _uploadedFileStorage = uploadedFileStorage;
- }
- public void SaveMyFilesLocally()
- {
- if (!FilesCollection.IsBusy)
- {
- var permenentPath = Path.Combine(Context.Configuration.ApplicationPhysicalPath, "ProcessedFiles");
- if (!Directory.Exists(permenentPath))
- {
- Directory.CreateDirectory(permenentPath);
- }
- foreach (var file in FilesCollection.Files)
- {
- var newFileName = $"{Path.GetFileNameWithoutExtension(file.FileName)}_{file.FileId}{Path.GetExtension(file.FileName)}";
- var filePath = Path.Combine(permenentPath, newFileName);
- _uploadedFileStorage.SaveAs(file.FileId, filePath);
- _uploadedFileStorage.DeleteFile(file.FileId);
- }
- FilesCollection.Clear();
- }
- }
- First we check if _FilesCollection_ is busy with uploading files. If not, we start to process our uploaded files by looping over _Files_ property of our _FilesCollection_.
- After saving our file to permanent storage we delete it from the temp folder. Deleting files from temp folder is not necessary as DotVVM will delete it after 30 minutes but it is good to do to specially if your application upload huge number of files.
- Then we clear our _FilesCollection_ to not process the same files again if we uploaded another set of files.
Here is how our sample page looks,

Uploading files to Azure Storage Account.
Here the magic of DotVVM begins. If at any point of time you decided to upload your file to the Azure Storage Account instead of local storage, all you need is to modify SaveMyFilesLocally method.
For demonstration purposes we will add a new method SaveMyFilesToAzure and let FileUpload point to it.
- <dot:FileUpload UploadedFiles="{value: FilesCollection}"
- AllowMultipleFiles="true"
- AllowedFileTypes=".png,.jpg"
- SuccessMessageText="Uploaded"
- UploadButtonText="Select Files to Upload"
- UploadCompleted="{command: SaveMyFilesToAzure()}">
- </dot:FileUpload>
- Install WindowsAzure.Storage nuget package
- Install-Package WindowsAzure.Storage
- Add the following using statement to DefaultViewModel class.
- using Microsoft.WindowsAzure.Storage;
- Add SaveMyFilesToAzure method to DefaultViewModel class
- public async Task SaveMyFilesToAzure()
- {
- if (!FilesCollection.IsBusy)
- {
- var stoageAccount = CloudStorageAccount.DevelopmentStorageAccount;
- var blobStorageClient = stoageAccount.CreateCloudBlobClient();
- var container = blobStorageClient.GetContainerReference("dotvvmblobcontainer");
- await container.CreateIfNotExistsAsync();
- foreach (var file in FilesCollection.Files)
- {
- var newFileName = $"{Path.GetFileNameWithoutExtension(file.FileName)}_{file.FileId}{Path.GetExtension(file.FileName)}";
- var blobRef = container.GetBlockBlobReference(newFileName);
- await blobRef.UploadFromFileAsync($"temp/uploadedFiles/{file.FileId}.tmp");
- }
- FilesCollection.Clear();
- }
- }
As you see it is almost the same as before. We are just creating a client to Azure Storage Account.
Here I'm using the Storage Account Emulator. Explaining how to use it is out of the scope of this article. You can refer to Microsoft Documentations for more details.
Summary
In this post we demonstrated how it is pretty easy to upload files with DotVVM FileUpload Control to your local storage and to your Azure Blob Container.
You can find the full code on Github.
Join the conversation! Your thoughts help the community grow.