

The compute module of Intel called Intel Edison is slightly larger than a SD card. It has an onboard Wi-Fi and Bluetooth, perfect for IoT projects. We can connect to Edison remotely and run commands or access the file system. This gives lots of flexibility to developers via SSH.
Edison can be used with Arduino IDE but to get the most out of it you can use other programming languages like Python, Node.js, C/C++. Intel has its own IDE called Intel XDK IoT edition which makes programming with Edison easy. While setting up the programming environment for Edison you can choose between Arduino IDE, Intel XDK or Eclipse.
Let us create a simple temperature monitor with Edison which will monitor the room temperature and notify us through an email. We will be using AWS Cloud in this project. AWS environment consists of a number of different AWS services providing security, transport, and storage of the sender data produced by your device. All services in AWS are delivered via a rich set of REST APIs. You can use a service programmatically through the APIs or can invoke manually using the console which make AWS Cloud powerful. It also offers numbers of API to speed our development with the language of our choice. Hence I have chosen its Node.Js library to interact with my Edison.
Follow the steps to setup the cloud environment:
Create an account at AWS Cloud.
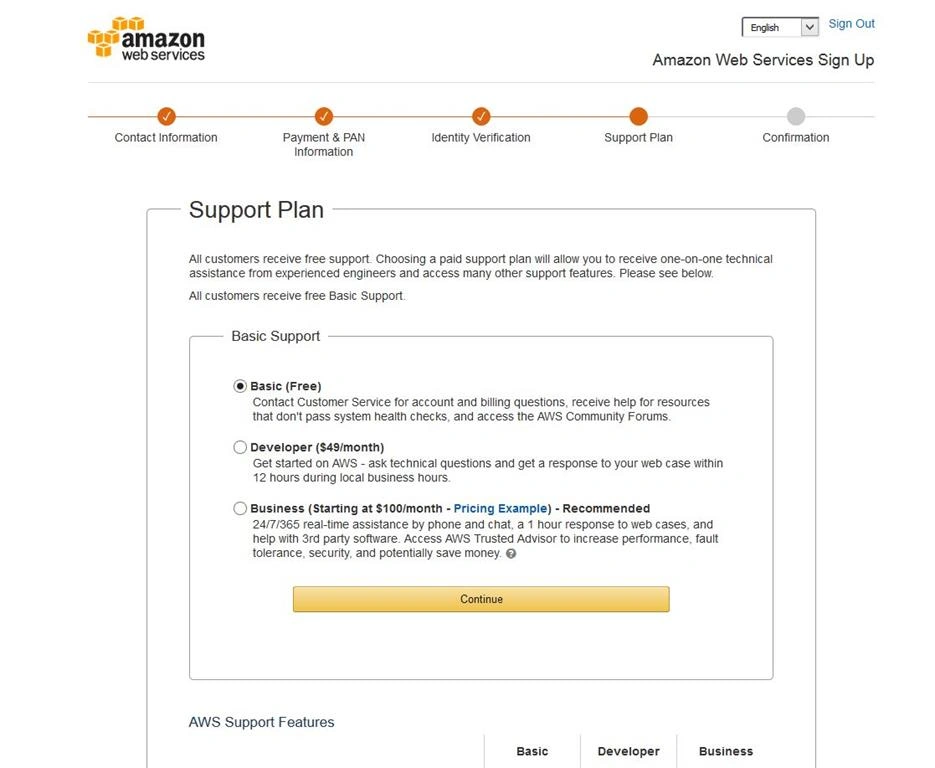
Figure 1: Create an account at AWS Cloud
Sign in to AWS IoT Console https://aws.amazon.com/iot.
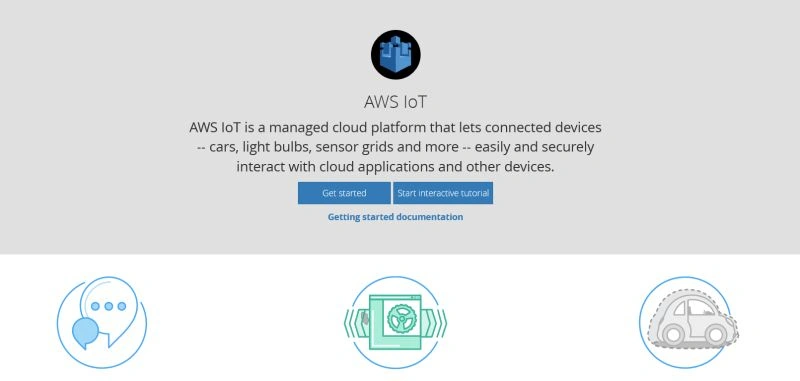
Figure 2: Sign in to AWS IoT
Create and attach a thing.
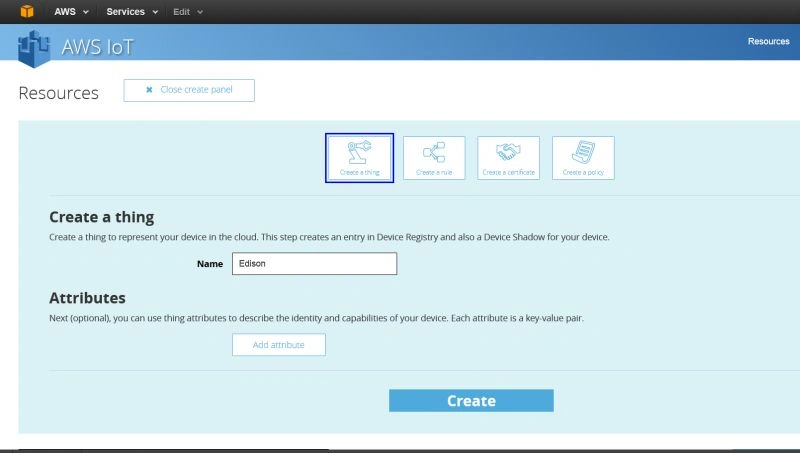
Figure 3: Create and attach thing
Generate and download the keys and certificates to make connections.
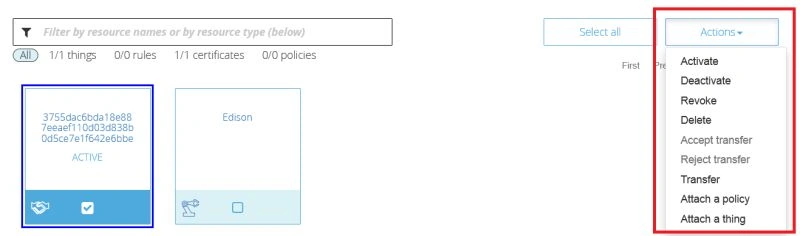
Figure 4: Certificates to make connections
Set up AWS SNS and create a topic.
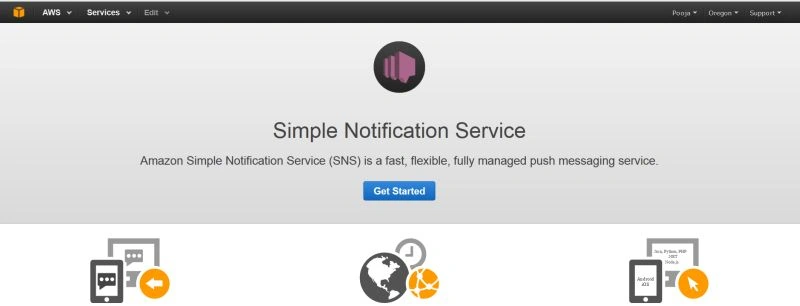
Figure 5: Simple notification service
Create an Email Subscription in SNS and publish the topic.
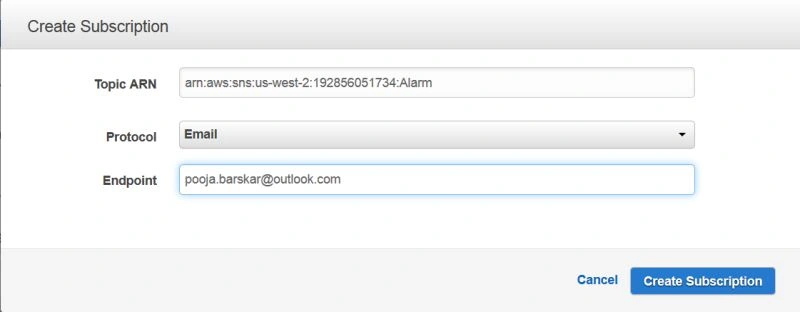
Figure 6: Email Subscription in SNS
In AWS IoT page, Create a Rule from the Resource panel and select “Send message as a push notification (SNS)” from Action dropdown. Create a new Role and add the recently created SNS action.
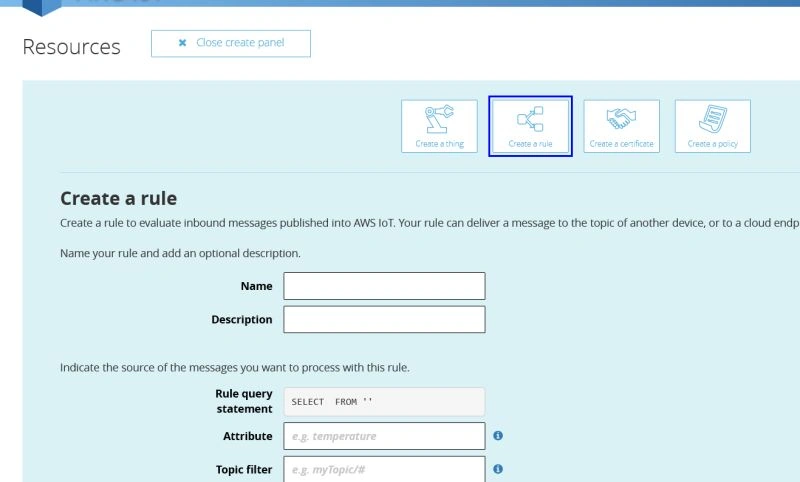
Figure 7: Create SNS action
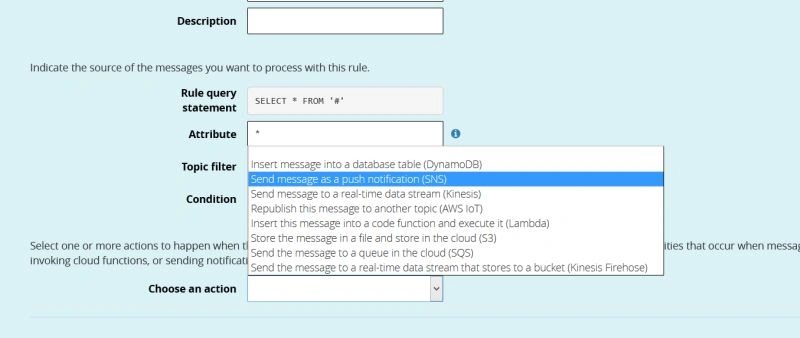
Figure 8: Send message as a push notification (SNS)
Create an IAM Role. Enter a User Name as snsReceiver and click Create. Now attach the Policy. From the list select AmazonSNSFullAccess&AmazonIoTFullAccess and click on Attach Policy.
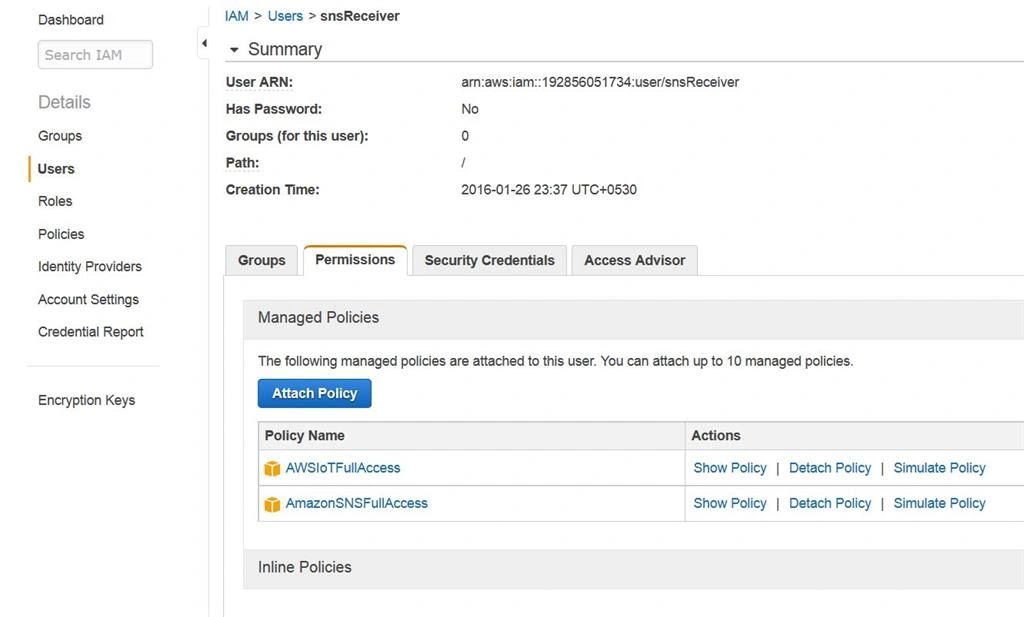
Figure 9: Attach Policy
Setting up Edison
Flash your Edison and enable WIFI on it.
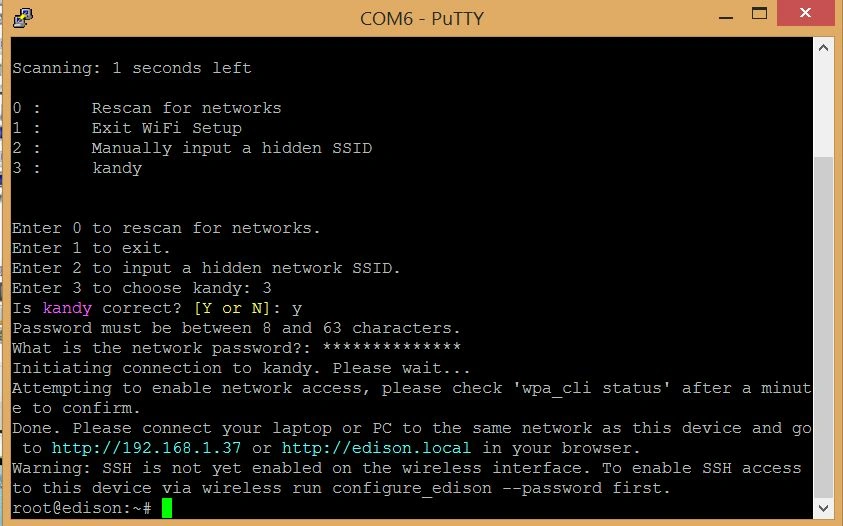
Figure 10: Enable WIFI
Transfer Certificates and key files to Edison.
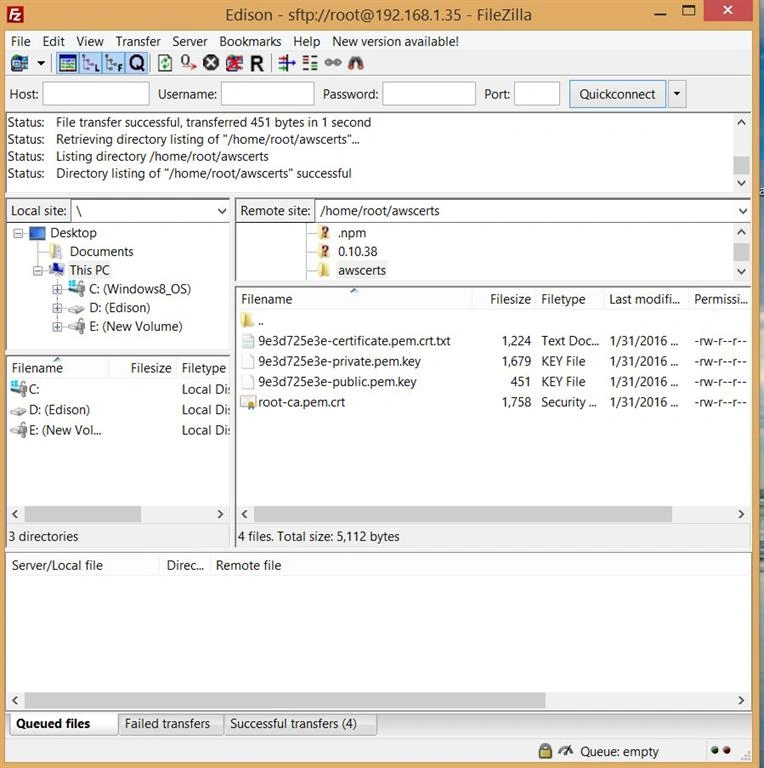
Figure 11: Key files to Edison
Establish a serial connection with Edison and run this command to install the AWS IoT SDK.
npm install aws-iot-device-sdk
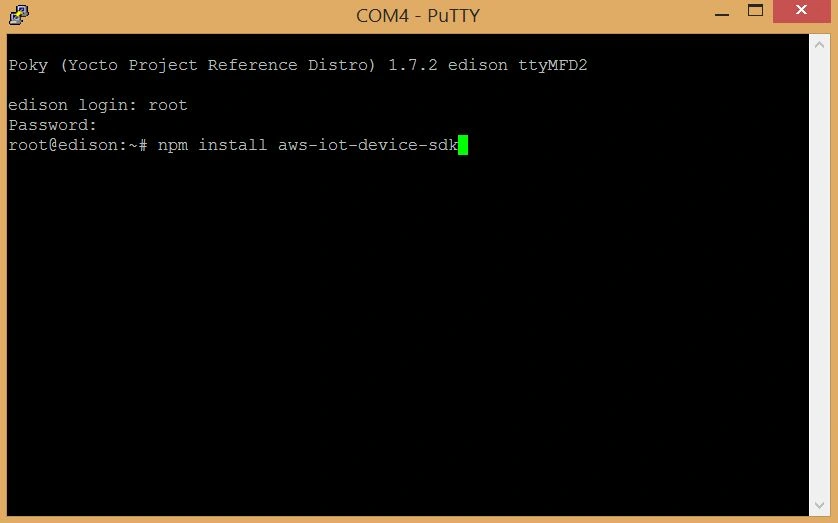
Figure 12: Install aws-iot-device-sdk
Create a new project in Intel XDK, and paste the code.
Code
- varawsIot = require('aws-iot-device-sdk'); //require for awsiot
- varmraa = require('mraa'); //require mraa for analog/digital read/write
- console.log('MRAA Version: ' + mraa.getVersion()); //write the mraa version to the console
- /*
- * CONFIGURATION VARIABLES
- * To set your AWS credentials, export them to your environment variables.
- * Run the following from the Edison command line:
- * export AWS_ACCESS_KEY_ID='AKID'
- * export AWS_SECRET_ACCESS_KEY='SECRET'
- */
- // AWS IoT Variables
- varmqttPort = 8883;
- varrootPath = '/home/root/awscerts/';
- varawsRootCACert = "root-CA.pem.crt";
- varawsClientCert = "certificate.pem.crt";
- varawsClientPrivateKey = "private.pem.key";
- vartopicName = "Edison";
- varawsClientId = "Edison";
- varawsIoTHostAddr = "https://AWVI662RQY269.iot.us-west-2.amazonaws.com";
- /*
- * Instance AWS variables for use in the application for
- * AWS IoT Certificates for secure connection.
- */
- varprivateKeyPath = rootPath + awsClientPrivateKey;
- varclientCertPath = rootPath + awsClientCert;
- varrootCAPath = rootPath + awsRootCACert;
- /*
- *Initializing Device Communication for AWS IoT
- */
- varmyThingName = 'Edison';
- varthingShadows = awsIot.thingShadow({
- keyPath: privateKeyPath,
- certPath: clientCertPath,
- caPath: rootCAPath,
- clientId: awsClientId,
- region: 'us-west-2'
- });
- console.log("AWS IoT Device object initialized");
- mythingstate = {
- "state": {
- "reported": {
- "ip": "unknown"
- }
- }
- }
- varnetworkInterfaces = require( 'os' ).networkInterfaces( );
- mythingstate["state"]["reported"]["ip"] = networkInterfaces['wlan0'][0]['address'];
- vartemperaturePin = new mraa.Aio(2); //setup access analog input Analog pin #2 (A2)
- vartemperatureValue = temperaturePin.read(); //read the value of the analog pin
- console.log(temperatureValue); //write the value of the analog pin to the console
- // calculate temperature
- vartmpVoltage = ((temperatureValue*5.0)/1023.0); // convert analog value to voltage
- var temperature = (5.26*Math.pow(tmpVoltage,3))-(27.34*Math.pow(tmpVoltage,2))+(68.87*tmpVoltage)-17.81;
- console.log(temperature);
- thingShadows.on('connect', function() {
- console.log("Connected...");
- console.log("Registering...");
- thingShadows.register(myThingName );
- // An update right away causes a timeout error, so we wait about 2 seconds
- setTimeout( function() {
- console.log("Updating my IP address...");
- clientTokenIP = thingShadows.update(myThingName, mythingstate);
- console.log("Update:" + clientTokenIP);
- }, 2500 );
- // Code below just logs messages for info/debugging
- thingShadows.on('status',
- function(thingName, stat, clientToken, stateObject) {
- console.log('received '+stat+' on '+thingName+': '+
- JSON.stringify(stateObject));
- });
- thingShadows.on('update',
- function(thingName, stateObject) {
- console.log('received update '+' on '+thingName+': '+
- JSON.stringify(stateObject));
- });
- thingShadows.on('delta',
- function(thingName, stateObject) {
- console.log('received delta '+' on '+thingName+': '+
- JSON.stringify(stateObject));
- });
- thingShadows.on('timeout',
- function(thingName, clientToken) {
- console.log('received timeout for '+ clientToken)
- });
- thingShadows
- .on('close', function() {
- console.log('close');
- });
- thingShadows
- .on('reconnect', function() {
- console.log('reconnect');
- });
- thingShadows
- .on('offline', function() {
- console.log('offline');
- });
- thingShadows
- .on('error', function(error) {
- console.log('error', error);
- });
- //Watch for temperature
- if(temperature > 35 ){
- thingShadows.publish('arn:aws:sns:us-west-2:316723939866:TemperaturAlarm',
- 'Your room temperature is greater than 35deg C');
- }
- });
Connect the temperature sensor to A2 pin of Edison.
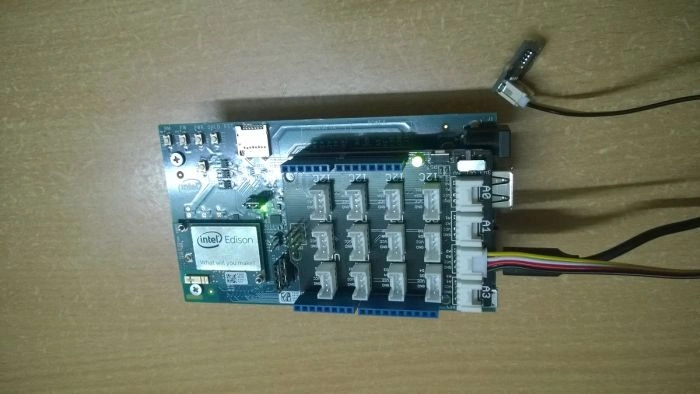
Figure 13: Temperature sensor to A2 pin of Edison
Upload and Run the code.
Now you will notice if the temperature exceeds 35 degree Celsius you will receive an Email Notification.
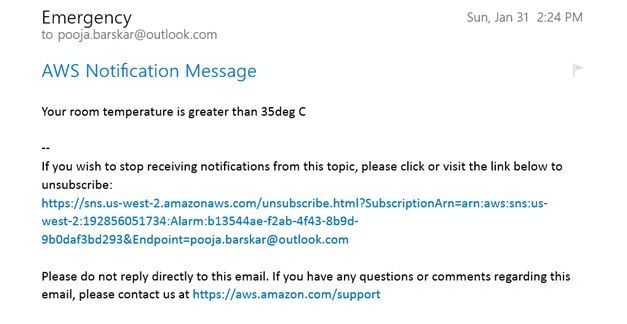
Figure 14: Email Notification
Satyaprakash SamantarayPosted Aug 8, 2017, 2:24 AM
Super article...........................
Pooja BaraskarPosted Feb 14, 2016, 9:25 AM
Thanks everyone :)
Pankaj Kumar ChoudharyPosted Feb 11, 2016, 11:23 PM
Another Great Article on IOT by IOT expert .......
Sibeesh VenuPosted Feb 11, 2016, 1:52 AM
Nice Share
Ankur MistryPosted Feb 10, 2016, 11:33 PM
good one thanks for sharing
Santhakumar MunuswamyPosted Feb 10, 2016, 2:13 PM
Thanks for nice article. Keep it up
Sr KarthigaPosted Feb 10, 2016, 6:21 AM
Very nice
Shubham KumarPosted Feb 10, 2016, 5:18 AM
Interesting