

Introduction
In this article, I will show you how to upload a file (image/video/..) to Amazon S3 Bucket through an ASP.NET web application. For this, first, you need to have an AWS account in Amazon Web Services. You can create an AWS free tier account that's valid for 12 months. Visit this link to know more about a free tier account.
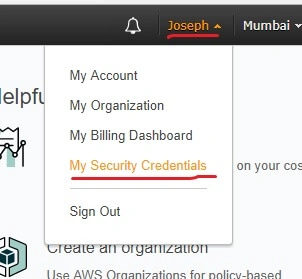
After signing into the AWS account, the next thing you need is to create security credentials for your account which will create a secret access key Id and secret access key. The below images show how to do this.
Account name> My Security Credentials.
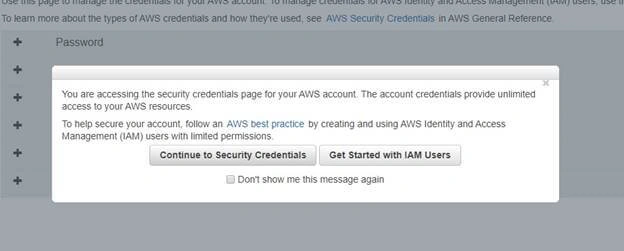
 Continue to Security Credentials.
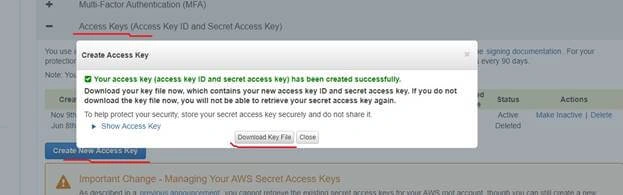
 Click (+) Acess Keys> create New Access Key button > download the key file or take note of your id and key somewhere.
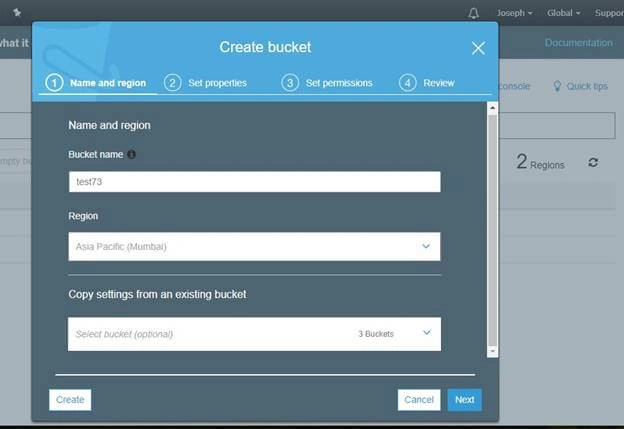
 Next, create an S3 Bucket. Click the "Services" tab and select S3 under the Storage division. This will take you to Amazon S3 page. On clicking the "Create" button, the following pop up will come up. Give a bucket name and select a region. Click "Next" and allow the public to read it.
 Now, we need to create a bucket policy that allows us to create rules for managing access to our buckets and files.
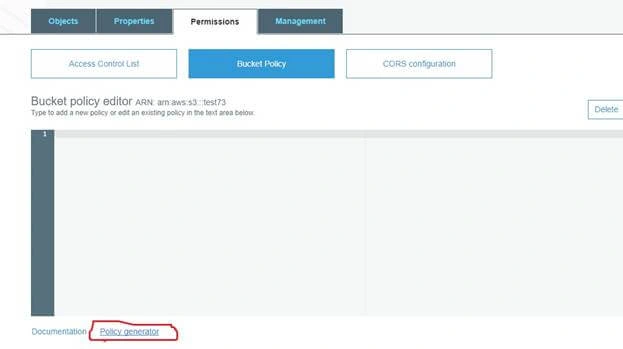
Select your bucket > Permission tab > Bucket Policy > Policy Generator.
 This will take you to a new page. Fill in the details as per your requirement. I have selected two actions - putobject and getobject. And in ARN, give your bucket name such as ‘test73’.
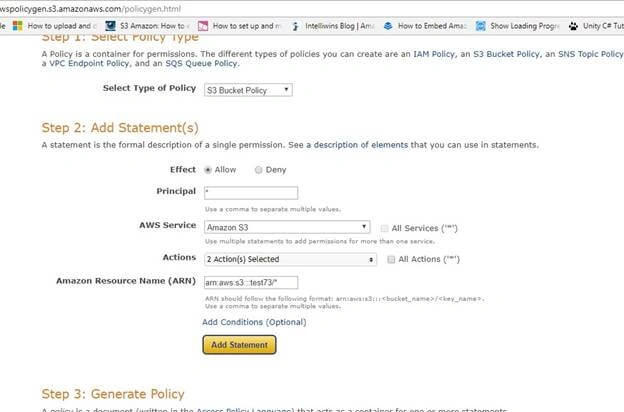 Clicking "Add Statement" will enable a new button ‘Policy Generator’. Click that button, copy, and paste the generated policy back in your bucket policy.
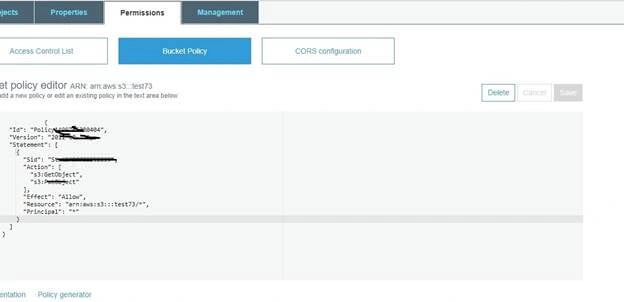 Click "Save". Now, you are done with all Amazon settings. The next step is to create an ASP.NET Application.
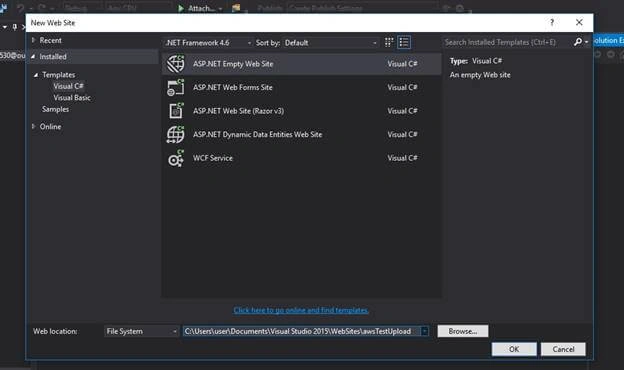
Open Visual Studio, and go to File > New > website > ASP.NET Empty web Site. Give a project name and click OK.
Download these two references to your project.
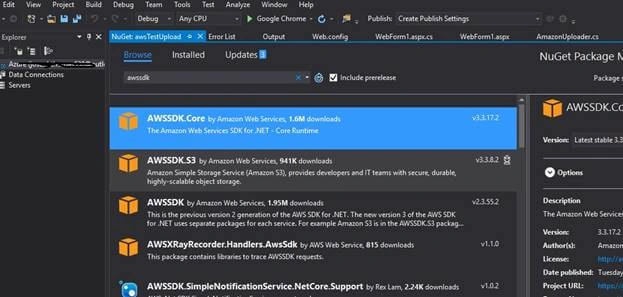 Now, add a fileupload control and a button control to your webform. The code for the webform is shown below.
- using System;
- using System.IO;
- namespace awsTestUpload
- {
- public partial class WebForm1 : System.Web.UI.Page
- {
- protected void Page_Load(object sender, EventArgs e)
- {
- }
- protected void upload(string path,string file)
- {
- }
- protected void Button2_Click(object sender, EventArgs e)
- {
- Stream st = FileUpload1.PostedFile.InputStream;
- string name = Path.GetFileName(FileUpload1.FileName);
- string myBucketName = "test73"; //your s3 bucket name goes here
- string s3DirectoryName = "";
- string s3FileName = @name;
- bool a;
- AmazonUploader myUploader = new AmazonUploader();
- a = myUploader.sendMyFileToS3(st, myBucketName, s3DirectoryName, s3FileName);
- if (a == true)
- {
- Response.Write("successfully uploaded");
- }
- else
- Response.Write("Error");
- }
- }
- }
Now, right click on your project name in Solution Explorer and add a new class. I have named it AmazonUploader.cs.
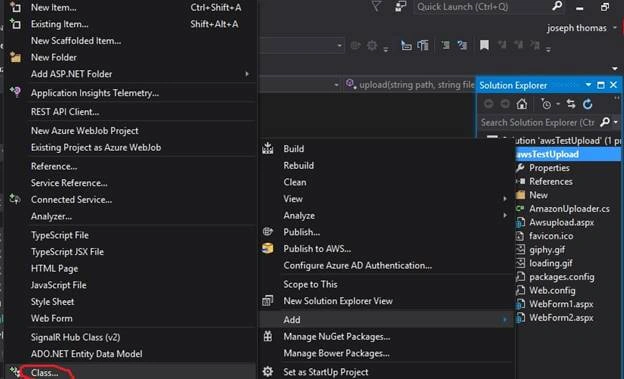 The code for AmazonUploader.cs will be like below.
- using Amazon.S3;
- using Amazon.S3.Transfer;
- namespace awsTestUpload
- {
- public class AmazonUploader
- {
- public bool sendMyFileToS3(System.IO.Stream localFilePath, string bucketName, string subDirectoryInBucket, string fileNameInS3)
- {
- IAmazonS3 client = new AmazonS3Client(RegionEndpoint.APSouth1);
- TransferUtility utility = new TransferUtility(client);
- TransferUtilityUploadRequest request = new TransferUtilityUploadRequest();
- if (subDirectoryInBucket == "" || subDirectoryInBucket == null)
- {
- request.BucketName = bucketName; //no subdirectory just bucket name
- }
- else
- { // subdirectory and bucket name
- request.BucketName = bucketName + @"/" + subDirectoryInBucket;
- }
- request.Key = fileNameInS3; //file name up in S3
- request.InputStream = localFilePath;
- utility.Upload(request); //commensing the transfer
- return true; //indicate that the file was sent
- }
- }
- }
Now, you have to set your AWS Secret Key Id and Secret Key in your webconfig file. Place the following code under <configurations> tag in webconfig file.
- <appSettings>
- <add key="AWSProfileName" value="Profile Name" />
- <add key="AWSAccessKey" value=" Your Secret Key Id " />
- <add key="AWSSecretKey" value="Your Secret Key " />
- <!--AWSProfileName is used to reference an account that has been registered with the SDK.
- If using AWS Toolkit for Visual Studio then this value is the same value shown in the AWS Explorer.
- It is also possible to register an account using the <solution-dir>/packages/AWSSDK-X.X.X.X/tools/account-management.ps1 PowerShell script
- that is bundled with the nuget package under the tools folder.
- <add key="AWSProfileName" value="" />
- -->
- </appSettings>
If you want to upload large files, add the following settings too in webconfig file all under <configuration> tag.
- <system.web>
- <compilation debug="true" targetFramework="4.6" />
- <httpRuntime targetFramework="4.6" maxRequestLength="1048576" executionTimeout="3600" />
- <pages>
- <controls>
- <add tagPrefix="ajaxToolkit" assembly="AjaxControlToolkit" namespace="AjaxControlToolkit" />
- </controls>
- </pages></system.web>
- <system.webServer>
- <security>
- <requestFiltering>
- <requestLimits maxAllowedContentLength="1073741824" />
- </requestFiltering>
- </security>
- </system.webServer>
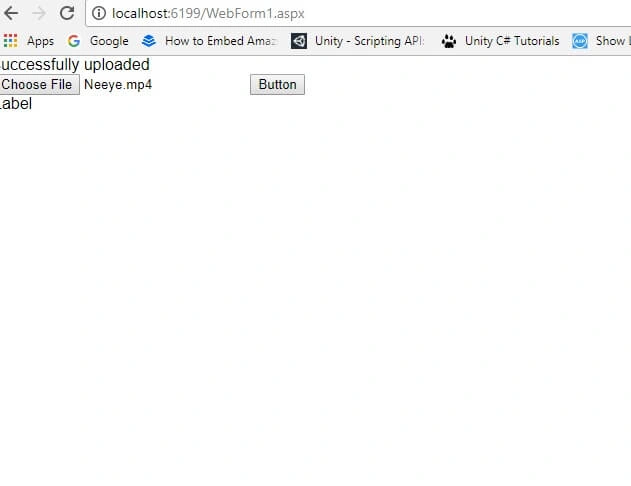
That’s it. Now, run the project.
Output
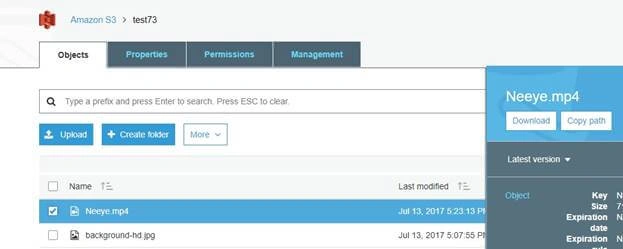
 Uploaded file in S3
User4400Posted Jul 27, 2022, 11:07 AM
I have one doubt. why you're gave "FileUpload1" please let me know that meaning. That place I am confused.
Anjali agarwalPosted Jun 30, 2021, 12:15 AM
Thank you so much for the tutorial!!
Michael LucasPosted May 24, 2021, 3:41 PM
My configuration as an Endpoint where do I place this information, and how is it accessed through the code?
Vivek SadokpamPosted Dec 13, 2020, 3:51 AM
How can multiple file uploaded?
vikas sharmaPosted May 5, 2020, 4:19 AM
Hi Joseph this article is very helpful. But i did not find that how we can download file form AWS s3 bucket in asp.net. Can you please help to do this.
שי ישראליPosted May 13, 2019, 10:32 PM
Hi, How can I get back the URL of download this file from the service after uploaded?
cristian merliPosted Apr 28, 2019, 12:26 PM
Hello, where can i find the AWSProfileName, AWSAccessKey, AWSSecretKey used?
Tabarak HussainPosted Apr 8, 2019, 7:27 AM
Please upload code or send me, because I am unable to use code properly, getting errors
Dawood AbbasPosted Mar 7, 2019, 3:16 AM
When Iam trying to upload like your code then iam getting below error..Message = "The authorization mechanism you have provided is not supported. Please use AWS4-HMAC-SHA256."
satish kumarPosted Dec 13, 2018, 11:27 PM
When i upload image file from local host it uploaded successfully but after publish the code into amazon lamda and upload the image it corrupted and show small square box
shine naylinooPosted Aug 26, 2018, 5:44 AM
Hello Joseph, thanks for the fantastic tutorial. I'm following your example in my web service to put the files to S3. It works locally, but having security issue after I deployed into GoDaddy hosting. I tried to use the hard code for AccessKey and SecurityKey in the class declaration for AmazonS3Client. But it also work locally and having same error after deployment. Do you have any idea for this issue?? Thanks in advance :)
Osvaldo MariaPosted Jul 29, 2018, 6:46 AM
Thanks for the tutorial.. worked out great for me
Kapil SharmaPosted Mar 21, 2018, 5:43 AM
Hello i am trying with same code but getting exception as access is denied. I have applied correct secret token and access key
Marco BaccaroPosted Oct 4, 2017, 1:30 PM
Joseph, let me introduce you the string.IsNullOrEmpty() and string.Concat to contribute in your example.
Kashif AsifPosted Jul 18, 2017, 12:48 AM
Nice article keep it up (y)