

Introduction
If you're hosting applications or websites on AWS, you might need a fixed IP address for your EC2 instance. Elastic IP (EIP) is useful in this case because it stays the same even when you stop or start the instance. An Elastic IP is a static IPv4 address that can be linked to your EC2 instance. The advantage is that you can move the Elastic IP to another instance without changing the IP address your users use.
Steps to Attach an Elastic IP to an EC2 Instance
Let's go step by step to attach an Elastic IP to your EC2 instance.
Step 1. Allocate an Elastic IP
Before attaching an Elastic IP to your EC2 instance, you need to first create one.
- Log in to the AWS Management Console.
- In the search bar, type and select EC2.
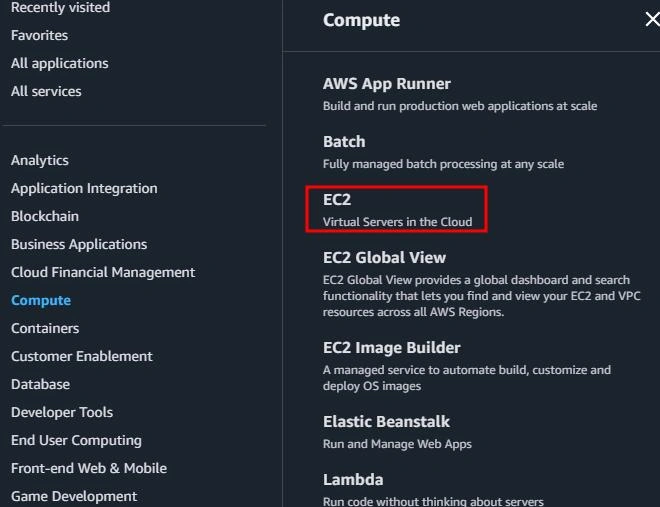
- In the left-hand menu, scroll down and click on Elastic IPs under the Network & Security section.

- Click the Allocate Elastic IP address button.

- In the next window, select Amazon pool of IPv4 addresses (default option), and click Allocate.
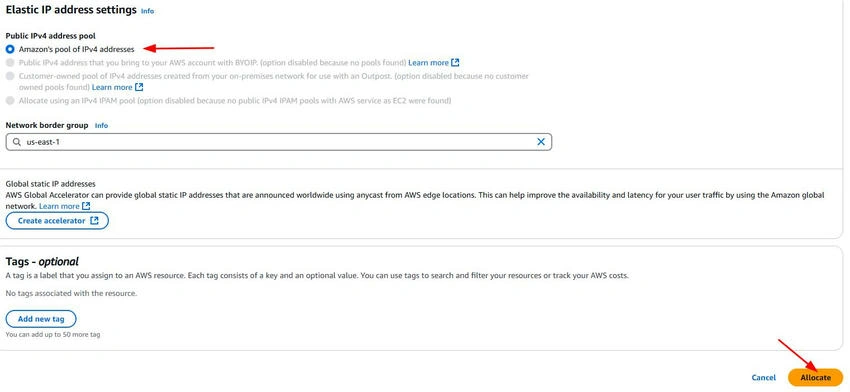
- You’ll see a new Elastic IP listed under your Elastic IPs section. Copy this IP for the next steps.

Step 2. Associate the Elastic IP with Your EC2 Instance
Now that you have your Elastic IP let’s attach it to your EC2 instance.
- In the Elastic IPs section, select the Elastic IP you just allocated.
- Click on the Actions button, then select Associate Elastic IP address.

- In the Instance field, select the EC2 instance you want to assign the IP to.
- Leave the Private IP field as the default, or choose a specific private IP if your instance has more than one.
- Click Associate.

Your EC2 instance now has a fixed IP address. You can use this Elastic IP for connecting to the instance or making your web application publicly accessible.
Step 3. Verify the Connection
To make sure everything is working correctly.
- Go to the Instances section in the EC2 dashboard.
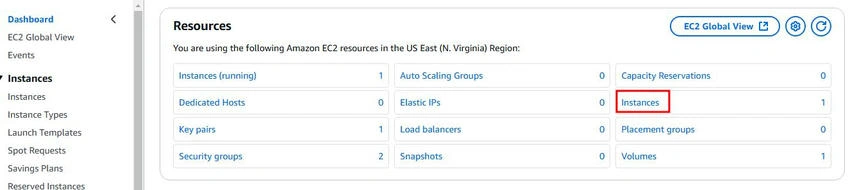
- Select your instance and note the Public IP field.
- You should see the Elastic IP you just attached. You can now access your instance using this IP address.

Why use an Elastic IP?
- Static IP Address: Elastic IPs do not change when you stop and start your EC2 instance.
- Reassignability: If something goes wrong with your EC2 instance, you can move the Elastic IP to another instance quickly.
- Better Control: You can manage your EC2 instance’s IP more efficiently, especially in production environments.
Note. Remember, you are charged for Elastic IPs if they are not associated with a running instance. If you no longer need the Elastic IP, it’s a good idea to release it to avoid any extra charges.
To release an Elastic IP.
- Go back to the Elastic IPs section.
- Select the IP you no longer need.
- Click Actions, then choose Release Elastic IP address.

Conclusion
Attaching an Elastic IP to your EC2 instance is a straightforward process that ensures your EC2 instance has a static IP address. Whether you're running a website, a database, or any other application, an Elastic IP gives you the consistency you need. Just follow these steps, and you'll have your Elastic IP set up in no time.
Join the conversation! Your thoughts help the community grow.