

Introduction
In this article, I will show you how to configure Azure Cloud Backup Service on Windows 11 using the proper and easiest method.
What is a cloud backup service?
A cloud backup service is like having a safety deposit box in the sky for all your important digital stuff. Instead of storing your files, photos, and other data on your computer or an external hard drive, you save them to a remote server run by a cloud service provider. This means your data is safely stored off-site and can be accessed anywhere with an internet connection.
Cloud backup services provide several key benefits.
- Safety: If something happens to your computer (like theft, damage, or a crash), your data is still safe and accessible.
- Accessibility: Access your files from any device, anywhere in the world.
- Automation: Many services offer automatic backups, so you don't have to remember to do it yourself.
- Scalability: Easily increase storage as your data grows.
Here, I use the Azure cloud backup service on the Windows 11 operating system.
Step 1. On your Azure portal, click “Create A Resource”.

Step 2. In the search bar, type “Backup and Site Recovery” and click “Create”.
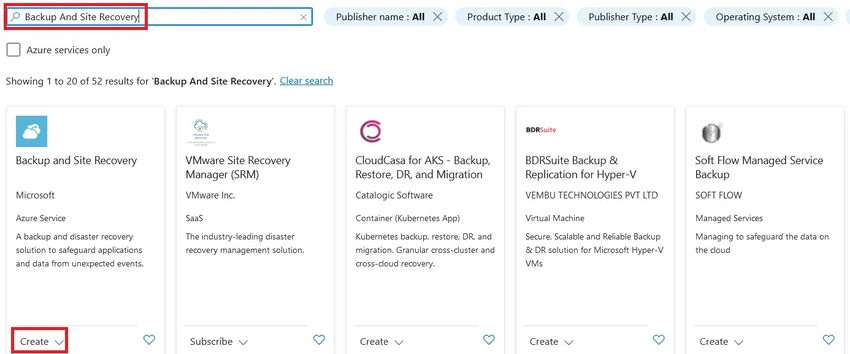
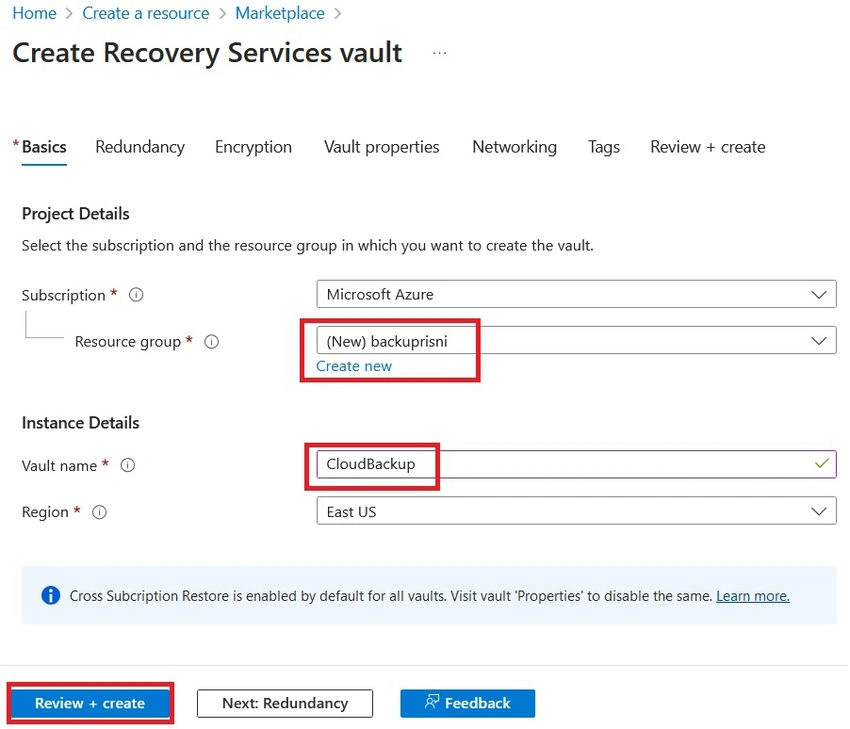
Step 3. Now you can select your resource group and give your vault name after clicking “Create”.
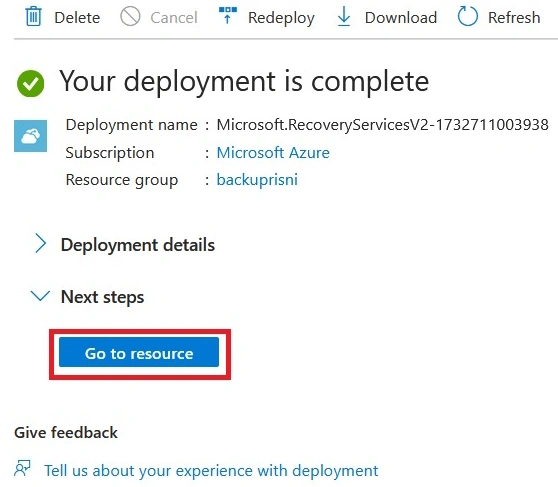
Step 4. After creating, click “Go to Resource”.
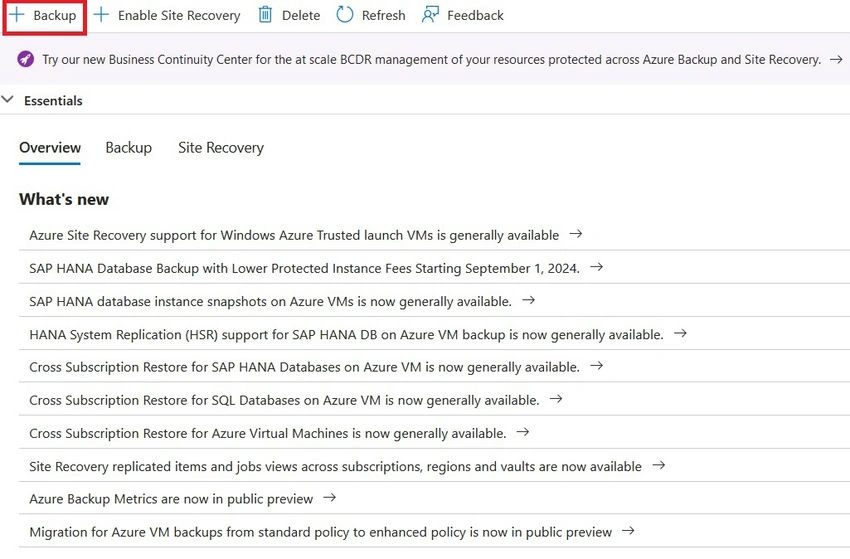
Step 5. In this window, click “Backup”.
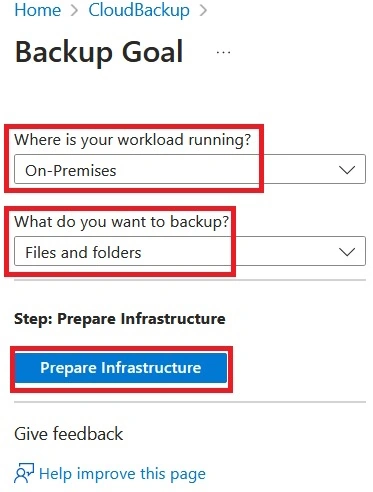
Step 6. Here, you can select your purposes now. I’m going to select “On-Premises” after clicking “File and Folders” and then clicking “Preparing Infrastructure”.
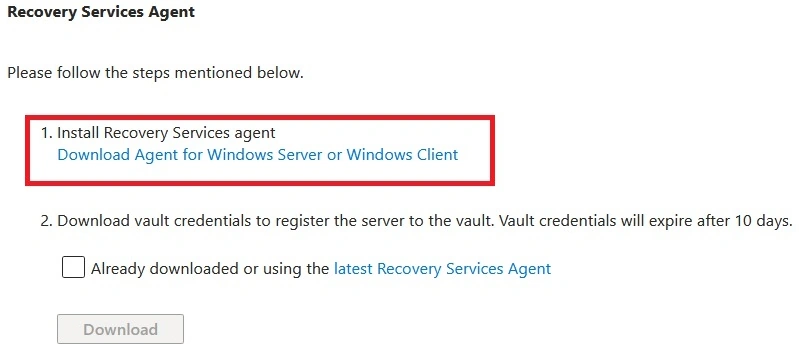
Step 7. After clicking “Download Agent for Windows Server or Windows Client”.
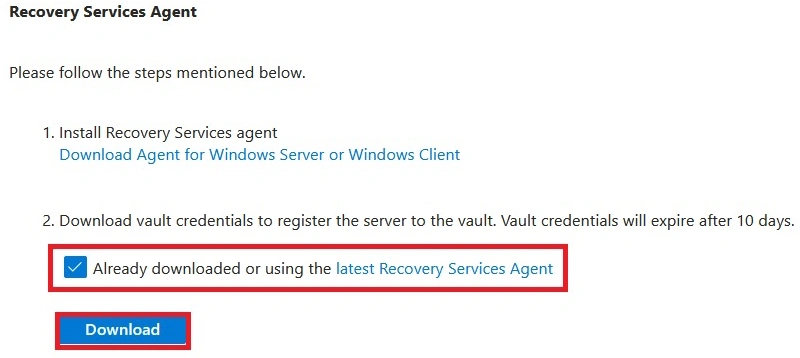
Step 8. Then click “Already downloaded or using the latest Recovery Services Agent” after clicking download.
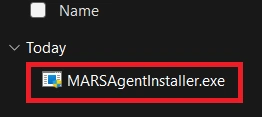
Step 9. After clicking and installing “MARS AGENTINSTALLER”.
Step 10. After installing, you will get the setup wizard. Click “Next”.
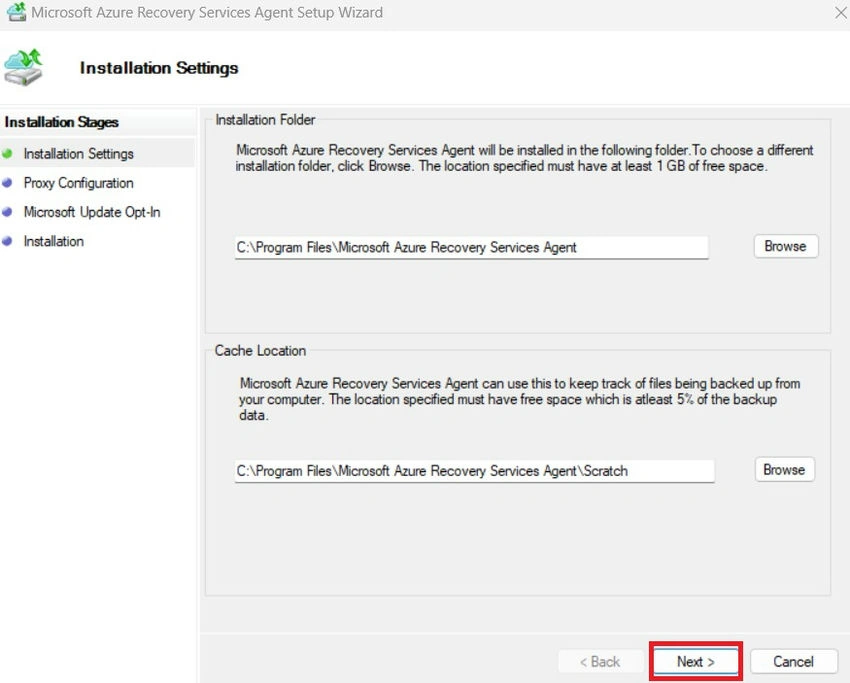
Step 11. Click “Next”.
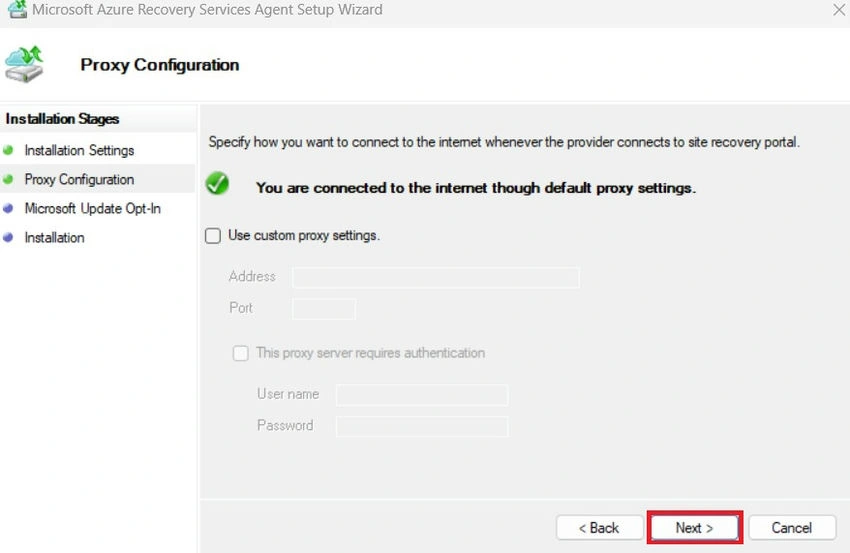
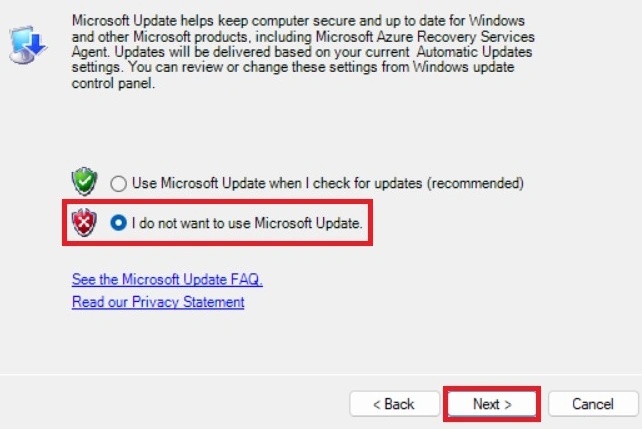
Step 12. After clicking “I Don’t Want Update” then click “Next”.
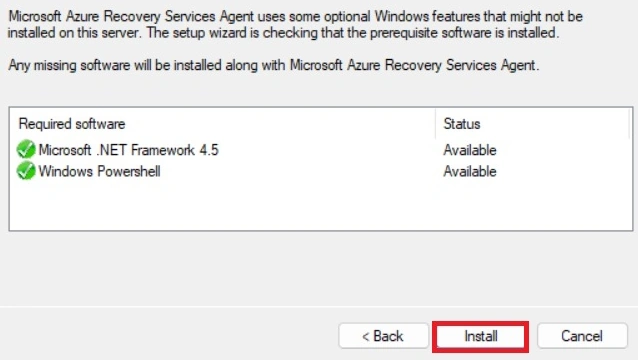
Step 13. Click “Install”.
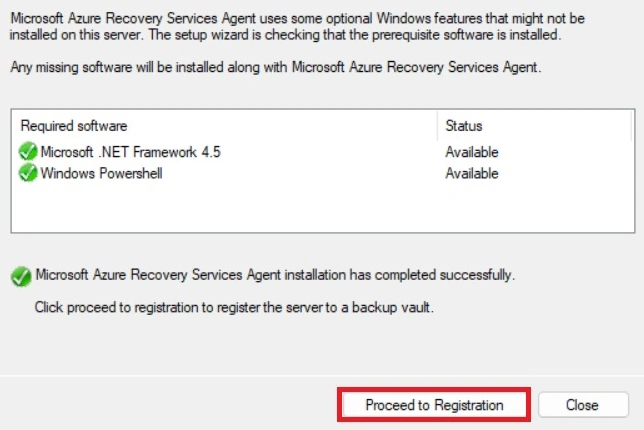
Step 14. Click “Process to Register”.
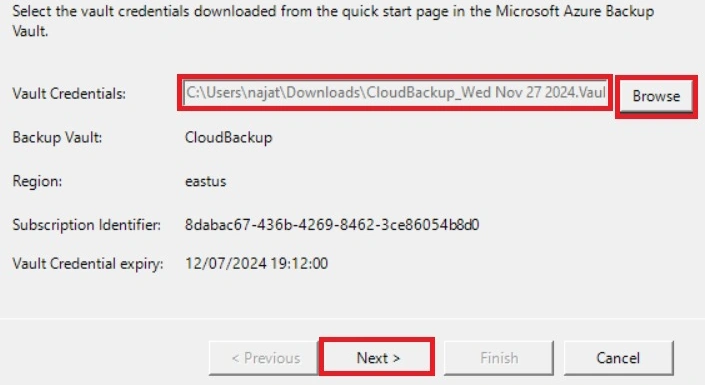
Step 15. Click “Browse” and locate your downloaded “VAULTCREDENTIALS” file, then click “Next”.
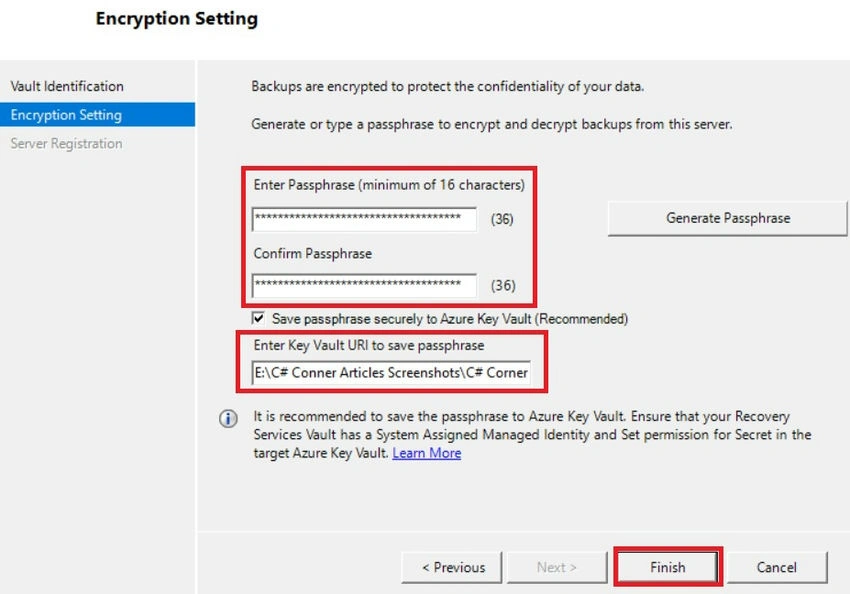
Step 16. Here, you can give your strong password and select the location of your passkey vault, then click “Finish”.
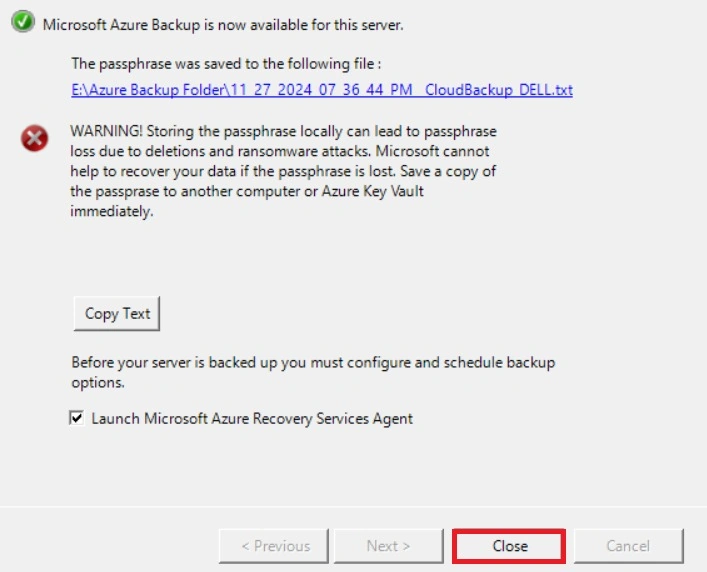
Step 17. After configured, click “Close”.
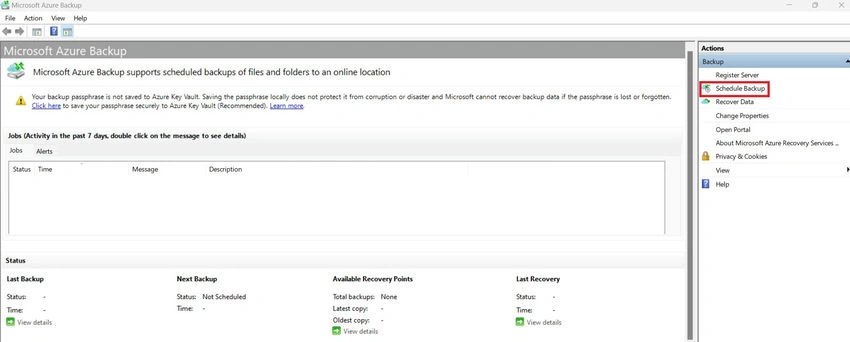
Step 18. Now, you can see the backup wizard. Here, you can schedule your backup with files.
Conclusion
We all clearly understand how to configure Azure cloud backup service to Windows 11 using the proper and easiest method and easiest way. If you need clarification regarding this topic, feel free to contact me.
Join the conversation! Your thoughts help the community grow.