

In Power Pages, every authenticated external user is represented by a Contact record in Dataverse. While there are multiple technical ways to create contacts, in real‑world and best‑practice Power Pages implementations, there are two approaches that stand out as the most important and recommended:
Automatic contact creation through Power Pages user registration.
Manual contact creation using the Power Pages Management.
This article focuses on only these two approaches, explaining how they work, when to use each, and why they are considered best practices for secure, scalable Power Pages solutions.
1 - Creating Contacts via Power Pages User Registration (Recommended Approach)
Power Pages provides a built‑in authentication and registration mechanism that automatically creates a Contact record when a user signs up. This is the most common and recommended method for adding person details to the Contact table.
How this works:
A visitor registers using the Sign in page on a Power Pages site.
Power Pages validates the identity using the configured provider.
A Contact record is automatically created in Dataverse.
The contact is linked to the external identity provider.
Configuration steps:
Open the home page or any page you created on the site.
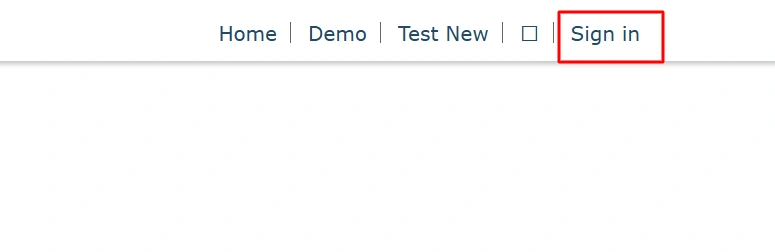
Click on the "Sign in" link.
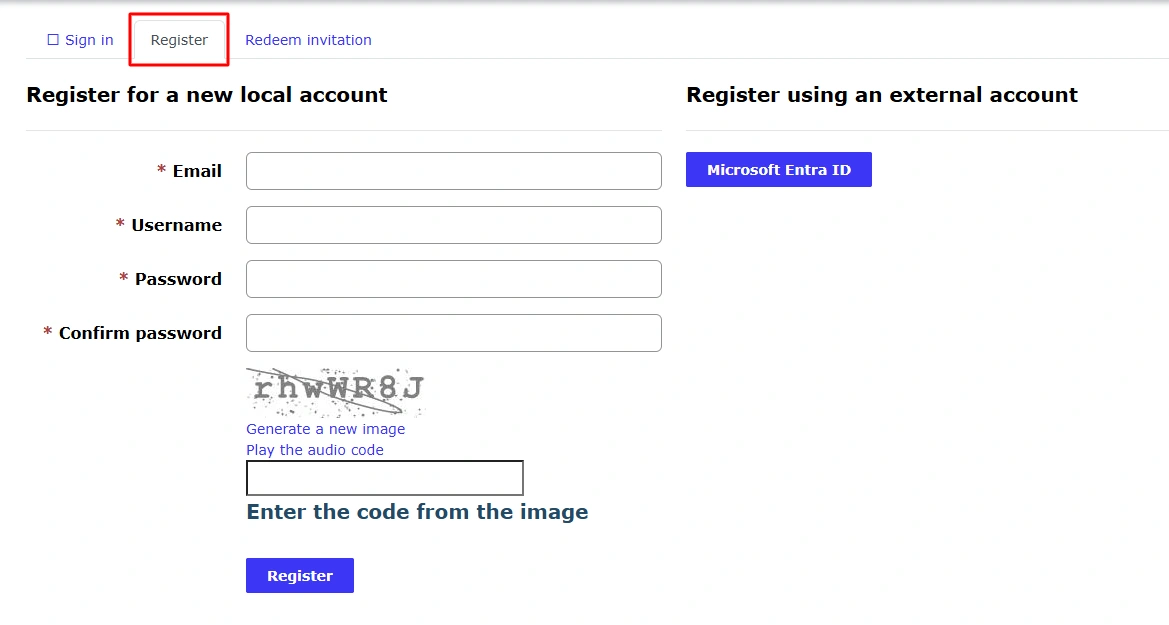
Then, click on "Register" tab, then you will see fields like email, password etc.
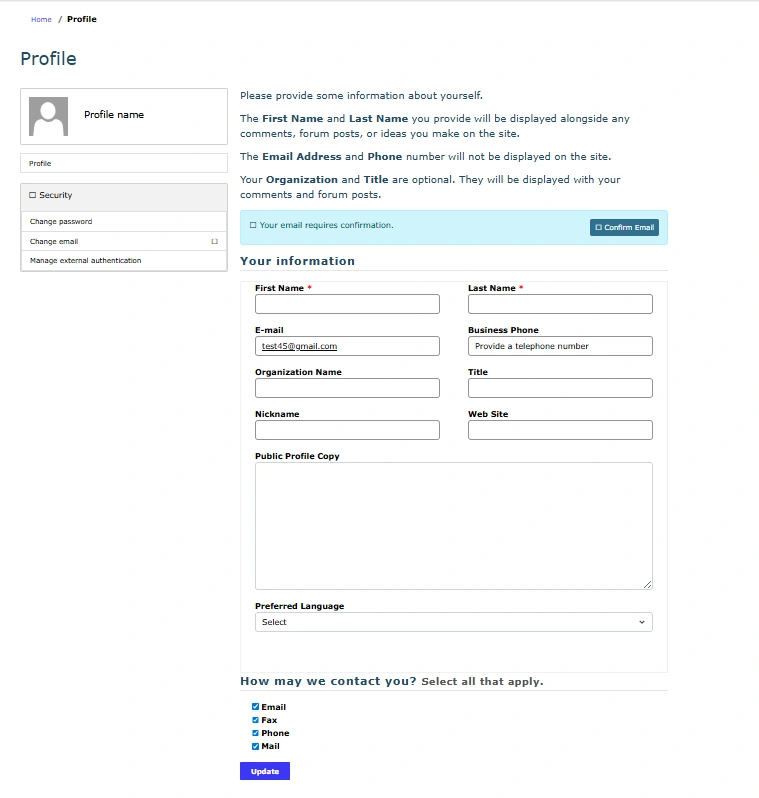
After filling details then click on "Register", Profile details will be open for updating or adding new details.
You will see your details in Contact table and you can sign in with username (take from table) and password on Power Pages site.

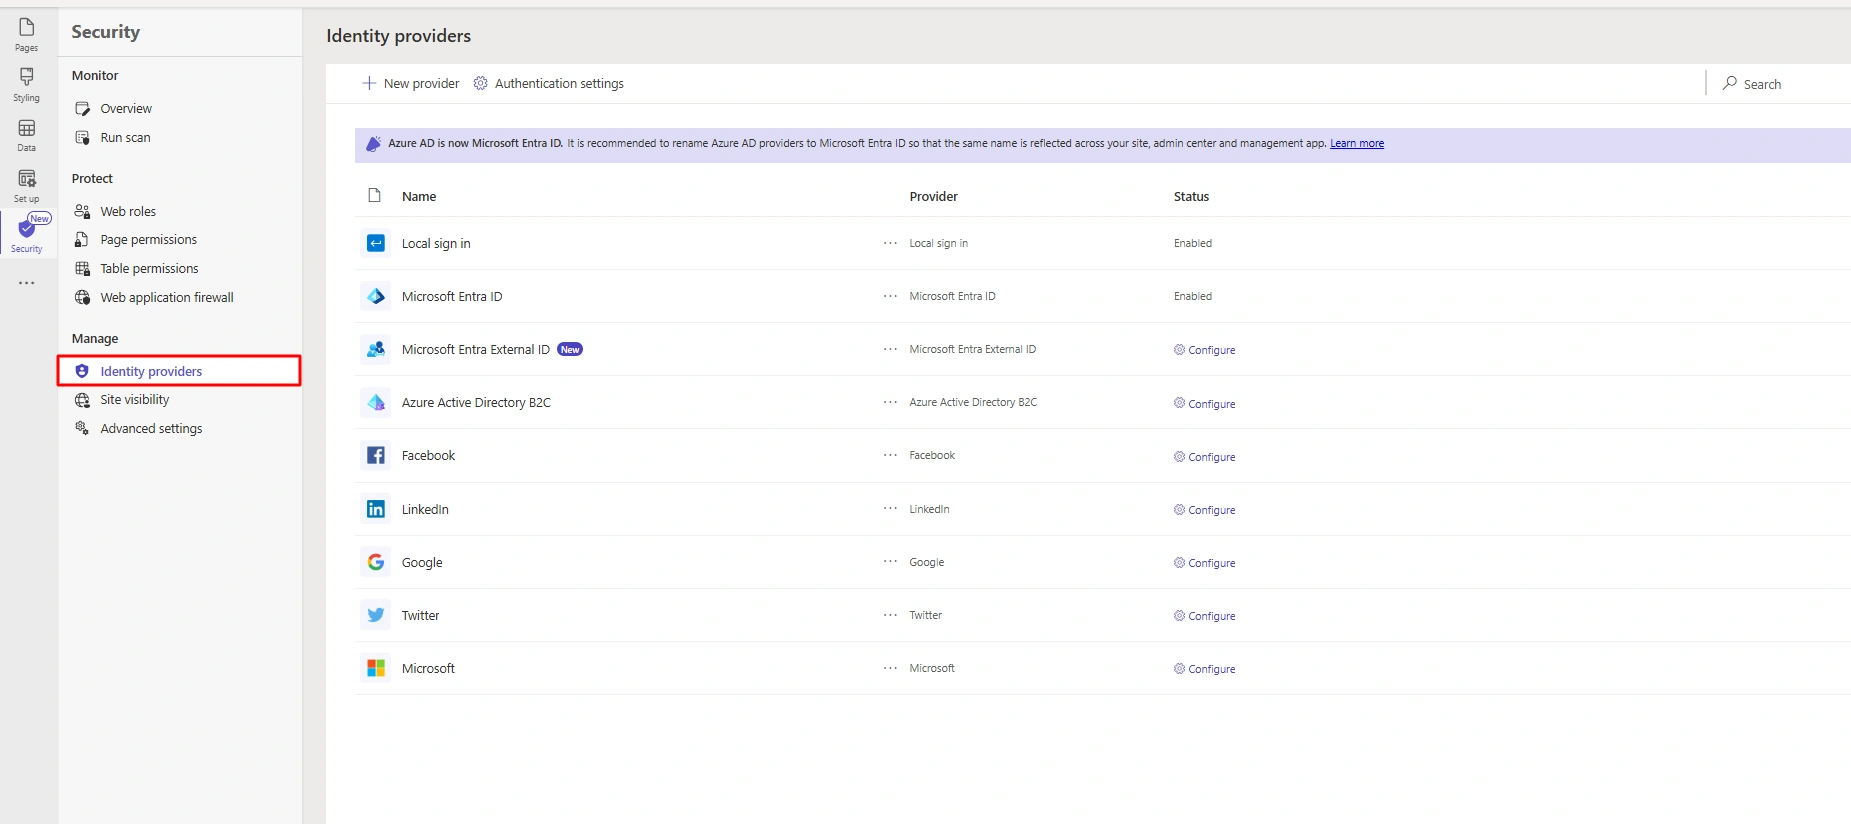
Supported Identity Providers:
Why this approach is recommended:
Fully secure and identity‑aware.
No custom development required.
It automatically handles login, authentication, and identity mapping.
Best aligned with Microsoft’s Power Pages architecture.
2 - Creating Contacts Manually via Power Pages Management (Admin‑Controlled)
In scenarios where contacts must be controlled or pre‑created, Power Pages allows administrators to manually add contacts using the Power Pages Management.
How this approach works:
An administrator manually creates a Contact record.
Required details such as name and email are entered.
The contact is later linked to an identity when the user signs in.
Configuration steps:
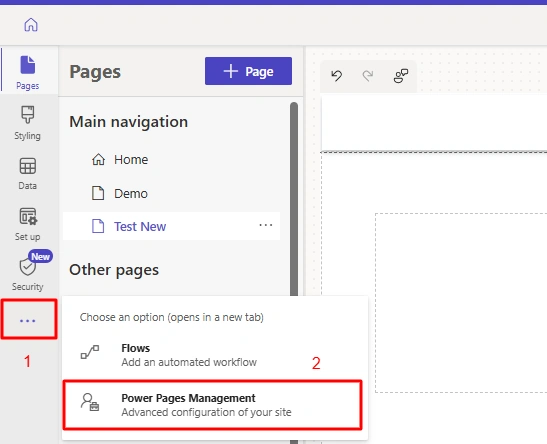
Open Power Pages Management from three dots in Power Pages studio.
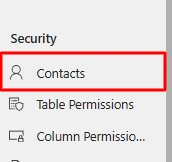
Then, scroll down as you will see Contacts under Security section.
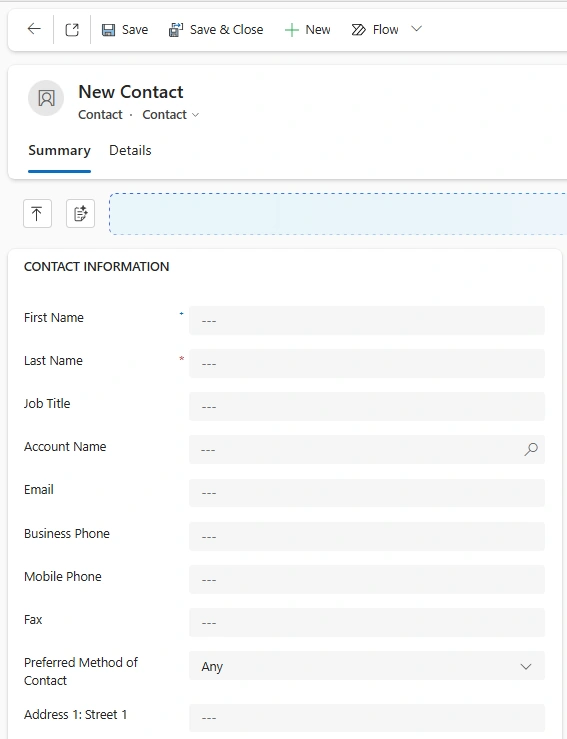
Click on "New" for creating new contact record.

You can fill details in this form and click on Save or Save & Close.
You can see newly created contact in "Active Contacts" view

When to use this approach:
Pre‑onboarding known users or partners.
Invitation‑based or restricted portals.
Testing, support, or troubleshooting scenarios.
Choosing the Right Approach:
| Scenario | Recommended Method |
|---|---|
| Public user sign‑up | Power Pages Registration |
| Customer or partner self‑service | Power Pages Registration |
| Pre‑assigning web roles | Power Pages Management |
| Restricted or invite‑only access | Power Pages Management |
Best Practices
You should prefer registration‑based contact creation for scalability.
Use manual contact creation only for controlled access scenarios.
Conclusion
When working with Power Pages, the Contact table should be populated using secure, identity‑driven approaches. In most implementations, Power Pages registration and admin‑managed contact creation cover nearly all real‑world requirements.
Join the conversation! Your thoughts help the community grow.