

Introduction
In this article, I'm going to show you how to create a virtual machine in the Azure portal in the proper and easiest method.
Benefits of Azure virtual machine
- Cost reduction: Azure VMs can be cheaper than running workloads on your servers.
- High-performance computing: Azure VMs can run workloads like scientific simulations and financial modeling faster and more efficiently than on-premises hardware.
- Networking capabilities: Azure VMs offer a range of networking capabilities and related services, such as Azure Virtual Network, public and private IP addresses, network security groups, virtual private networks (VPN), and Azure ExpressRoute.
- Patch management: Azure's patch management workflow makes it easy to manage and stay updated across all the nodes.
- Failover: You can replicate your virtual machines to any Azure region and create a recovery plan to automate the failover process for your application.
Step 1. Login to your Azure portal using the below-mentioned link. Home - Microsoft Azure.

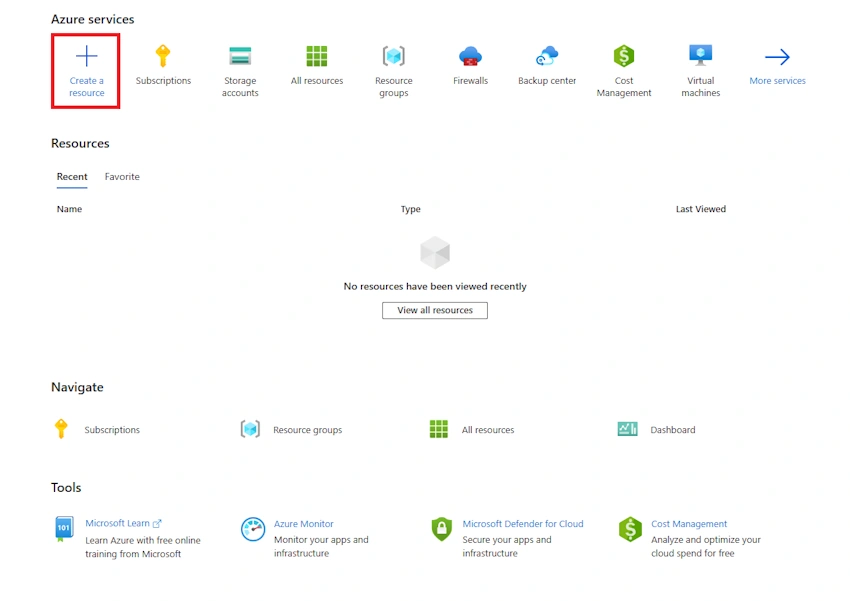
Step 2. Click “Create a resource”.
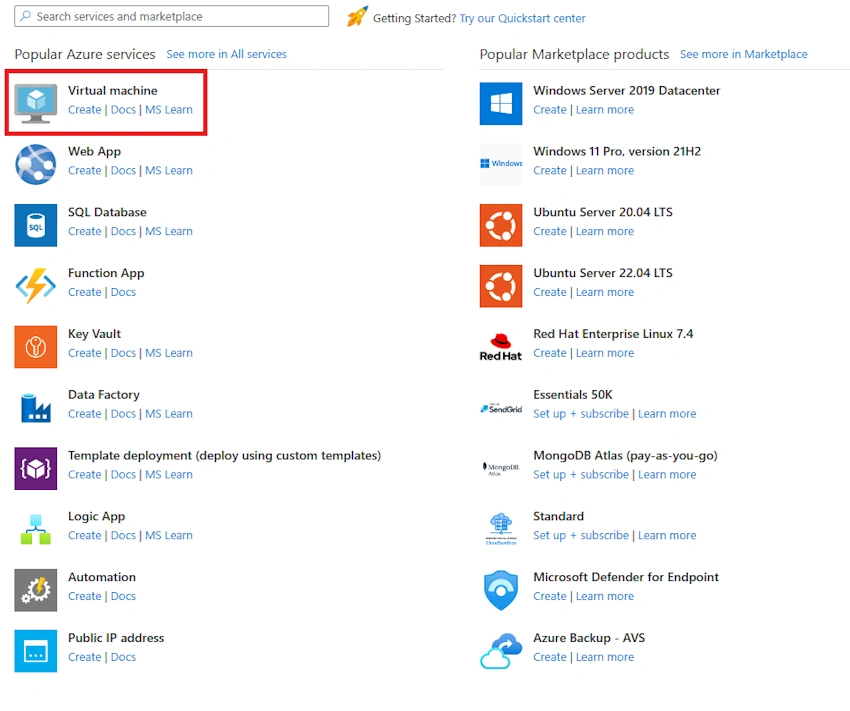
Step 3. Click “virtual machine create”.
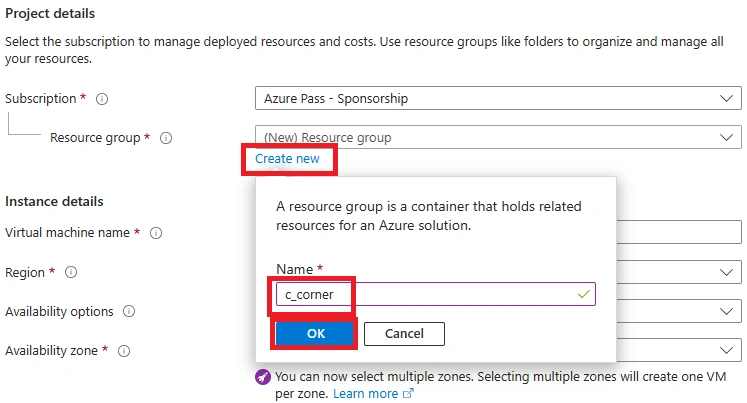
Step 4. Choose a resource group or create yourself by clicking “create new” after giving the proper name for your resource group then click “ok”.
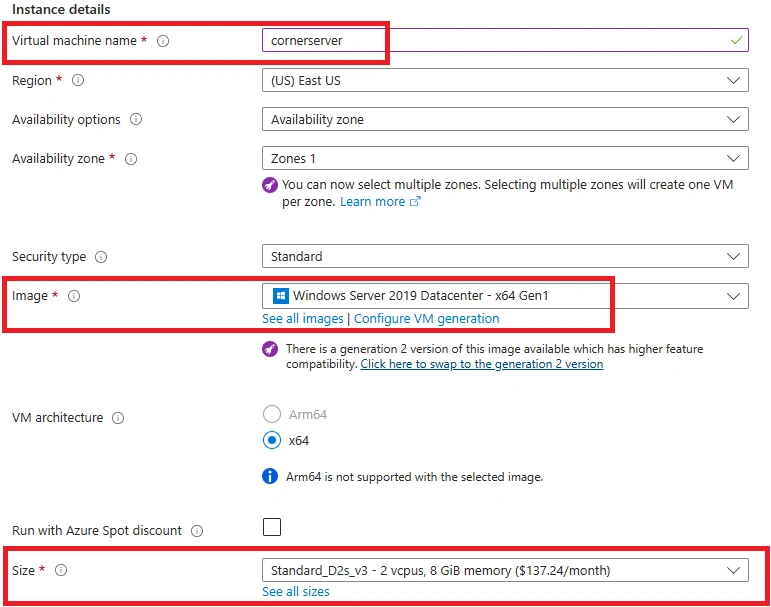
Step 5. Give your virtual machine name after selecting your operating system’s version and customize your size.
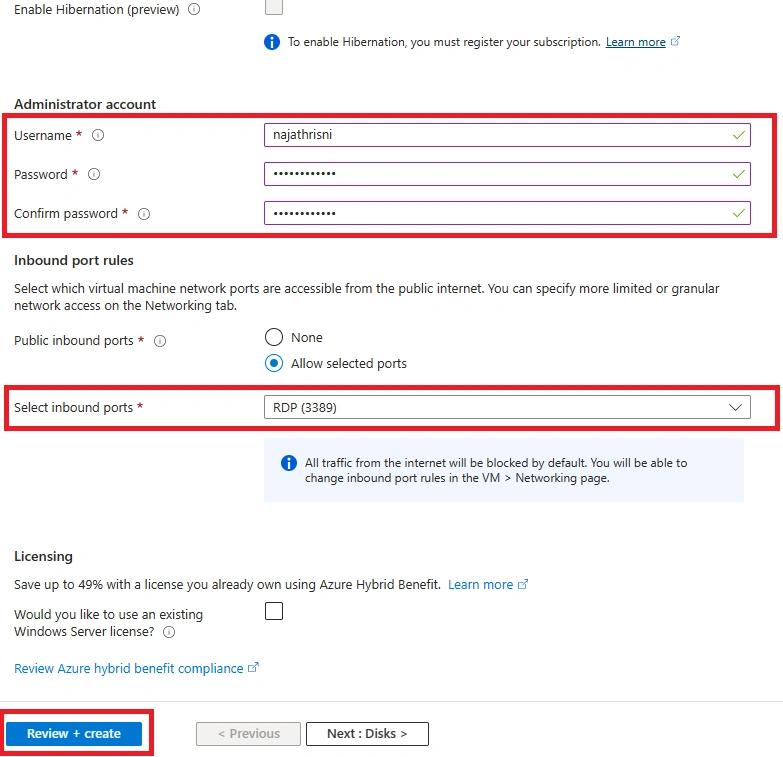
Step 6. Give your user’s name and password after selecting inbound ports to “RDP” and then click “Review + create”.
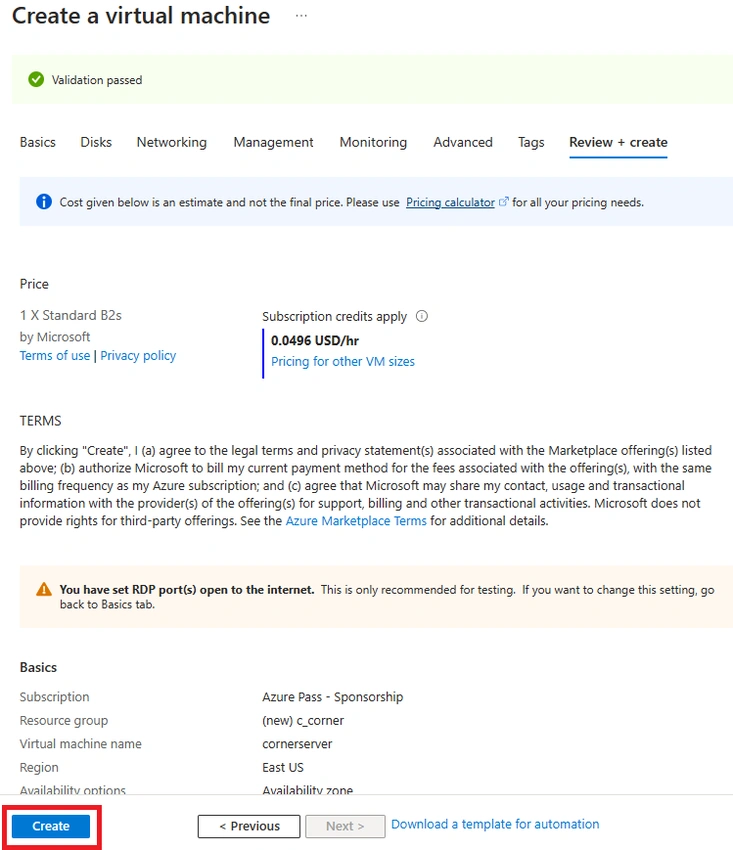
Step 7. Click “create”.
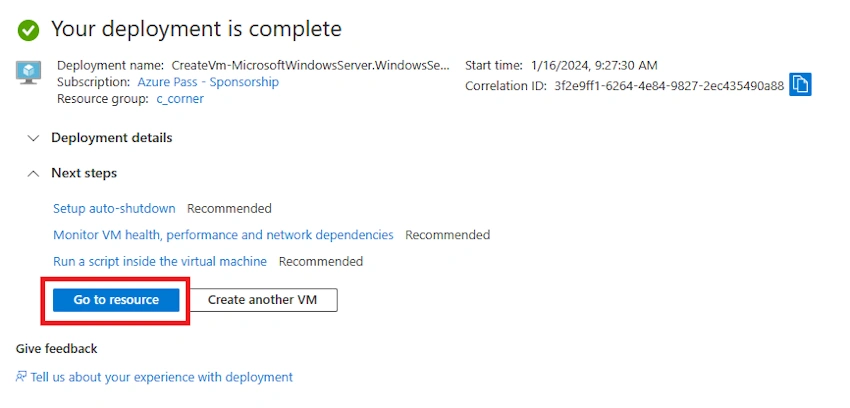
Step 8. Click “Go to resource”.
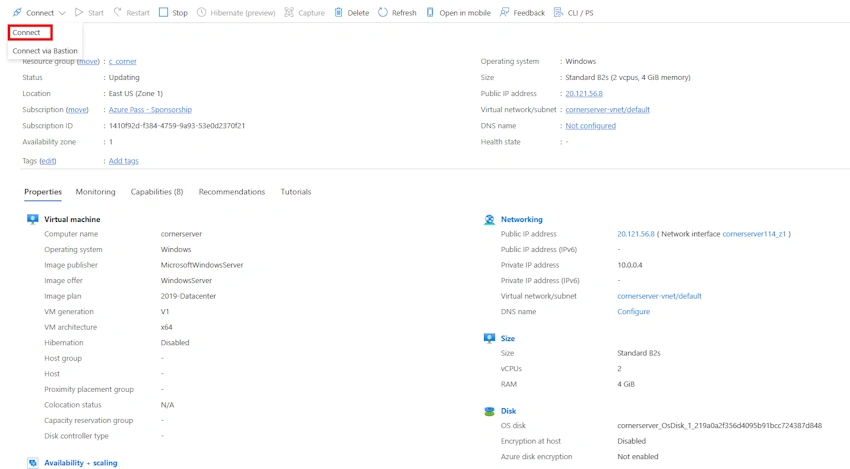
Step 9. Click “connect”.
Step 10. Click “Download RDF file”.
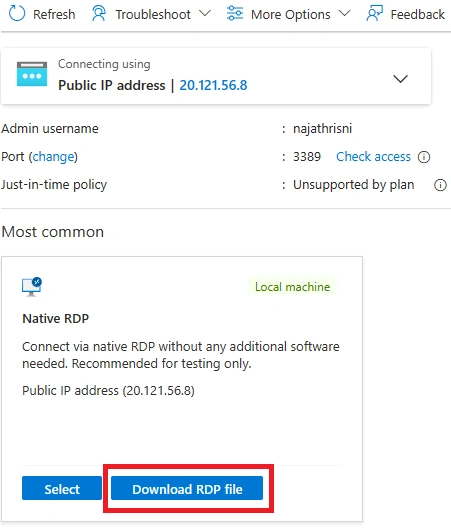
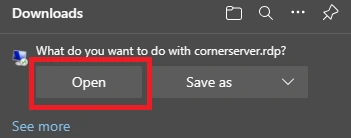
Step 11. Click download file.
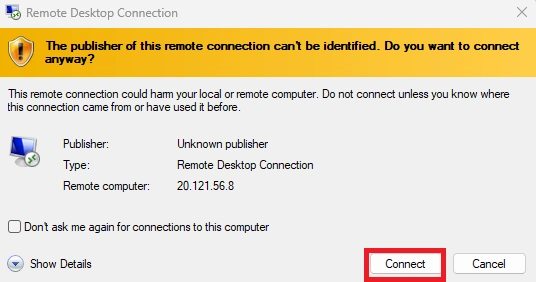
Step 12. Click “connect”.
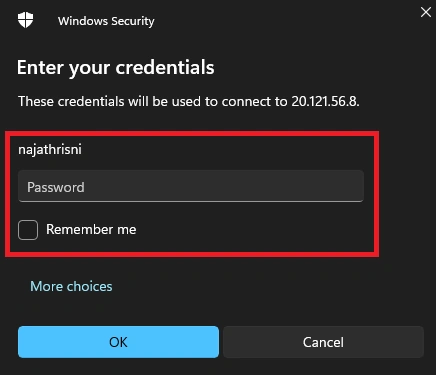
Step 13. Give your Azure VM’s password and username.
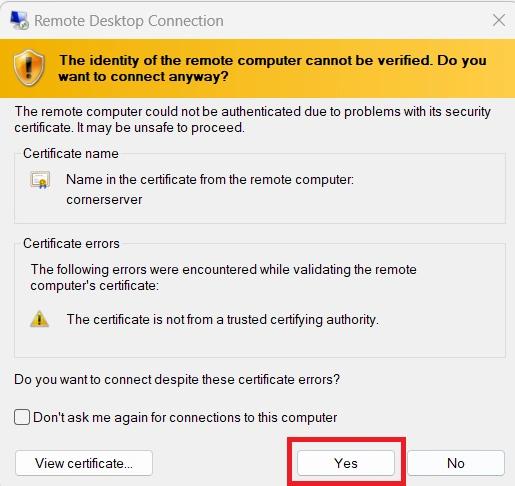
Step 14. Click “Yes”.
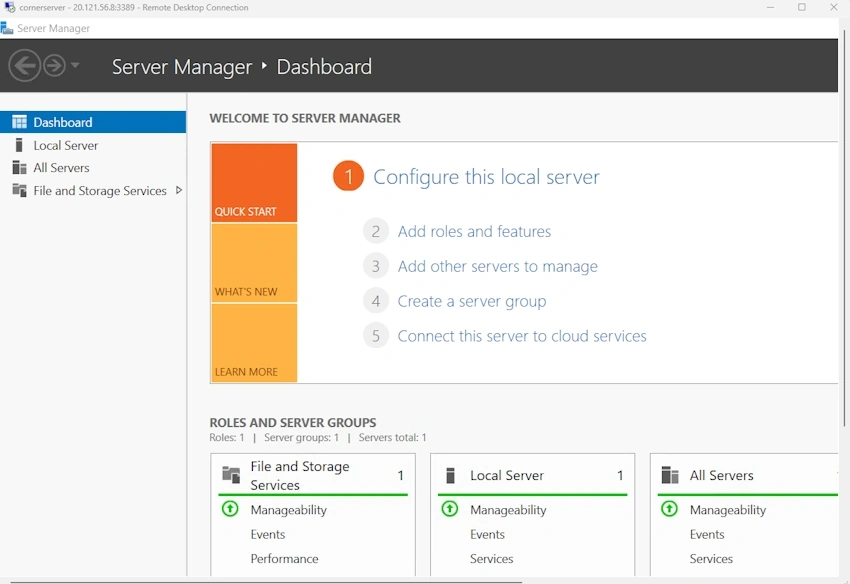
Now you can see our Azure VM running smoothly.
Conclusion
In this article, we all clearly understand how to create the virtual machine in the Azure portal in the proper and easiest method. If there is clarification regarding this topic, feel free to drop comments below.
Join the conversation! Your thoughts help the community grow.