

Introduction
In this article, you will learn about windows auto-enrollment by using Intune, creating a group and how to assign an Enterprise Mobility + Security E5 license.
Prerequisites
- Enterprise Mobility + Security E5 license
- Intune Administrator role permission
- Create one user group for Intune manage
- Windows 10 or 11 client OS
Step 1
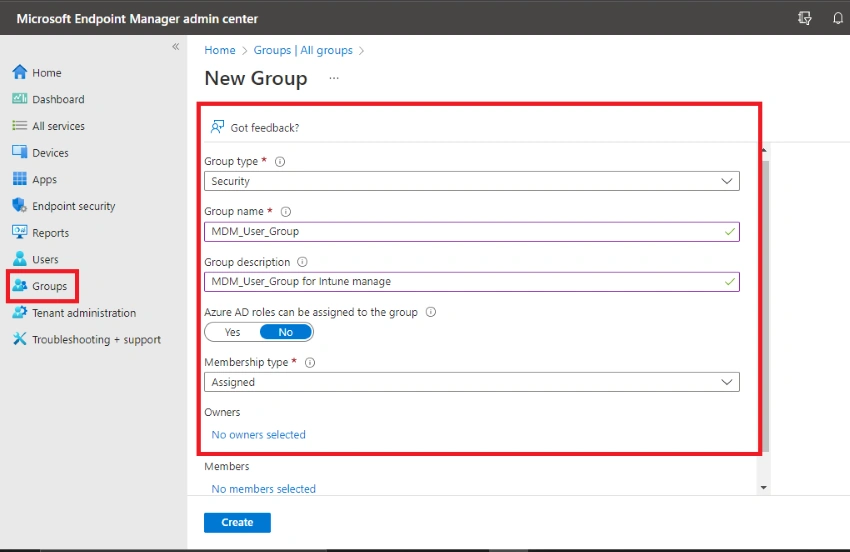
You will create and configure Microsoft Security Group (Azure AD) users in this first task.
Following the appropriate steps
Home>Groups>New Group> add members to the group
Step 2
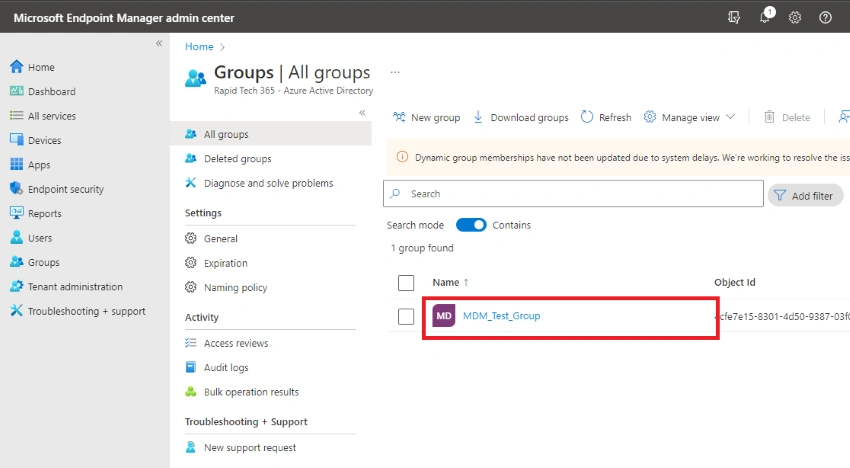
Successfully created my group my MDM_User_Group
Next, click the display name of your user group.
Step 3
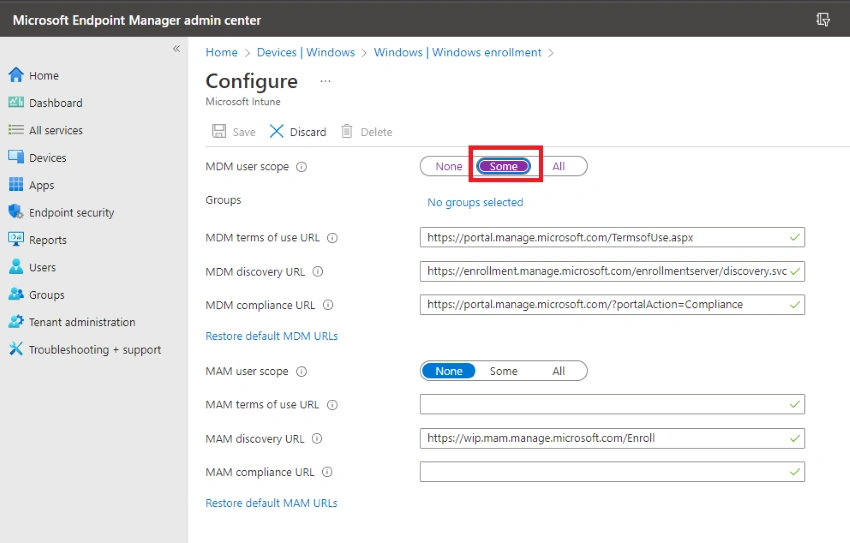
Navigate to your endpoint admin center using the URL
https://endpoint.microsoft.com/
On the page click Home>Devices>Windows>Windows enrollment, and MDM user scope by default is not configured.
You can choose options Some and All In this case I have selected Some because only a few users must enroll.
Step 4
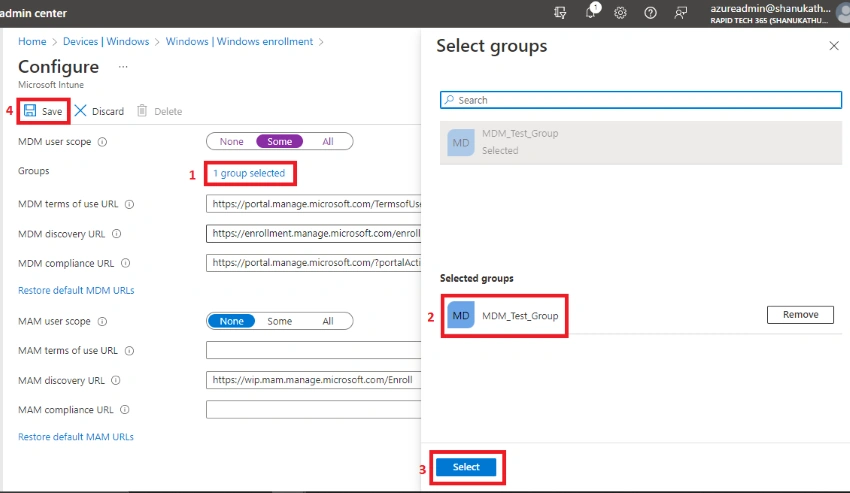
In the Group option select which is you created, the group for MDM users
Step 5
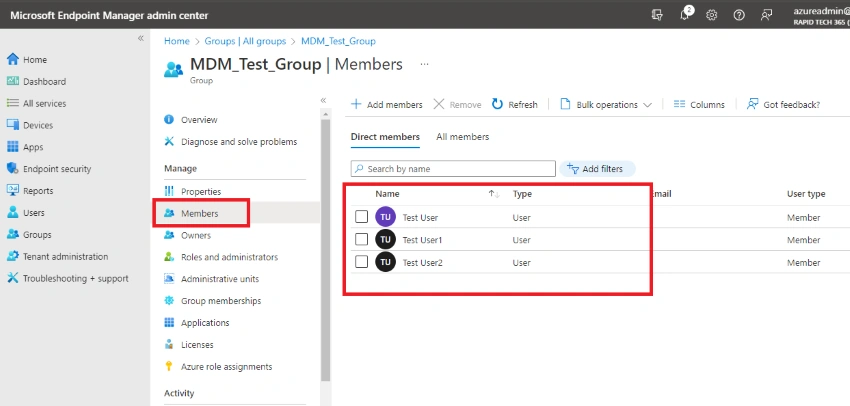
Make sure users have Intune licenses or not
Home>Groups>All groups>select your group name>Members
Successfully added by users in the group
Step 6
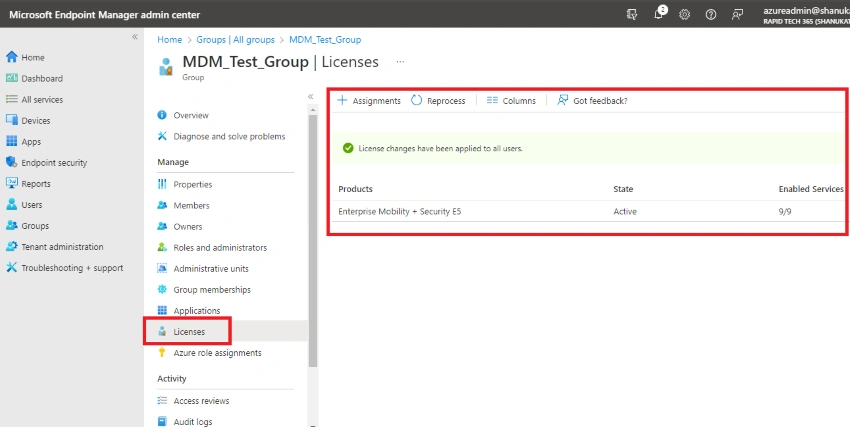
Verify your Intune license
Home>Groups>All groups>select your group name>License Successfully assigned licenses
After configuring the auto-enrollment setting we need to test joining windows 11 computer to Intune,
Step 1
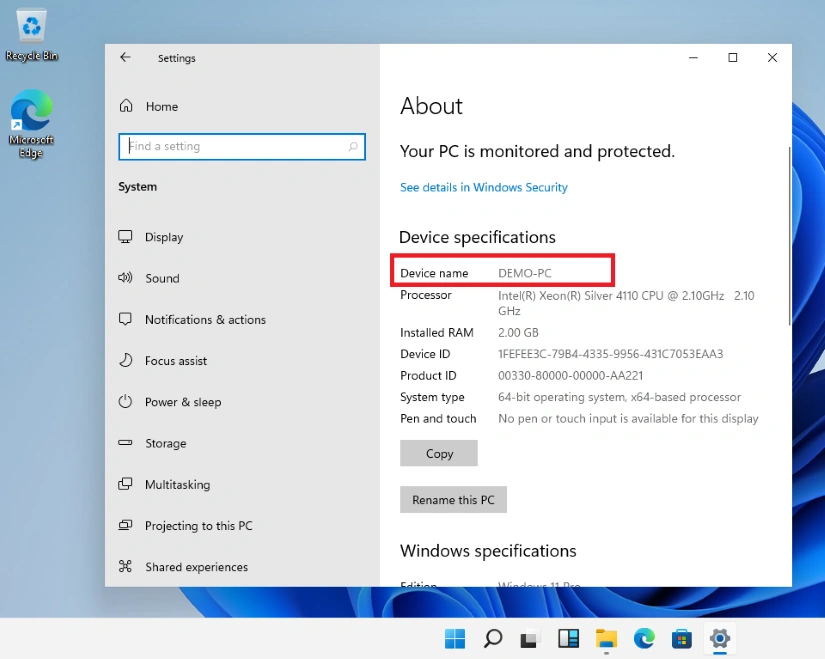
Navigate to your windows 10/11 PC
Step 2
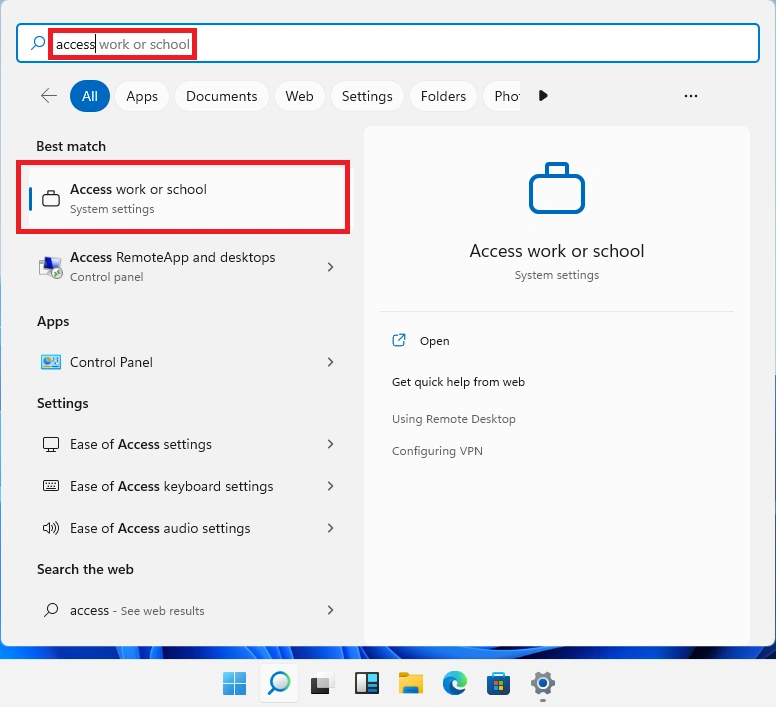
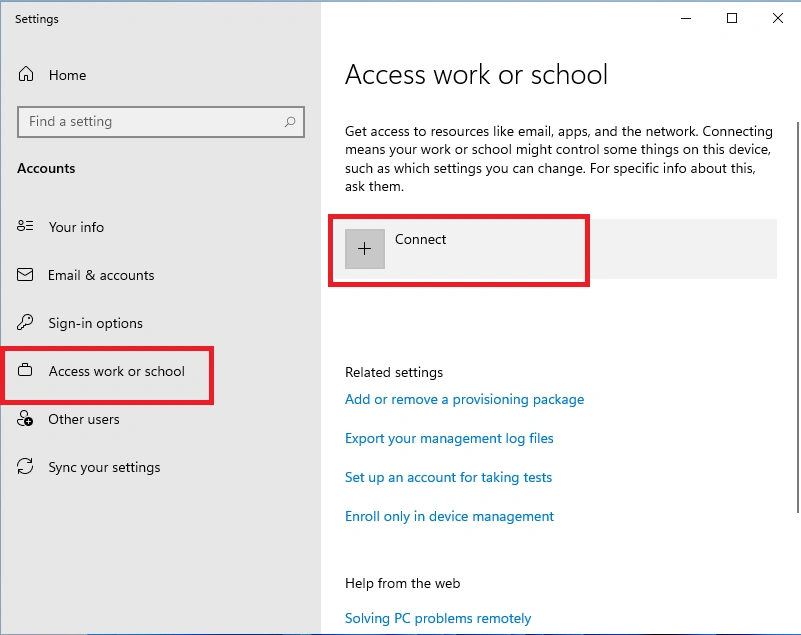
Go to windows and type Access and select Access work or school
Step 2
Click connect
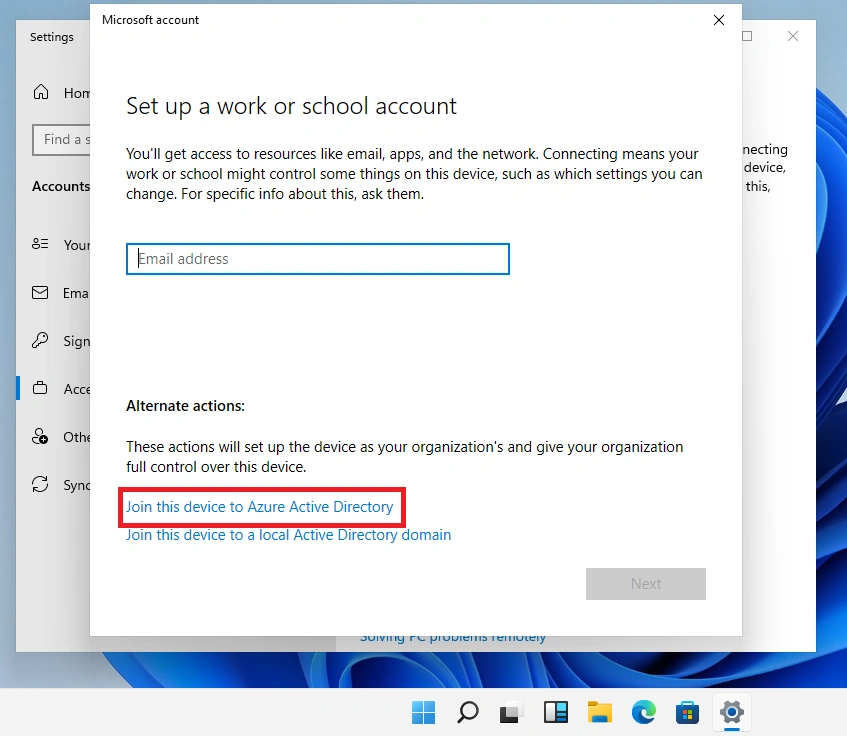
Step 3
I have already assigned Intune license for these users.

Step 4
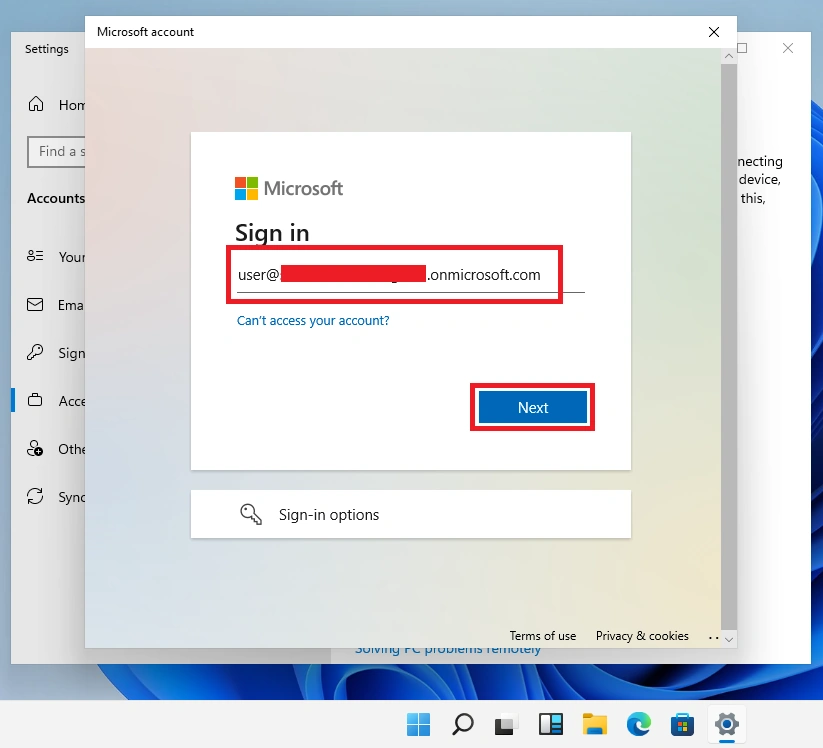
Sign in to the Azure Active Directory using the created user account.
In my case, I will be using Test User with UPN for demonstration.
Step 5
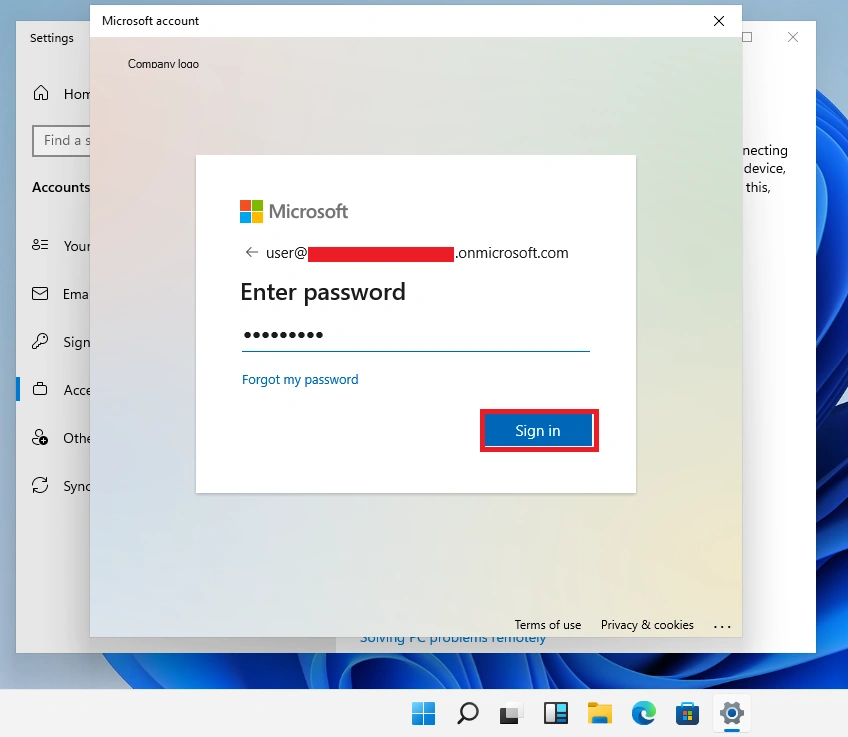
Enter the user password here.
Step 5
Change the password to a secure password.
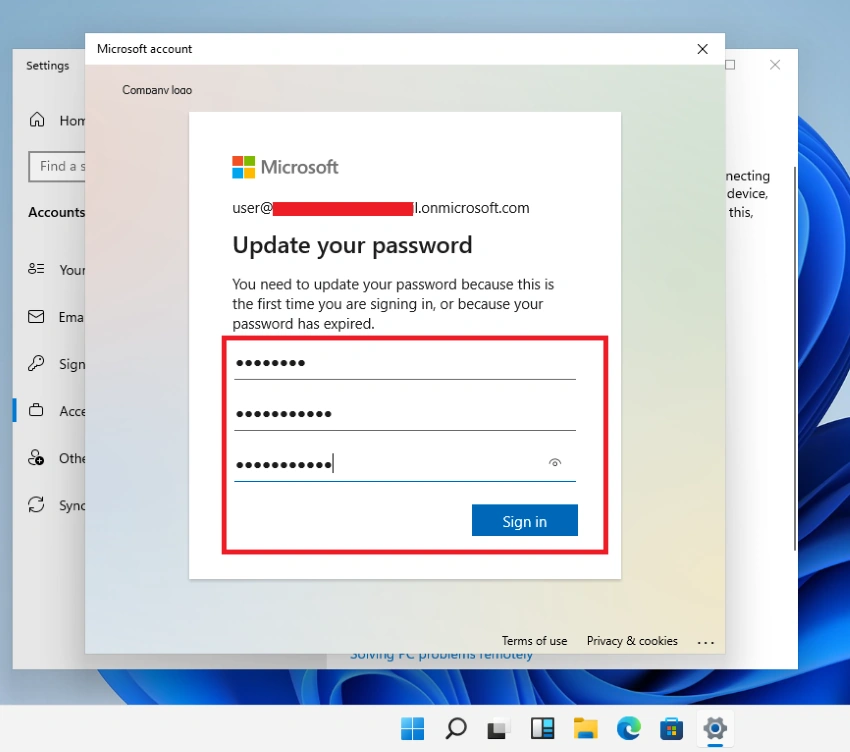
Step 6
Verify your domain details and Join
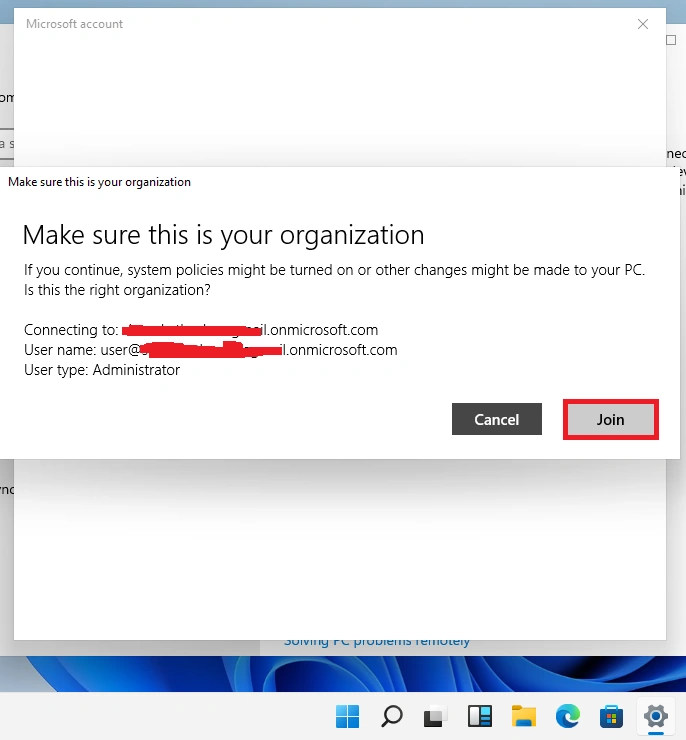
Step 7
Successfully connected my device
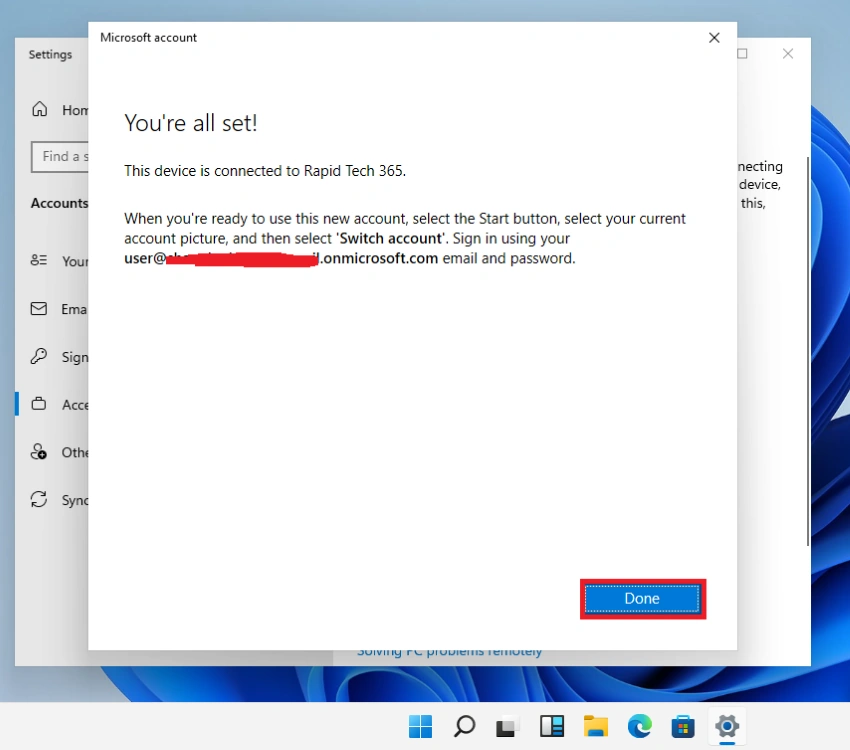
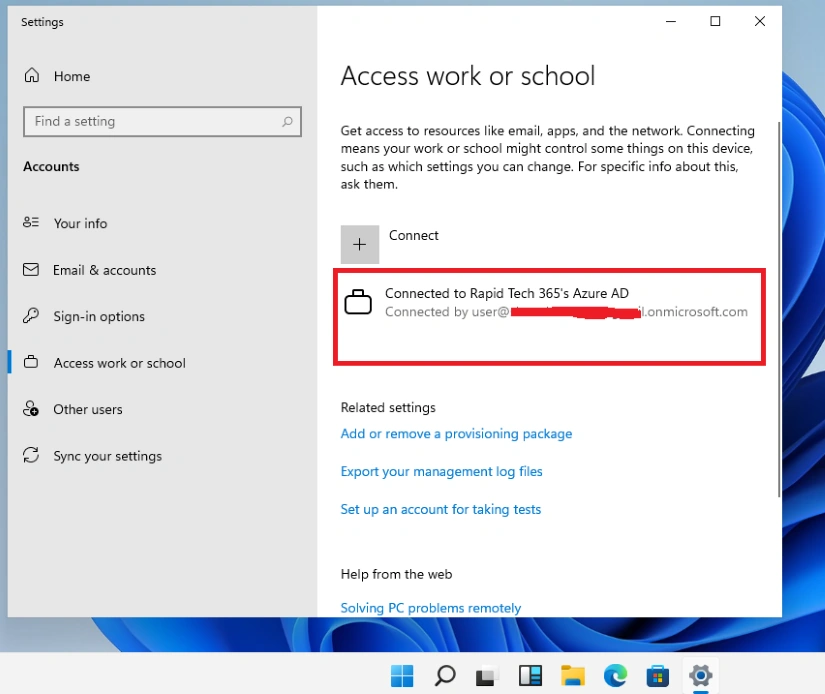
Step 8
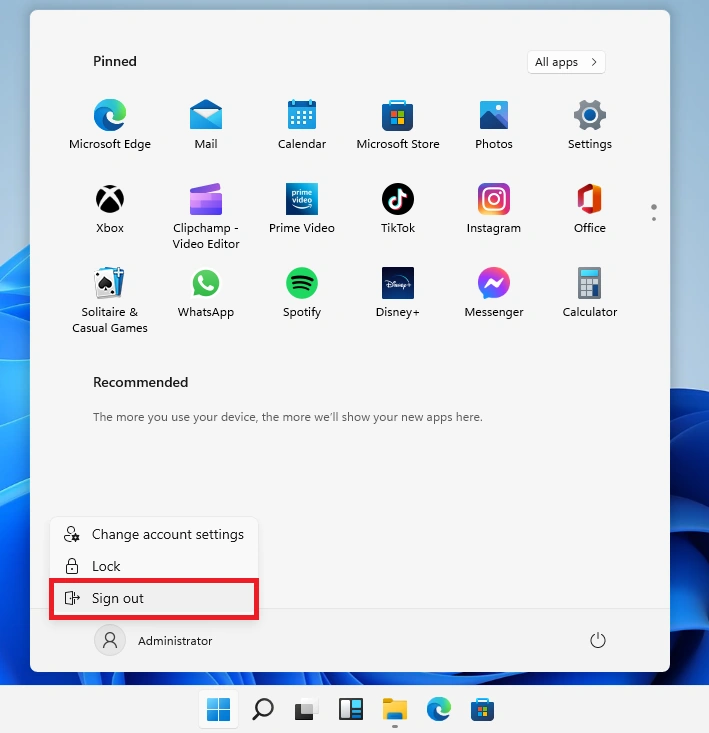
Once done enrollment process sign out your PC
Step 9
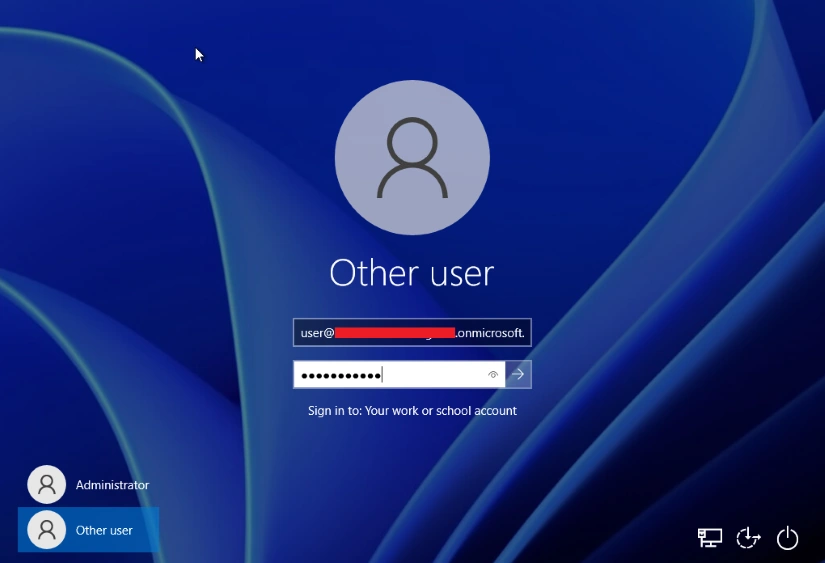
Now you will get the other user option. Please sign in with your user credentials

Step 10
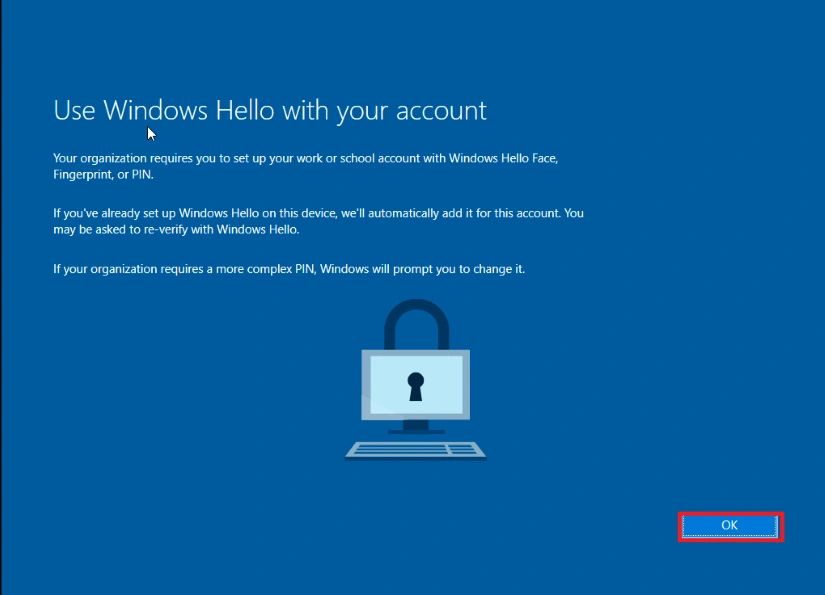
Click OK and after It will initialize automatically
Step 11
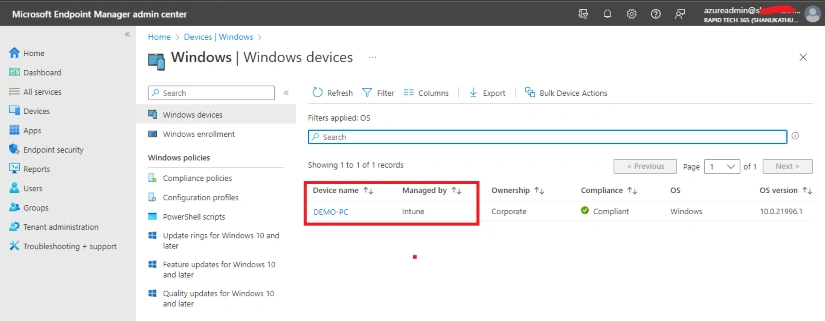
Navigate to your Endpoint dashboard and click Devices>Windows
www.endpoint.microsoft.com
Here you can see your windows 11 device hostname and manage by Intune
Conclusion
This article taught us how to set up Microsoft windows auto-enroll by using Intune. If you have any questions, please contact me.
Join the conversation! Your thoughts help the community grow.