In this article, you will learn how to set up a personal Amazon WorkSpace with Simple AD to validate the Amazon WorkSpaces provisioning and sign-in experience without first implementing the intended Microsoft Entra ID-based architecture. It follows the actual console flow: create a directory, register it, provide a desktop for a user, and connect to it.
IMPORTANT — AWS Simple AD availability (reviewed October 2026): AWS stopped direct Simple AD onboarding for new customers on July 30, 2026. Existing eligible customers can continue using Simple AD; AWS also documents an exception for WorkSpaces Personal Quick Setup. The illustrated manual path may not be available in your account. The steps below describe manual setup for an eligible AWS account. Also, Simple AD is available only in select AWS regions — refer to the AWS Simple AD Region Availability page.
Prerequisites
Before you start, you need an AWS account with permissions for WorkSpaces, Directory Service and VPC; an AWS Region and account eligible for Simple AD; a VPC with two suitable subnets in different Availability Zones; a directory DNS name (for example, corp.example.com); and a valid email address for the test user. AWS resources can incur charges.
Create Simple AD Directory
Perform the following steps to setup Simple AD directory.
1. Open the browser and navigate to AWS Console.
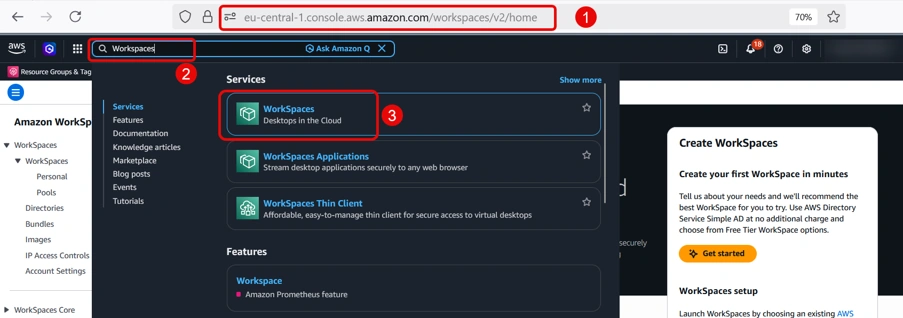
2. In the search box, enter the keyword “workspaces” and select WorkSpaces service.
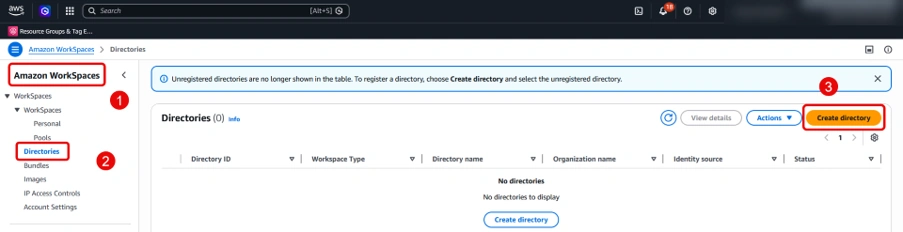
3. In the left navigation, select Directories and click Create directory.
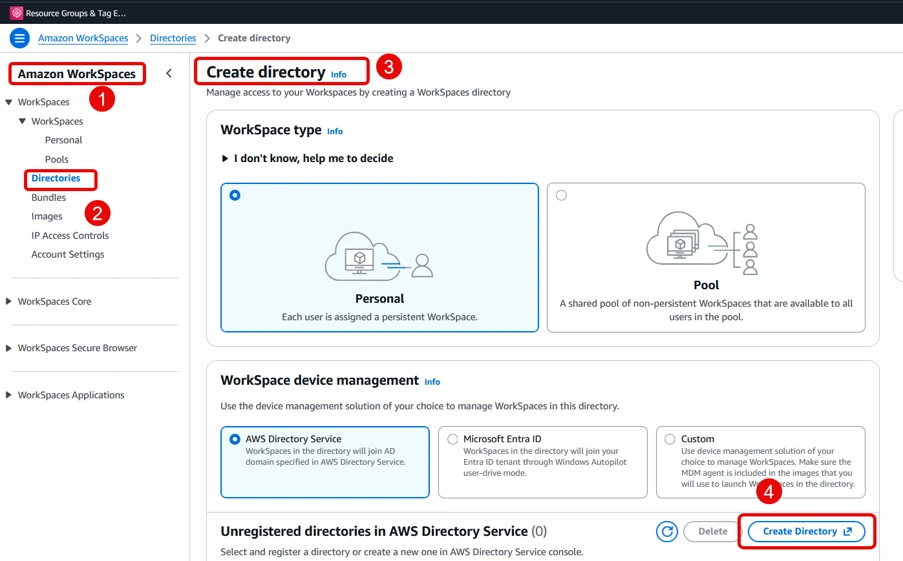
4. In the Create directory page, click Create Directory.
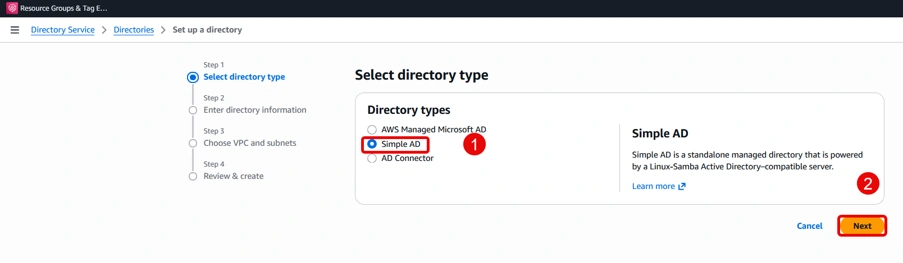
5. In the Select directory type page, select Simple AD and click Next.
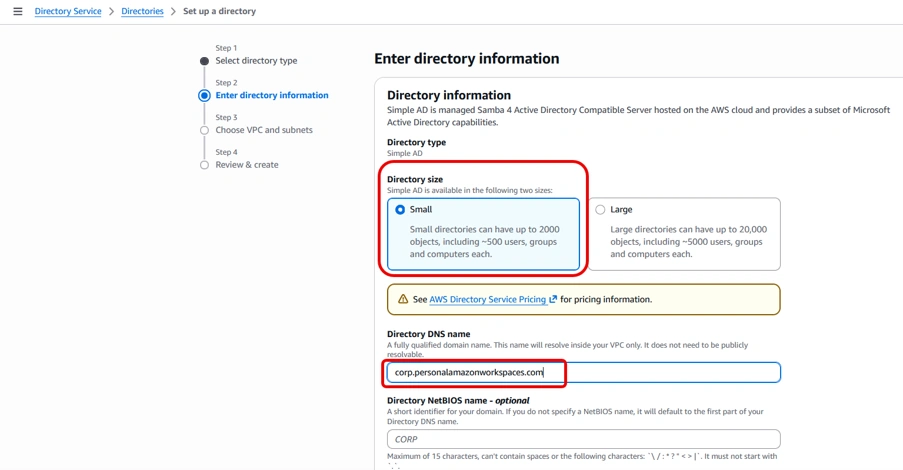
6. In the Enter directory information page, select directory size as small and enter the directory DNS name (for example: corp.example.com).
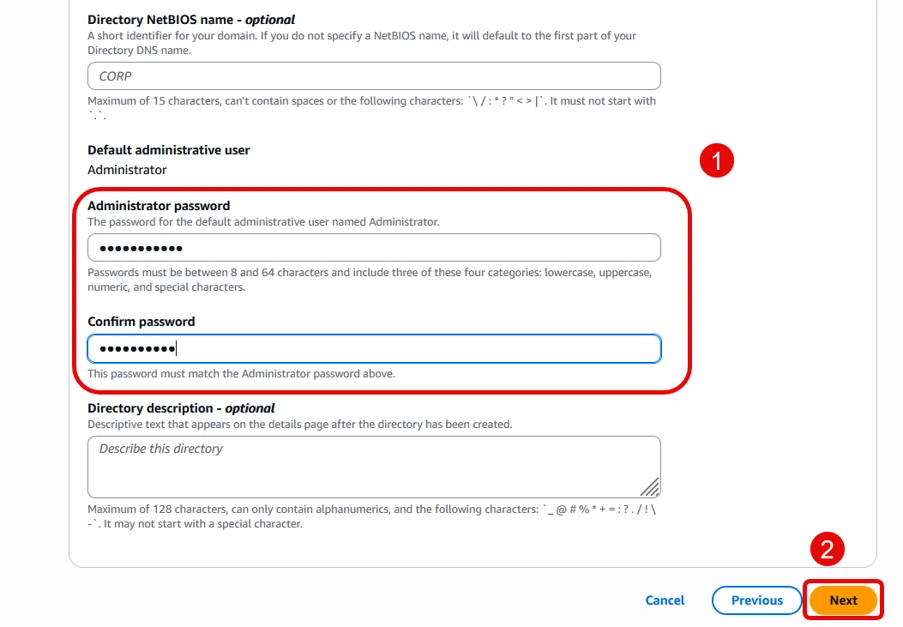
7. Enter the administrator password and click Next.
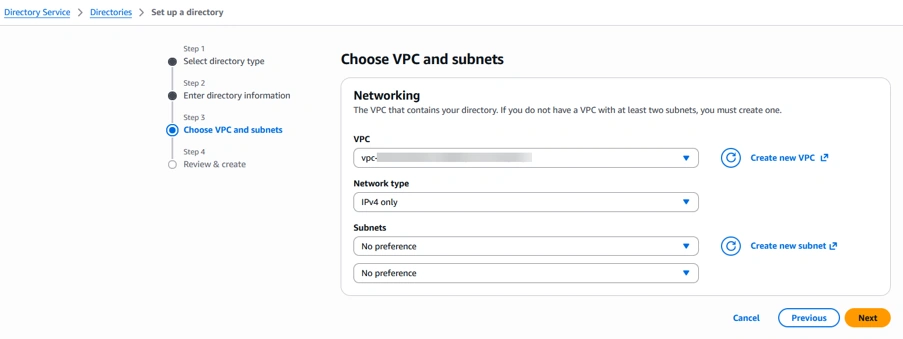
8. Select the VPC and click Next.
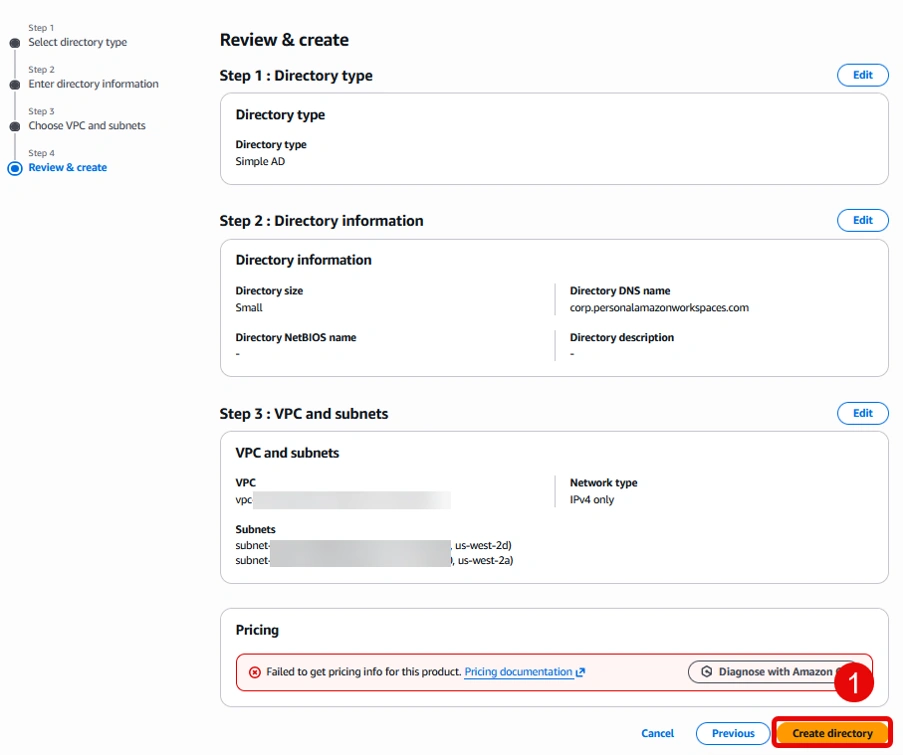
9. Review the details and click Create Directory.
10. Wait for 10 minutes for the directory to get provisioned.

Note: The directory was created in the previous section. In the following steps, register that existing directory with WorkSpaces; do not create a second Simple AD directory.
Provision Amazon WorkSpace
Perform the following steps to provision Amazon WorkSpace using Simple AD.
1. Open the browser and navigate to AWS Console.
2. In the search box, enter the keyword “workspaces” and select WorkSpaces service.
3. In the left navigation, select WorkSpaces -> Personal and click Create WorkSpaces.
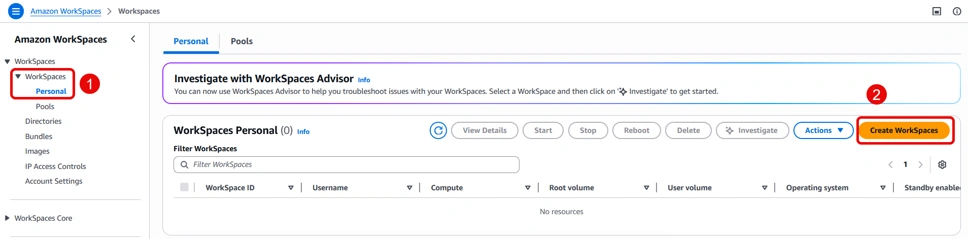
4. In the Onboarding page, select “I know what WorkSpace options I need for my use case.” and click Next.
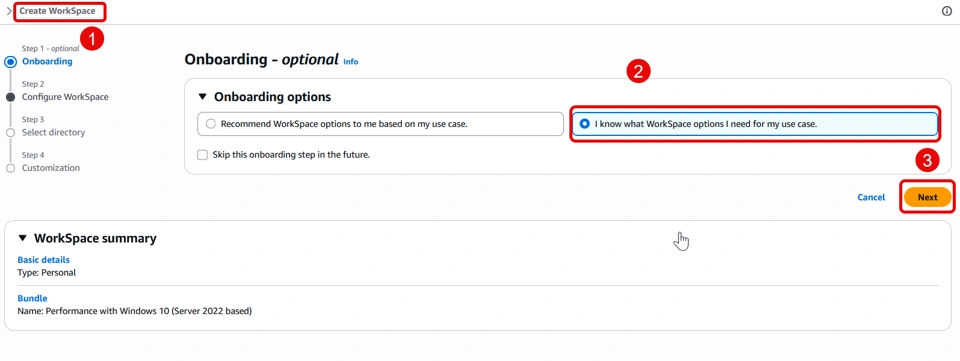
5. Select WorkSpaces Personal and choose a suitable bundle and running mode as shown in the screenshot and click Next.
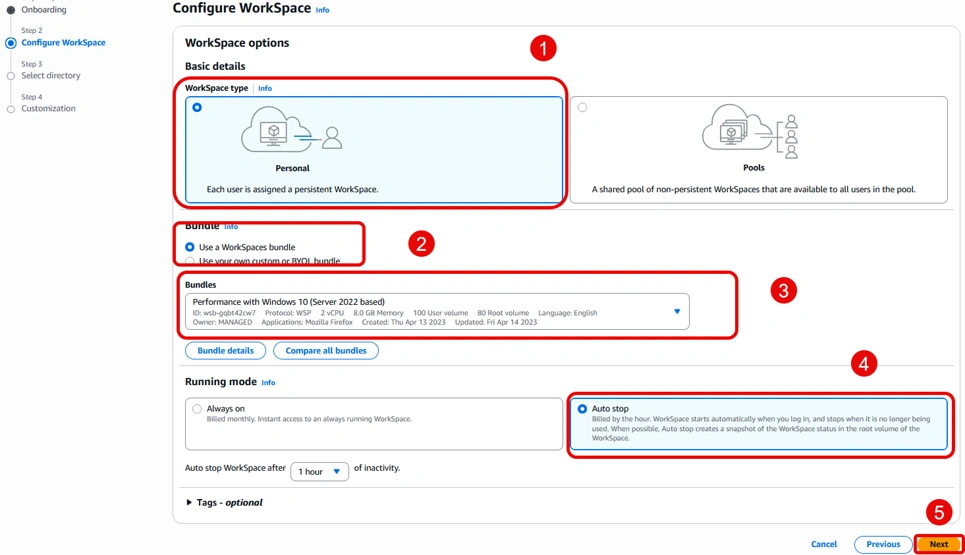
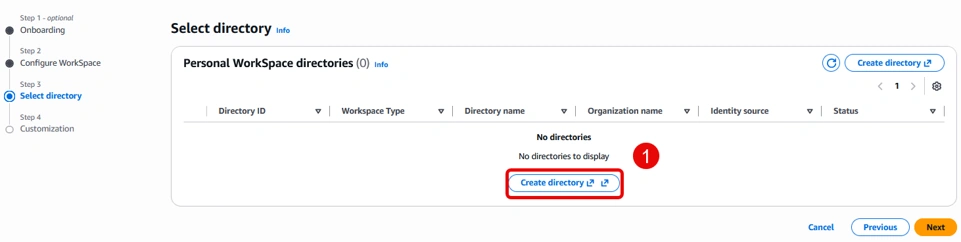
6. To register a directory, choose Create directory and select the unregistered directory.
7. Select the unregistered directory that you have created in the previous section and click Register.
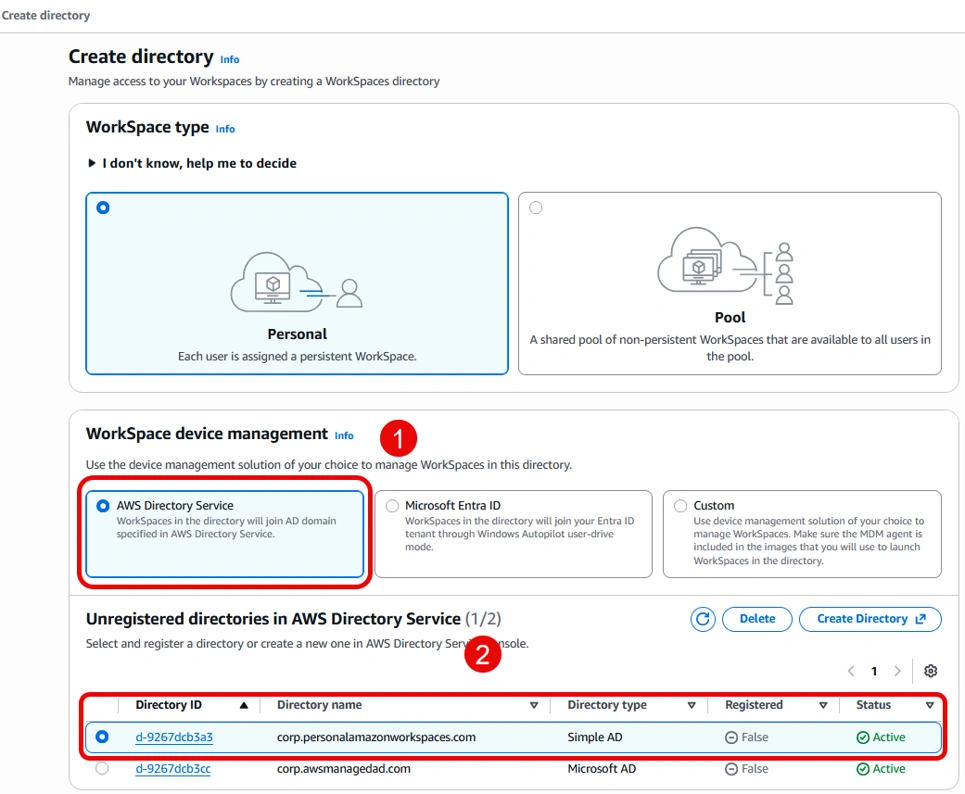
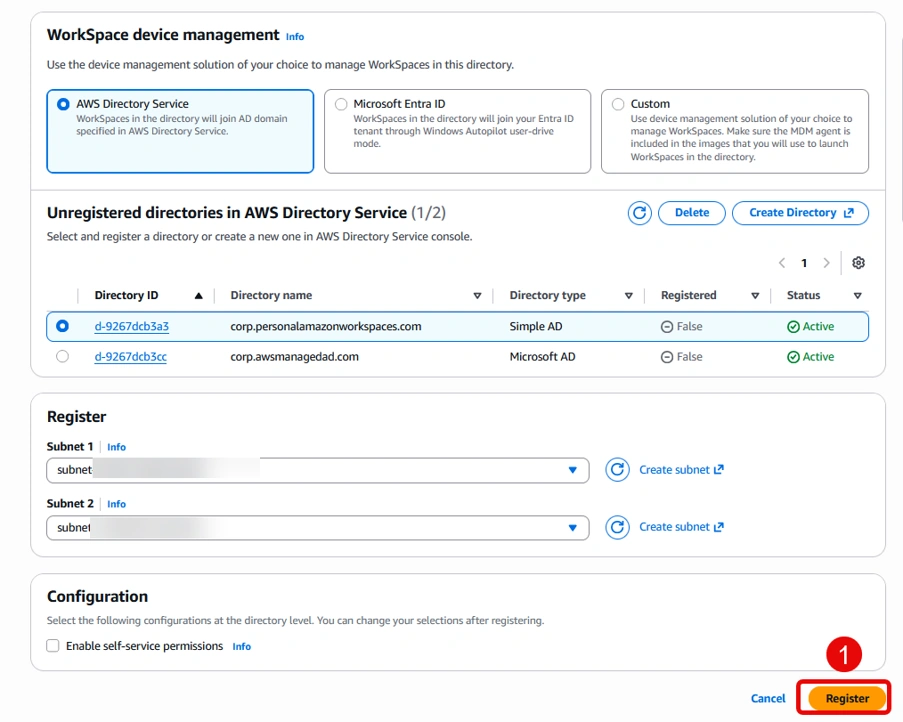
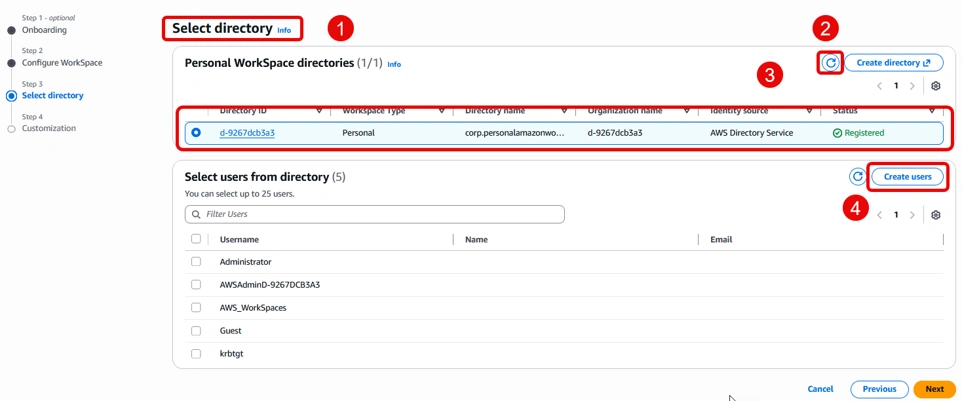
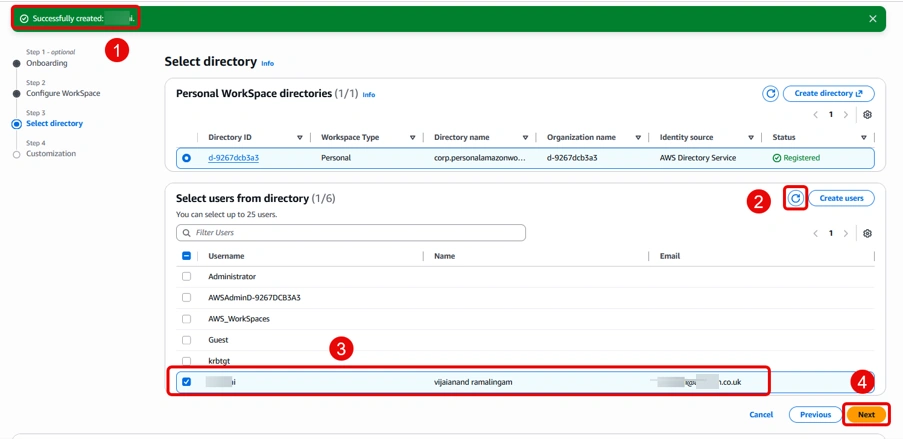
8. Go back to the previous tab (Select directory page) and click refresh. Select the directory. Click Create users.
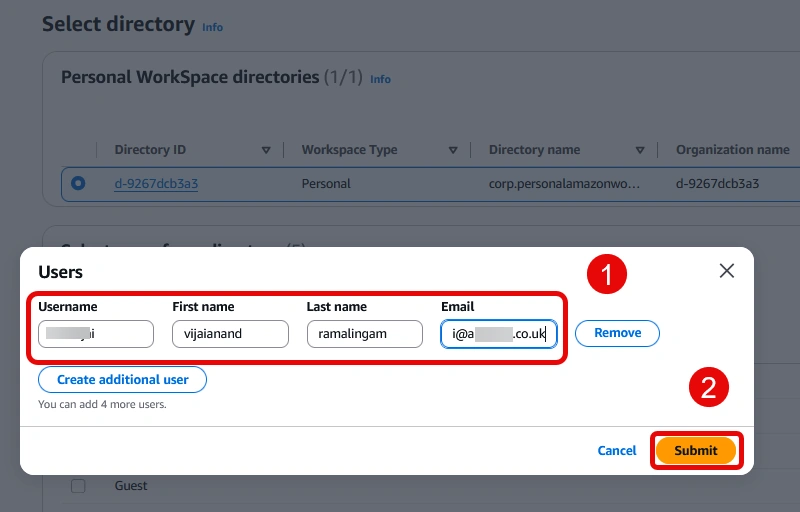
9. In the create user pop up, select Create additional user.
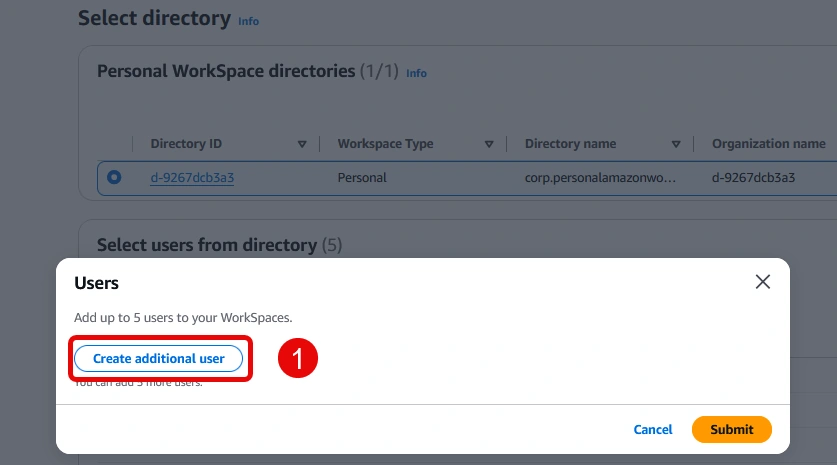
10. Enter the user details and provide valid email ID. Click Submit.
11. Click Refresh to display the newly created user and select the user. Click Next.
12. Click Create workspaces. Wait for few minutes for the workspace to be provisioned.
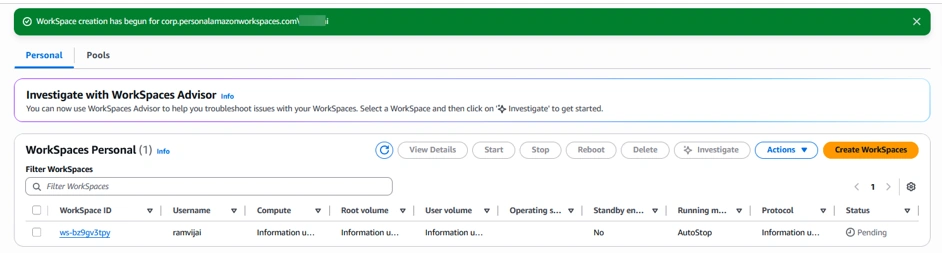
Once the WorkSpace status changes to Available, use the welcome email to complete sign-in. Browser access depends on the selected WorkSpaces configuration; otherwise, use the supported client.
Access Amazon Workspace
Perform the following steps to access the Amazon Workspace.
1. The user should receive an email as shown below.
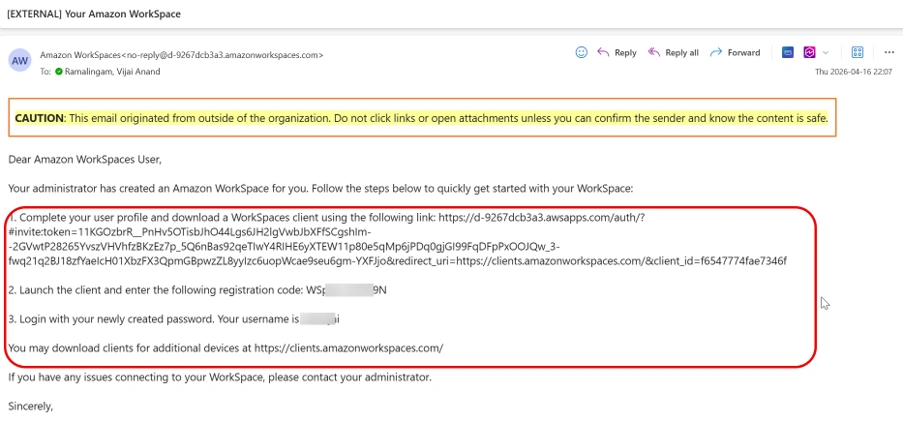
2. Navigate to the link provided in the email to setup the user profile including creating the password.
3. Download the Amazon Workspace client or access the workspace through web - https://clients.amazonworkspaces.com/.
4. Enter the registration code provided in the email and credentials to login.
Quick checks and cleanup
If the directory is not Active or the WorkSpace is not Available, wait and review its status in the AWS Console. If the welcome email is missing, confirm the user email address. After completing the POC, remove unused WorkSpaces and directory resources to avoid ongoing charges.
Summary
In this article, you learned how to create a Simple AD directory, register it with Amazon WorkSpaces, provision a personal WorkSpace, and connect using the registration code. For a POC, verify that the WorkSpace reaches Available status and that the test user can sign in.


Join the conversation! Your thoughts help the community grow.