

If you have not finished the first two parts of this series then please read the following parts:
- Step 1: How To Set Up SharePoint 2013 Virtual Machine on Windows Azure
- Step 2: Install and Configure Domain Controller
Step 3: Install SQL Server 2012 for SharePoint 2013 on Azure
In the last articles we saw how to create and configure network components and domain controllers. In this article we will see how to install and configure SQL Server 2012.
Create SQL Database VM
Create Database Server VM --> Microsoft SQL Server 2012 SP1 Enterprise on Windows Server 2008 R2.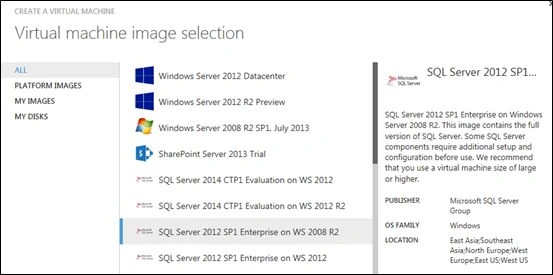
Follow the steps. Choose Large Size and ensure the Affinity Group, Subnet and Windows Azure Storage Account are selected properly as shown below.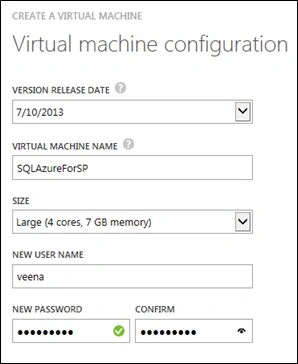
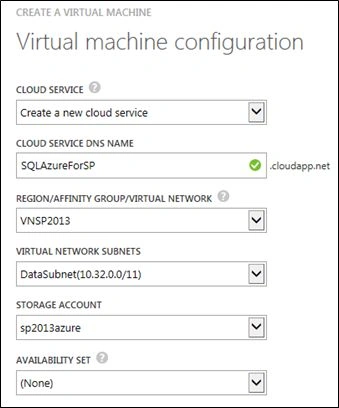
Add SQL Server to Domain
Once the VM is provisioned, RDP into it and go to "Control Panel" --> "System Properties" and change the computer domain to the domain you created in Step 1. When connecting to the domain you will be asked user name and password. Enter the "sp_install" user and password and click OK. 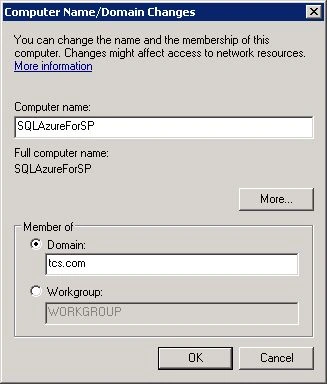
Your SQL Server will now be connected to your domain.
Configure SQL Server
Once SQL Server 2012 is provisioned, perform the following steps.
- Connect to that machine using RDP
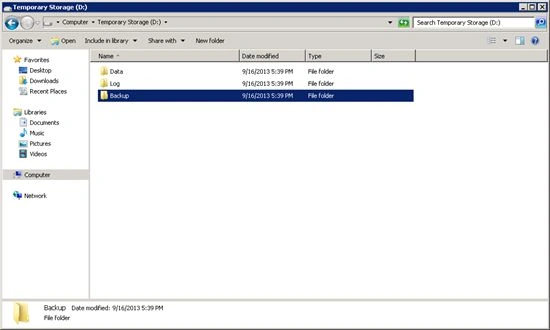
- Create 3 folders on any drive apart from the system drive for data, log and backup as shown below
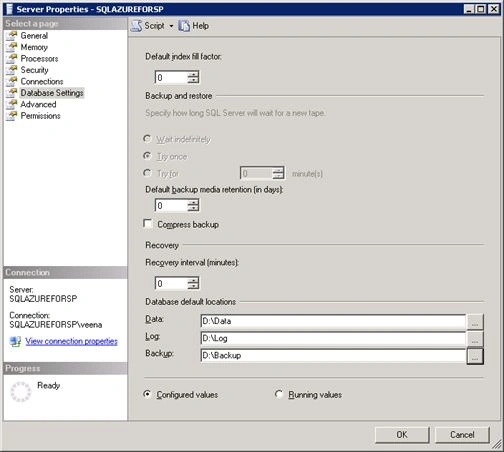
- Start SQL Server Management Studio then connect to the default database then right-click on "Properties" and change the Database default locations to point to the newly created folders. Please note that this will be applicable to databases created after this change. The previously created databases will not be moved.
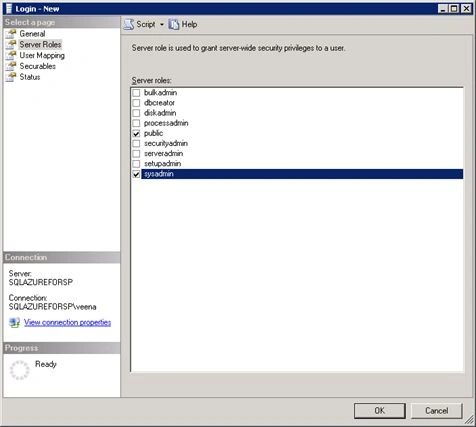
- Add "sp_farm_db" to the sysadmin role as shown below:
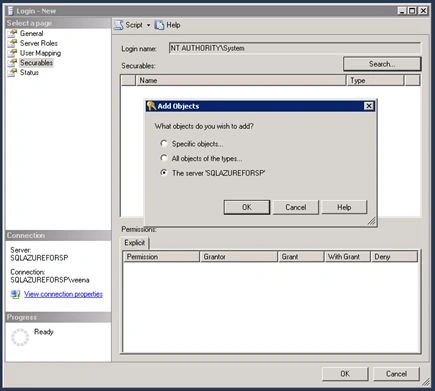
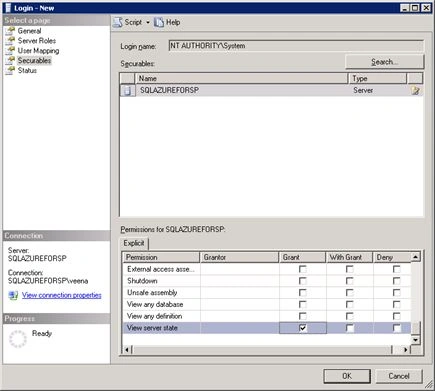
- Create a new login "NT AUTHORITY\System" and then grant the following permissions: "Alter any availability group", "Connect SQL" and "View server state" as shown below.
Change firewall settings
The Windows Firewall blocks both ports that SQL Server requires, client port 1433 and the high availability port 5022. We need to open the ports. To do that start Windows Firewall with the Advanced Security from "Start" --> "Administrative Tools".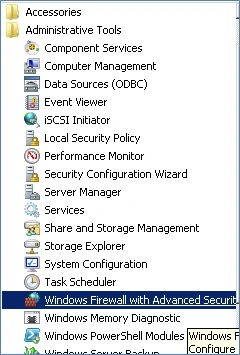
Click Inbound Rules then select "Add a new rule" then follow the wizard steps. Ensure the path to SQLsevr.exe is correct. Please note if this path is not correct then you will face issues when configuring SharePoint Server 2013. 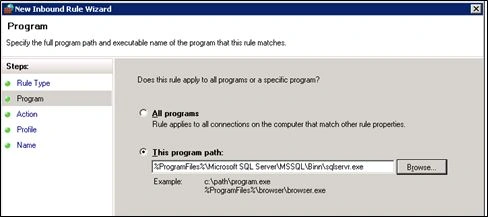
Let the default selection of "Allow the connection".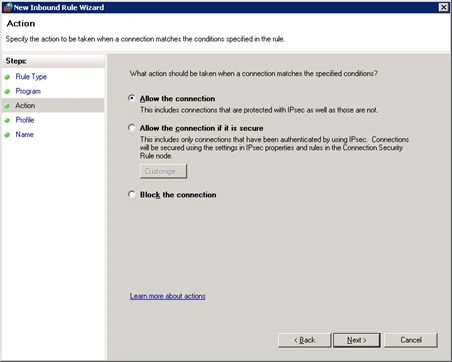
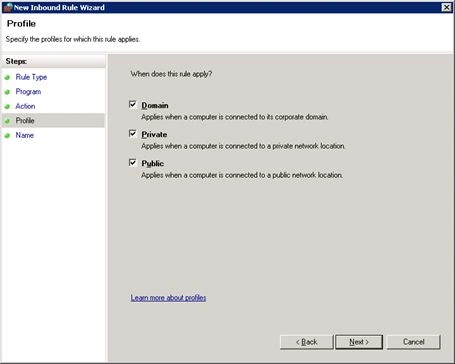
Click on "Finish". This completes the SQL Server 2012 configuration. In the next article we will see how to install and configure SharePoint Server 2013 on Windows Azure.
Further Readings
Join the conversation! Your thoughts help the community grow.