

Twitter has now released the Emoji API for World Wide Web mobile app developers. The Twitter Emoji is open source and available to the developer community at large.
In this article, I am using the Twitter Emoji in the Web App. Now let's begin with the following procedure.
Getting Started
Now, we'll create the application and add the Twitter API to the application. Use the following procedure.
Step 1
Create the ASP.Net Web Application in Visual Studio.
Step 2
Add the Web Form to the application named "EmojiForm".
Step 3
Design the web form with the following code:
- <body>
- <form id="form1" runat="server">
- <asp:Label ID="LblTwitterEmojiMsg" runat="server" CssClass="lbltwitteremojimsg"></asp:Label>
- <div class="container">
- <div class="emojibox">
- <asp:TextBox ID="TxtEmoji" runat="server" CssClass="textemoji" placeholder="Type a message here"></asp:TextBox>
- <input type="button" id="BtnEmoji" class="btnemoji" value="😀" />
- <ul class="emoji-list">
- <li>”Your Emoji Code”</li>
- <li>”Your Emoji Code”</li>
- </ul>
- </div>
- <asp:Button ID="BtnSendEmoji" runat="server" Text="Send" CssClass="sendbutton" OnClick="BtnSendEmoji_Click" />
- </div>
- </form>
- </body>
Note:
I am using some of the Twitter Emoji in my application. I have used "Your Emoji Code" here. Use the Emoji Code from the source code or you can find more Emoji from here.
Adding Twitter API Script
Now all you need to add is the following script to your web form:
- <script src="//twemoji.maxcdn.com/twemoji.min.js"></script>
Creating CSS and JavaScript for Web Application
Step 1
Add the CSS file named "TwitterEmoji" and add the following code to it:
- * {
- padding: 0px;
- margin: 0px;
- }
- ul li {
- list-style: none;
- }
- .emojibox {
- width: 355px;
- height: auto;
- background: #fff;
- border: 1px solid #ccc;
- margin-right: 20px;
- display: inline-block;
- float: left;
- position: relative;
- }
- .textemoji {
- width: 267px;
- float: left;
- height: 50px;
- border: none;
- background: none;
- outline: none;
- padding: 0 0 0 10px;
- font-size: 18px;
- }
- .btnemoji {
- width: 70px;
- height: 45px;
- float: right;
- border: none;
- background: none;
- outline: none;
- font-size: 30px;
- }
- .sendbutton {
- border: 1px solid #ccc;
- background: #f2f2f2;
- width: 100px;
- height: 30px;
- text-align: center;
- line-height: 30px;
- color: #252525;
- }
- .emoji-list {
- display: none;
- height: auto;
- width: 250px;
- background: #000;
- border: #020202;
- position: absolute;
- overflow: hidden;
- top: 73px;
- right: 0px;
- }
- .emoji-list li {
- float: left;
- font-size: 30px;
- margin: 0 10px 0 10px;
- cursor: pointer;
- }
- .container {
- display: block;
- width: 100%;
- height: 100px;
- position: fixed;
- top: 110px;
- }
- .lbltwitteremojimsg {
- font-size: 20px;
- }
Step 2
Add the JavaScript file named "TEmoji.js" and add the following code to it:
- $(document).ready(function () {
- $("#BtnEmoji").click(function () {
- var container = $(".emoji-list");
- if (!container.hasClass('hidden')) {
- container.addClass('hidden');
- container.slideDown(500);
- }
- else {
- container.removeClass('hidden');
- container.slideUp(500);
- }
- });
- $(".emoji-list li").click(function () {
- var mm = $(this).text();
- var textVal = $("#TxtEmoji").val();
- $("#TxtEmoji").val(textVal + mm);
- $(".emoji-list").removeClass('hidden');
- $(".emoji-list").slideUp(500);
- });
- $(".textemoji").click(function () {
- $(".emoji-list").removeClass('hidden');
- $(".emoji-list").slideUp(500);
- });
- });
In the preceding code, the button click function determines if the emoji container class is not hidden; if it is not then it adds a hidden class otherwise it removes the hidden class. When the emoji list is displayed, the emoji is added to the text in the TextBox and it removes the hidden class. This is defined in the emoji list options click function. When the user clicks on the TextBox the emoji list disappears.
- <%@ Page Language="C#" AutoEventWireup="true" CodeBehind="EmojiForm.aspx.cs" Inherits="TwitterEmojiApp.EmojiForm" %>
- <!DOCTYPE html>
- <html xmlns="http://www.w3.org/1999/xhtml">
- <head runat="server">
- <title>Twitter Emotions</title>
- <link href="TwitterEmoji.css" rel="stylesheet" />
- </head>
- <script src="//twemoji.maxcdn.com/twemoji.min.js"></script>
- <script src="jquery-1.10.2.min.js"></script>
- <script src="TEmoji.js"></script>
- <body>
- <form id="form1" runat="server">
- <asp:Label ID="LblTwitterEmojiMsg" runat="server" CssClass="lbltwitteremojimsg"></asp:Label>
- <div class="container">
- <div class="emojibox">
- <asp:TextBox ID="TxtEmoji" runat="server" CssClass="textemoji" placeholder="Type a message here"></asp:TextBox>
- <input type="button" id="BtnEmoji" class="btnemoji" value="😀" />
- <ul class="emoji-list">
- <li>”Your Emoji Code”</li>
- </ul>
- </div>
- <asp:Button ID="BtnSendEmoji" runat="server" Text="Send" CssClass="sendbutton" OnClick="BtnSendEmoji_Click" />
- </div>
- </form>
- </body>
- </html>
Step 1
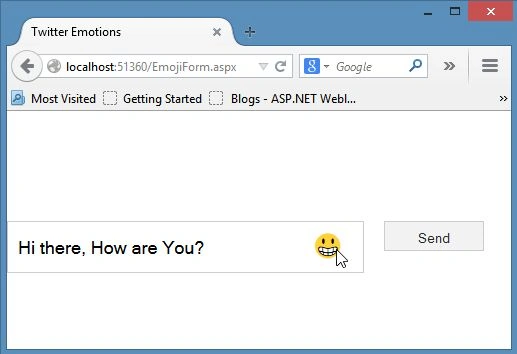
At first debug the application and enter the message and click on the Emoji icon as shown below:
Step 2
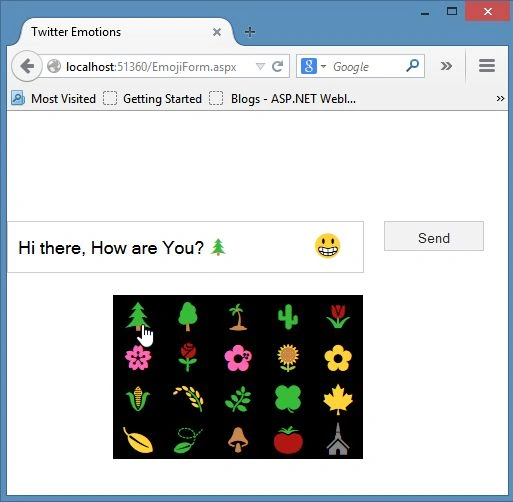
Enter the message and select Emoji.
Step 3
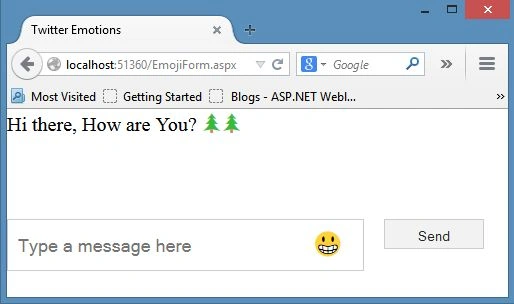
Click on the Send Button to send the message.
That's it.
Summary
This article described how to use the latest Twitter revealed Twitter Emoji in a web application. We can get more Twitter Emoji in the Github. Thanks for reading and Stay Updated!
Vusi KrakriPosted Sep 7, 2018, 1:56 AM
Hi Nimit please provide what happens in the code behind function BtnSendEmoji_Click.
Frédéric DruilhetPosted Dec 1, 2015, 5:44 AM
You can alose look at FrwTwemoji https://github.com/FrenchW/FrwTwemoji Full embed and therefore, self hosted. Work without js, and string parser
Tandra PoddarPosted Jan 29, 2015, 4:39 AM
Hi Nimit, I have run your code in chrome and IE but no icons are displaying. Instead of icons only square boxes are showing.
Rohatash KumarPosted Nov 13, 2014, 4:11 AM
Thank you for sharing . nicely explained with examples..
Anubhav ChaudharyPosted Nov 13, 2014, 12:13 AM
Nice Article Nimit
Atul GuptaPosted Nov 12, 2014, 7:20 AM
Good Article Nimit Keep It Up!!!