

Introduction
This article explains how to implement a Servlet in the Netbeans IDE. The Netbeans IDE is used for the development of the example.
What is Servlet?
A Servlet is basically a Java class that extends the features of servers, Servlets are normally used to extend the applications hosted by the web servers.
Features of Servlet
- Persistent
This feature enables the servlet to handle multiple requests, it can handle multiple requests after the servlet is loaded in the web server memory. - Fast
The Servlet provides quick response to the client request. - Platform Independent
Servlets are platform-independent, in other words, they can run on any hardware. - Efficient
The feature of handling multiple client requests makes a servlet more efficient than other server-side technologies. - Portable
A Servlet can run on various platforms, this makes servlets portable.
Advantages of Servlet
The advantages of Servlets are:
- Powerful
- Safety
- Extensibility
- Integrity
- Inexpensive
- Secure
- Performance
Disadvantages of Servlet
The disadvantages of Servlets are:
- The Java Runtime Environment (JRE) is required on the server to run the servlet.
- Designing a servlet is complex.
- The Web administrator will need to learn how to install and maintain servlets.
Example
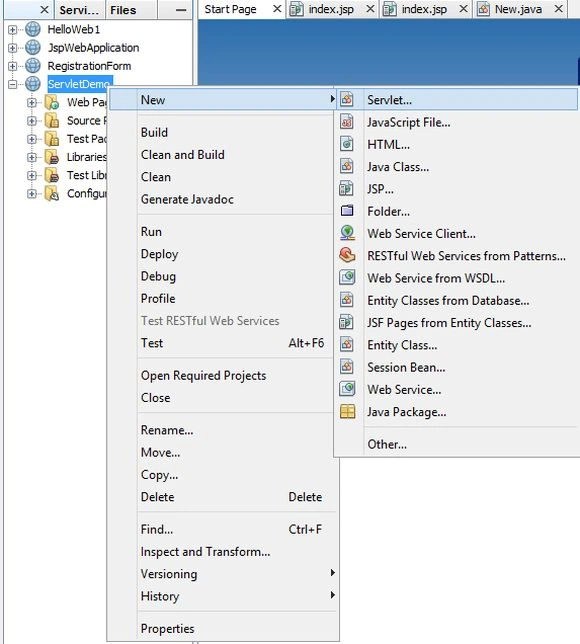
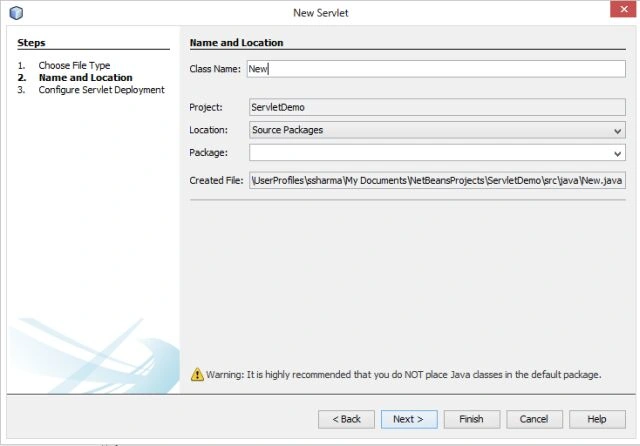
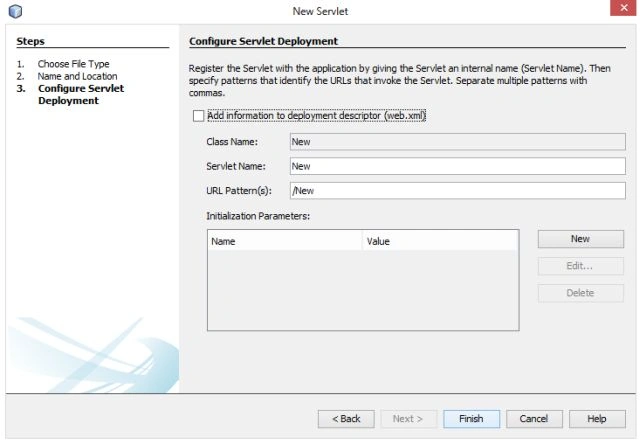
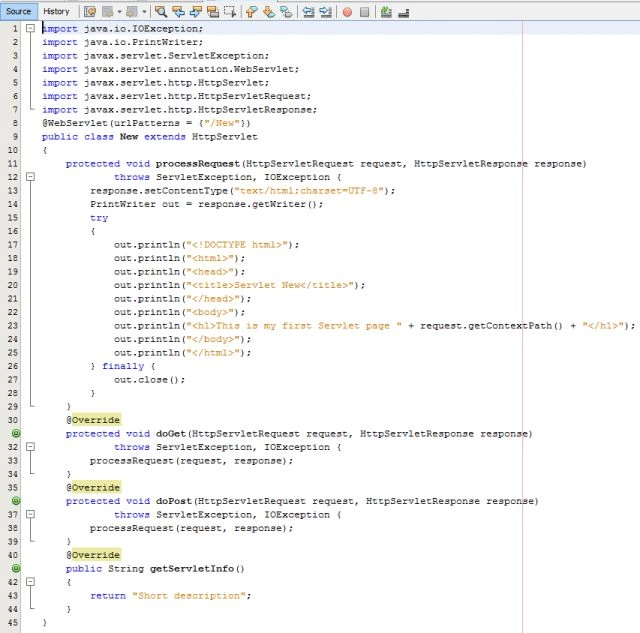
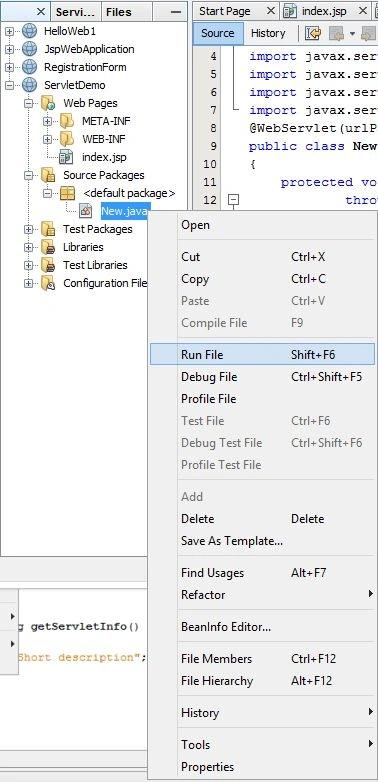
In this example; we discuss how to implement a servlet in the Netbeans IDE. There is a certain procedure in the Netbeans IDE that we need to follow as explained below.
Step 1
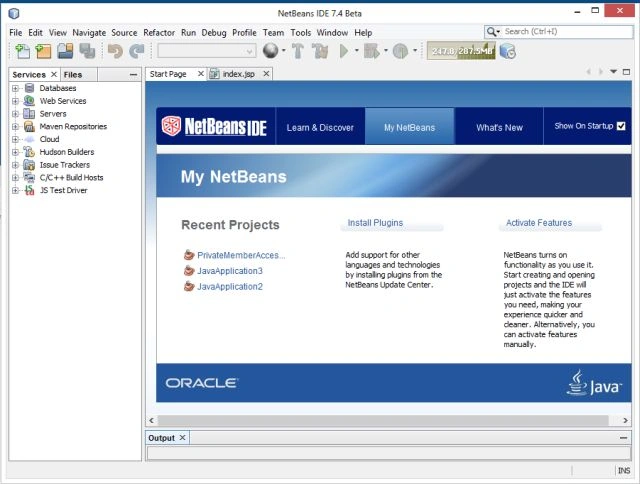
Open the Netbeans IDE.
Step 2
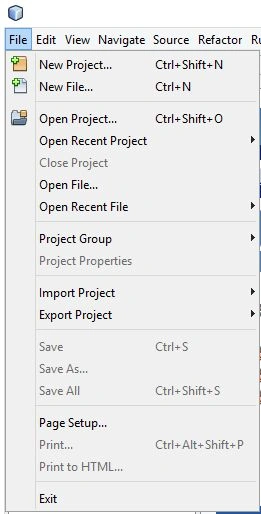
Click on "File" from the Menu bar as in the following:
Step 3
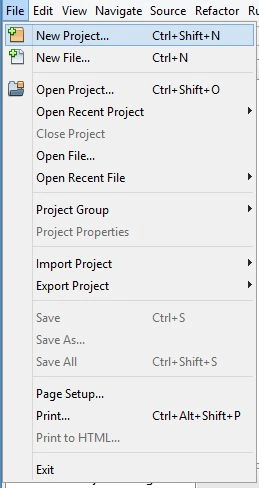
Click on "New Project" as in the following:
Step 4
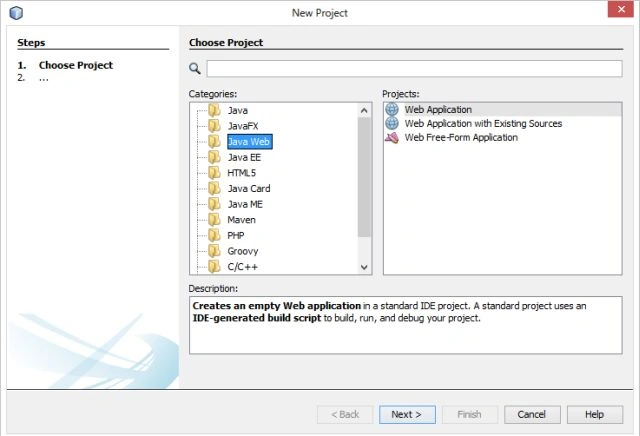
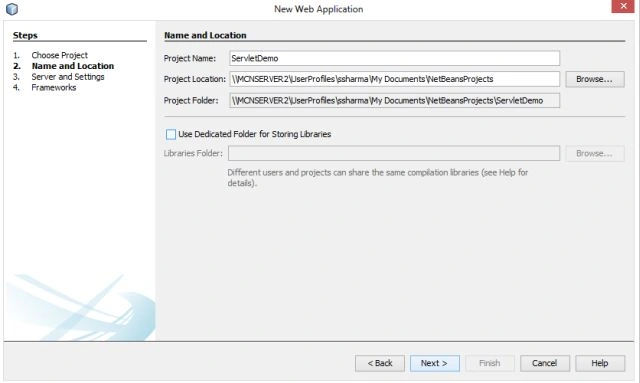
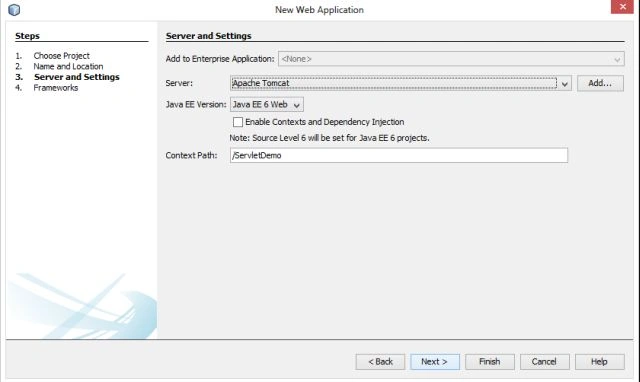
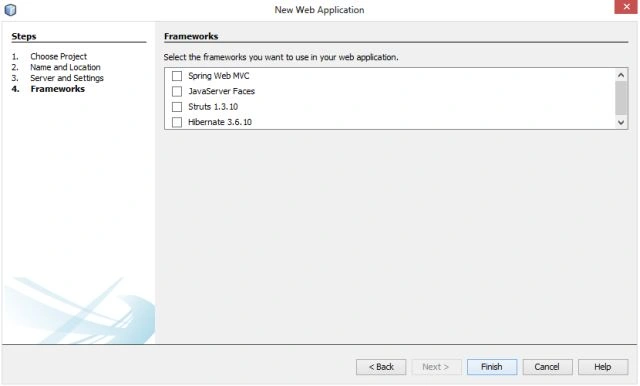
Select "Java Web" and "Web application" as in the following:
Join the conversation! Your thoughts help the community grow.