

Introduction
In this article I explain how to easily set up the Zend Framework in Windows and a Wamp Server and here is the procedure for easily installing Zend and how to use the Zend Framework.
Step 1
Download ZendFrame_work from http://framework.zend.com/ And put it into wamp/www root, if you want to then you can rename it.
Step 2
After the compilation of Step 1, open the php.ini file and set the include path as your zendframe_work library path.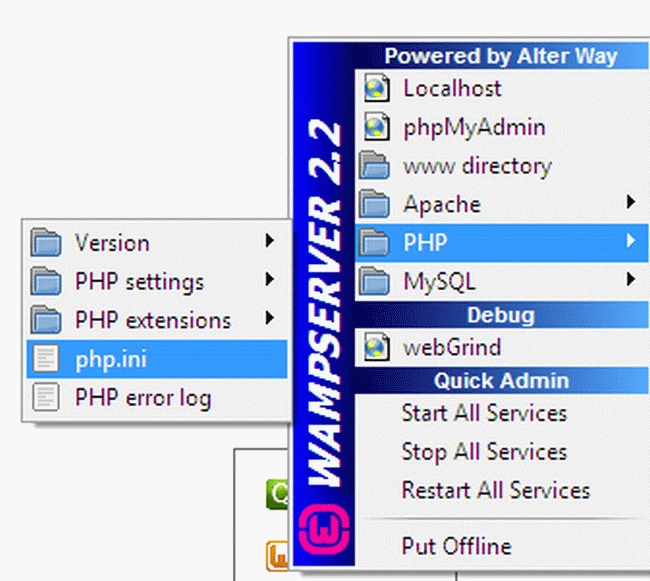
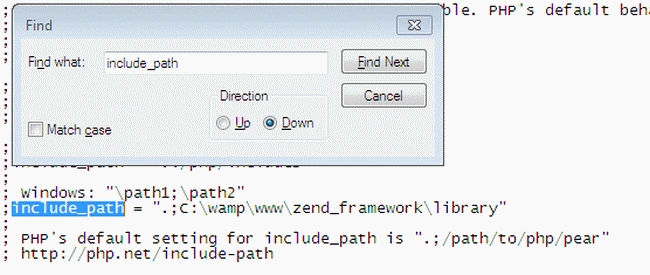
Step 3
Create your test app (Zend project). Open a cmmand prompt and then go to the "zendframe_work" bin path, where zf.exe exists, then run the image command "zf".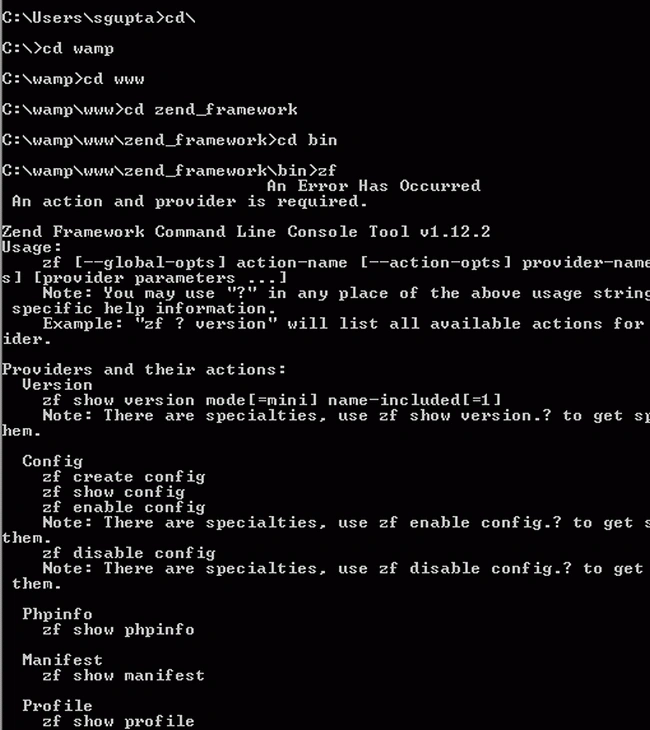
After the running this command create the Zend Framework project.

Step 4
After doing Step 4, include the "conf/extra/httpd-vhosts.conf" file and write the following lines into your "httpd.config" file:
<VirtualHost *:80>
DocumentRoot /wamp/www
</VirtualHost>
<VirtualHost *:80>
ServerName zendy.localhost
DocumentRoot /wamp/www/Zendy/public
SetEnv APPLICATION_ENV "development"
# (if needed:)
# <Directory /wamp/www/Zendy/public>
# DirectoryIndex index.php
# AllowOverride All
# Order allow,deny
# Allow from all
# </Directory>
</VirtualHost>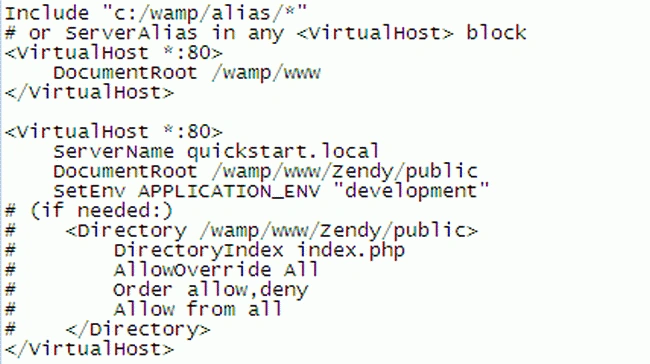
Step 5
Then go to "C:" -> "windows" -> "system32" -> "drivers" -> "etc" -> "temphost", then change it as in: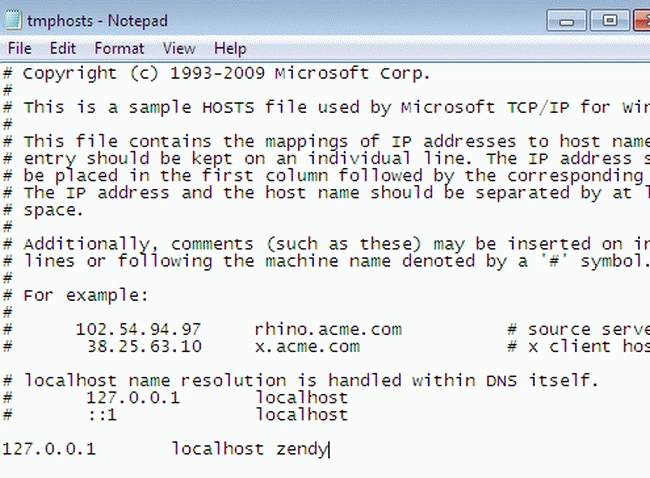
Step 6
Now you will see that your project has been added in your localhost root.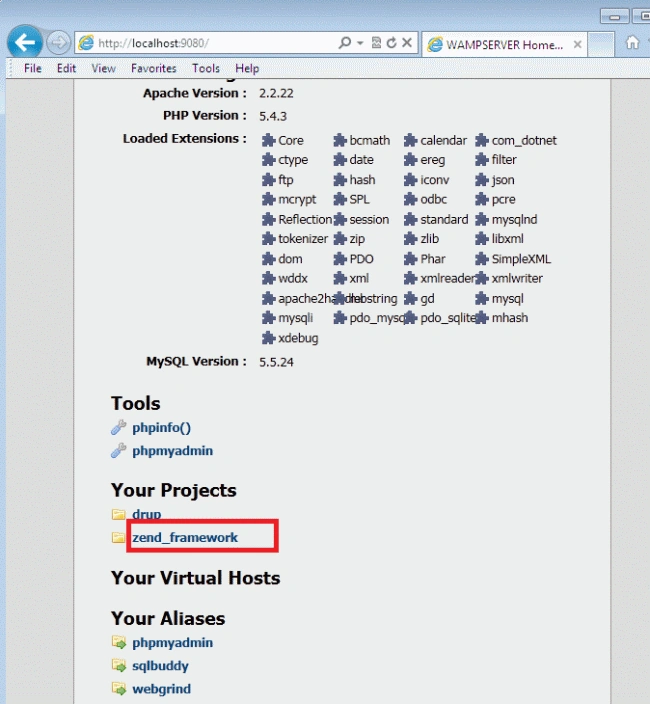
Step 7
Now run it:
http://localhost:9080/zend_framework/bin/zendy/public, then the output will look like:
Comments
Join the conversation! Your thoughts help the community grow.