

Prerequisites
- Microsoft Azure Subscription (MSDN subscribers or sign up for one month free trial).
- Visual Studio 2013 or Visual Studio 2015. To download web installer or ISO file, please click here.
You will learn:
- How to create SQL Server.
- How to create SQL Database.
- How to connect SQL Database to teh Visual Studio.
Getting Started with SQL
To learn how to create SQL database on Microsoft Azure, please refer to the below article:
Getting Started with PHP Website
Step 1: Click on “All resources” & choose MySQL Server.
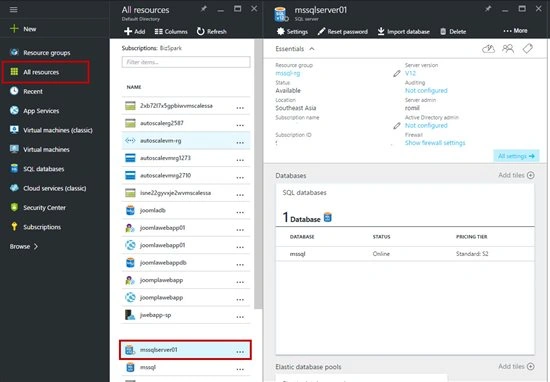
Note: If you do not see the option for Firewall on the blade you are looking at, go back and make sure that you are looking at the blade for the SQL Database logical server and not the blade for a SQL database.
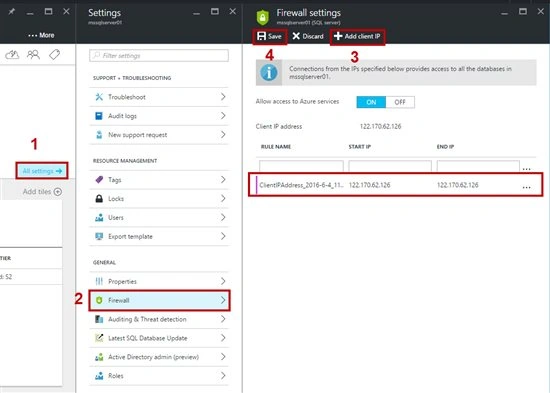
Step 2: Click on “All Settings” option & select “Firewall” from the list. Add client ip to the firewall rules & save it.
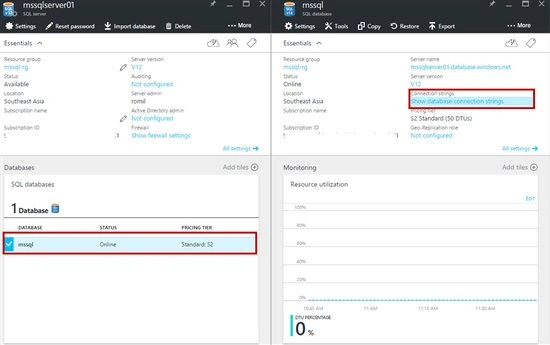
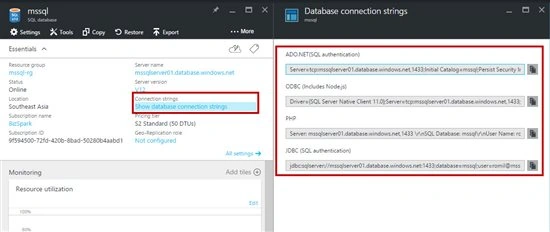
Step 3: Now, select MySQL Database & click on “Show database Connection strings”. All connection strings are available here like, ADO.NET, ODBC, PHP, JDBC.
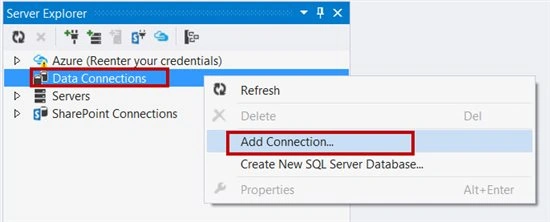
Step 4: Start Visual Studio 2013 or 2015. Open Server Explorer (if not available select View Menu -> Server Explorer).
Right click on Data Connections & select “Add Connection…” option.
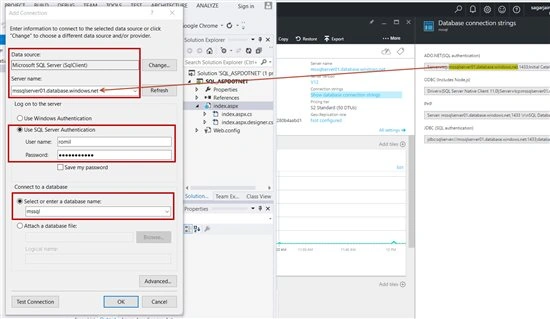
Step 5: Choose Data source as Microsoft SQL Server. Copy Server name from Azure Portal. Enter SQL Server Authentication – Username & Password. Within a few seconds, database name will show in the drop menu.
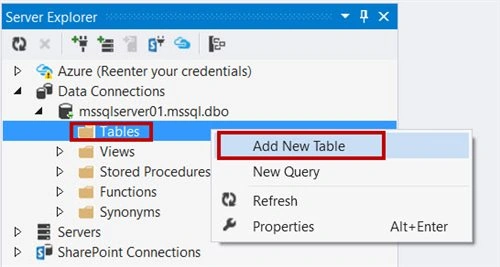
Step 6: After successful connection, we need to create Table. Right click on Tables folder & select “Add New Table” option.
Step 7: First, click on Id column & change the Identity to True value.
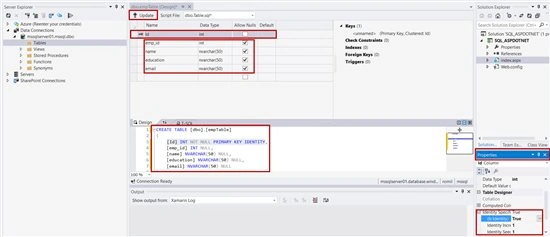
Complete Table Definition, available below.
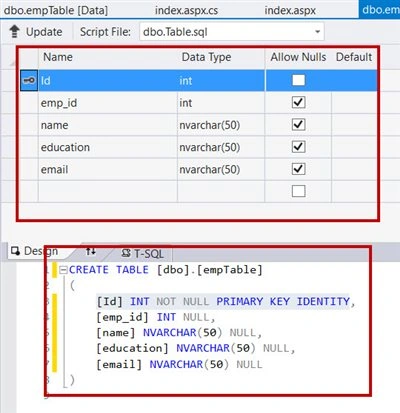
Update Database.
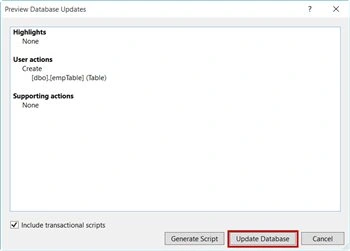
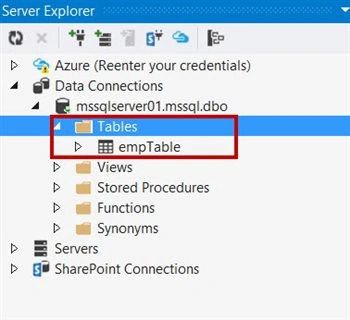
Just right click on Tables folder & select refresh option to get new table.
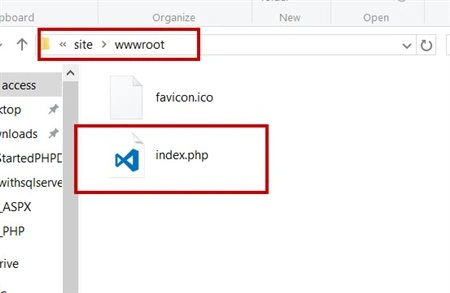
Step 8: Open notepad or any other editor. Copy the below code and save it as index.php.
- <html>
- <head>
- <Title>Azure SQL Database - PHP Website</Title>
- </head>
- <body>
- <form method="post" action="?action=add" enctype="multipart/form-data" >
- Emp Id <input type="text" name="t_emp_id" id="t_emp_id"/></br>
- Name <input type="text" name="t_name" id="t_name"/></br>
- Education <input type="text" name="t_education" id="t_education"/></br>
- E-mail address <input type="text" name="t_email" id="t_email"/></br>
- <input type="submit" name="submit" value="Submit" />
- </form>
- <?php
- /*Connect using SQL Server authentication.*/
- $serverName = "tcp:servername.database.windows.net,1433";
- $connectionOptions = array(
- "Database" => "DBName",
- "UID" => "Username",
- "PWD" => "Password"
- );
- $conn = sqlsrv_connect($serverName, $connectionOptions);
- if ($conn === false)
- {
- die(print_r(sqlsrv_errors() , true));
- }
- if (isset($_GET['action']))
- {
- if ($_GET['action'] == 'add')
- {
- /*Insert data.*/
- $insertSql = "INSERT INTO empTable (emp_id,name,education,email)
- VALUES (?,?,?,?)";
- $params = array(&$_POST['t_emp_id'], &$_POST['t_name'], &$_POST['t_education'], &$_POST['t_email']
- );
- $stmt = sqlsrv_query($conn, $insertSql, $params);
- if ($stmt === false)
- {
- /*Handle the case of a duplicte e-mail address.*/
- $errors = sqlsrv_errors();
- if ($errors[0]['code'] == 2601)
- {
- echo "The e-mail address you entered has already been used.</br>";
- }
- /*Die if other errors occurred.*/
- else
- {
- die(print_r($errors, true));
- }
- }
- else
- {
- echo "Registration complete.</br>";
- }
- }
- }
- /*Display registered people.*/
- /*$sql = "SELECT * FROM empTable ORDER BY name";
- $stmt = sqlsrv_query($conn, $sql);
- if($stmt === false)
- {
- die(print_r(sqlsrv_errors(), true));
- }
- if(sqlsrv_has_rows($stmt))
- {
- print("<table border='1px'>");
- print("<tr><td>Emp Id</td>");
- print("<td>Name</td>");
- print("<td>education</td>");
- print("<td>Email</td></tr>");
- while($row = sqlsrv_fetch_array($stmt))
- {
- print("<tr><td>".$row['emp_id']."</td>");
- print("<td>".$row['name']."</td>");
- print("<td>".$row['education']."</td>");
- print("<td>".$row['email']."</td></tr>");
- }
- print("</table>");
- }*/
- ?>
- </body>
- </html>
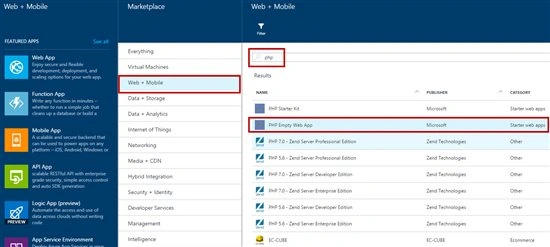
Click on +New -> Web + Mobile -> click on “See all” option.
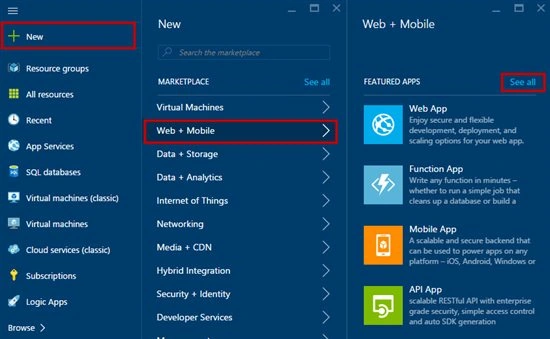
Search for “PHP”.
In search results, select “PHP Empty Web App”.
Click on “Create” button.
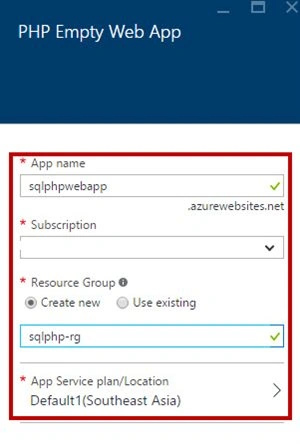
Step 10: Enter the Web App name, resource group, and app service plan.
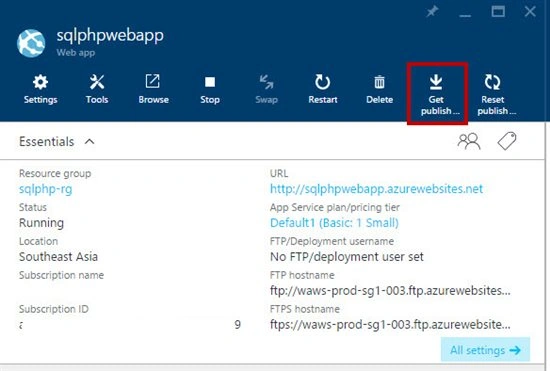
Click on “Get Publish Settings” option. Publish Settings file will be downloaded. Use FileZilla or file explorer to host the PHP file on Azure.
Step 11: Run the Website.
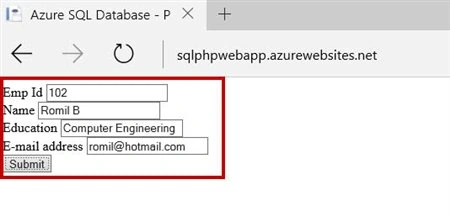
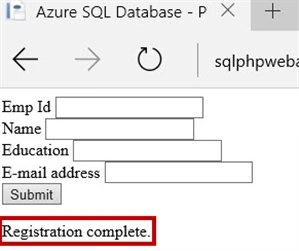
Step 12: To check the data, right click on Table & select “Show Table Data” option.
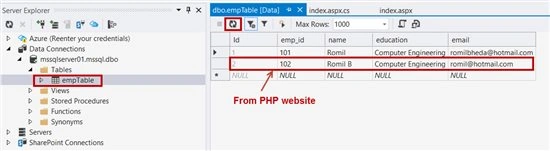
Congratulations! You have successfully inserted the data using PHP Website on Microsoft Azure!
Vivek KumarPosted Aug 2, 2016, 1:33 PM
Nice
Shobana JPosted Jul 16, 2016, 6:33 AM
Nice one
jaymin sutharPosted Jul 16, 2016, 2:26 AM
Nice
Vignesh ManiPosted Jul 15, 2016, 4:29 PM
Nice