

Introduction to AWS Elastic Block Store
In this article, we are going to learn about AWS EBS service and we will be covering the below topics,
- Introduction to AWS Elastic Block Store.
- The real-life use case for using AWS EBS service.
So, let’s get started step by step.
INTRODUCTION TO AWS ELASTIC BLOCK STORE
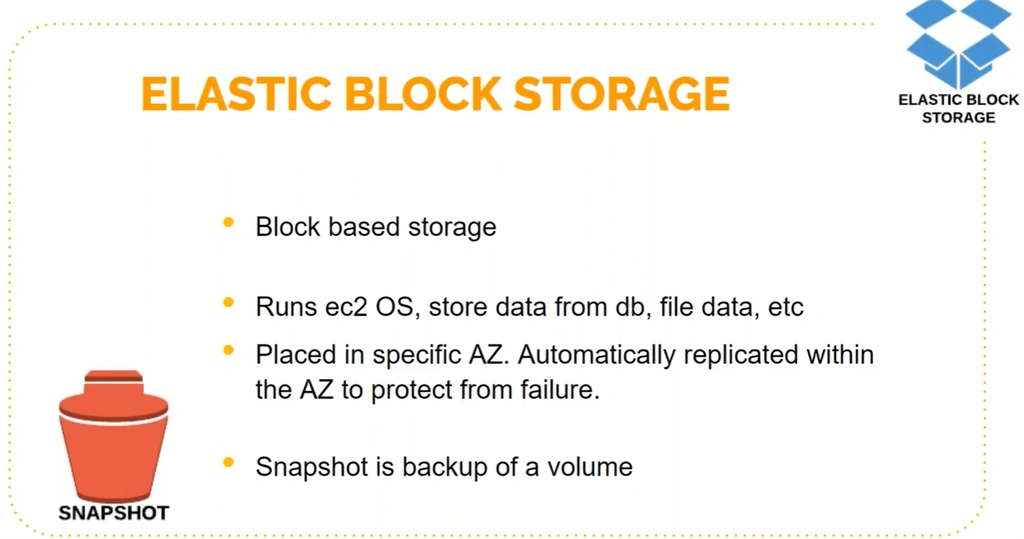
Amazon Elastic Block Store (Amazon EBS) provides persistent block storage volumes for use with Amazon EC2 instances. Each EBS volume is automatically replicated within its Availability Zone to protect you from the component failure, offering high availability and durability.
EBS volumes offer the consistent and low-latency performance needed to run your workloads. With EBS, we can scale our usage up or down within minutes, all by paying a low price for only what you provision.
IMPORTANT TO NOTE HERE,
- EBS volumes cannot be copied from one AWS region to another.
- To make a volume available outside of the Availability Zone, you can create a snapshot and restore that snapshot to a new volume anywhere in that region.
- You can copy snapshots to other regions and then restore them to new volumes there, making it easier to leverage multiple AWS regions for geographical expansion or disaster recovery.
We will be learning Snapshot in the coming parts of Introduction to AWS Elastic Block Store.
REAL LIFE USE CASE FOR USING AWS EBS SERVICE
We may get a requirement where we need to increase the disk space after we launch our EC2 instance from the AMI.
AMI will have some size like 8GB or 10GB and that will be the root volume. So, if we want extra disk space then we can extend the root volume from 8GB to suppose 100GB. But usually, we don’t do it this way.
Instead, we create a new volume and attach it with our instance.
Now let’s take the requirement which we are going to fulfill,
- Create a new EC2 instance with CentOS 7 for QA Environment.
- Storage size should be 5 GB for directory /opt/devdata.
- Allow port 80 for HTTP and port 22 for SSH.
- The owner has to be the QA team.
Here we need to have a 5GB of storage on directory /opt/devdata and this directory should be a separate partition with 5GB of storage size.
SOLUTION
We can achieve the above-mentioned requirement by using ELASTIC BLOCK STORAGE and we can think of it as a virtual hard disk, which one can plug and use.
This is block-based storage which means that we have to create a partition, format it, and then mount it, i.e., we store data. Each block acts as an individual hard drive.
There is also file-based storage like Google Drive where we don’t do partition, we simply put our files there and start using it.
Now, let’s get started with the below steps,
Step 1
Start by launching a CentOS 7 EC2 instance and we have seen already in one of my previous articles Host Your Sample App In AWS Instance Using EC2 Service how we can launch an EC2 instance.
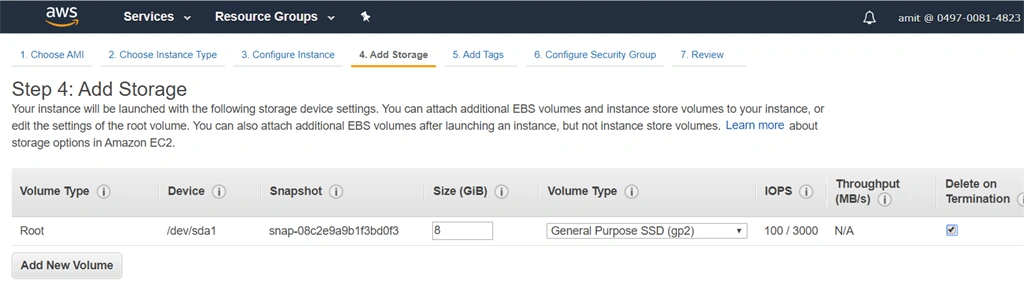
We can see that this is a root volume /dev/sda1 with default 8GB of size which we get by default when we create a new instance.
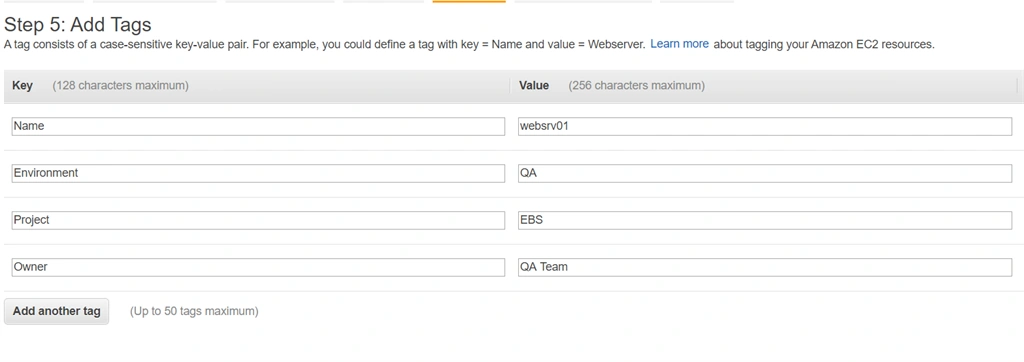
We will add the tags to this EC2 instance as shown above.
Step 2
I will create a new security group with the name EBS-sg and will set the inbound rules for HTTP and SSH service.
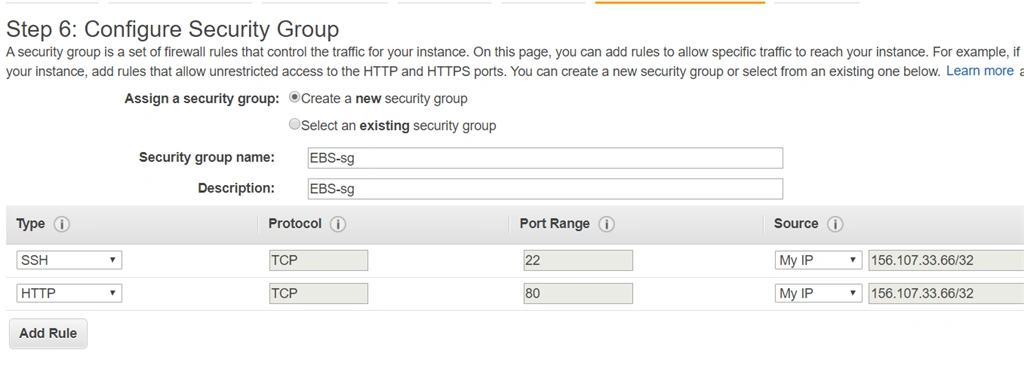
And will allow the ports 22 and 80 from my IP.
Step 3
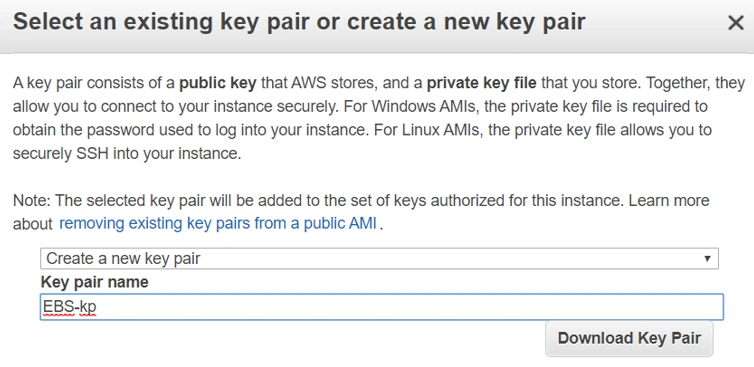
Then we will create the new key pair EBS-kp to login to this instance.
Step 4
Finally, will launch the instance post reviewing whatever we have configured and will connect to it using SSH as shown below.


Step 5
Once we get logged in to the machine, we will switch to the root user and run the below command.
fdisk -l
OUTPUT
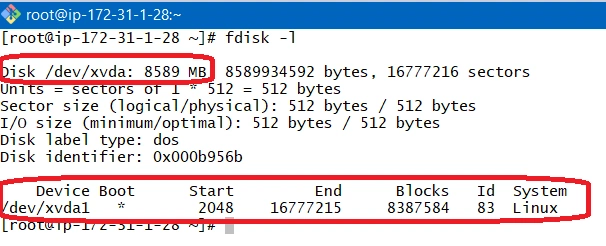
This command is going to list all the hard disk attached to our Linux OS which is CentOS 7 in our case. Here, we can see that this machine has a root volume named /dev/xvda with a size of 8GB and has one partition /dev/xvda1.
So, by now, we have set up a CentOS 7 EC2 instance and allowed port 80 for HTTP and port 22 for SSH. We have also mentioned the owner of this EC2 instance as the QA team.
Summary
In this article, we have gone through the introduction to AWS EBS service and have also set up the EC2 instance for our real-life use case. In the next article, we will understand some interesting facts about disks and partitions and will also see how we can create partitions and many more things.
I hope you find this article helpful. Stay tuned for more … Cheers!!
Join the conversation! Your thoughts help the community grow.