

Introduction
- The IR Proximity sensor is to perceiver the occurrence of any object without beginning in contact with with-it.
- It senses the accurate distance of a particular object.
- It will emit electromagnetic radiation.
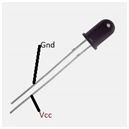 Figure1: IR sensor
IR LED Emitter:
- It will also emit light.
- When the object occurs it will produce light
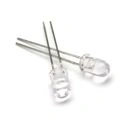 Figure 2: IR Emitter
Parts Of List:
- Arduino UNO
- IR Led Receiver
- IR Emitter
- Bread Board
- Hookup Wires
- Buzzer
Connection
Step 1: Fix the IR Receiver on the breadboard.
Step 2: Fix the IR Emitter 4 on the breadboard.
Connection Of Bread Board To Arduino:
Step 1: Take the IR Receiver Gnd pin to the Analog pin A0, then Vcc to the Digital pin 02.
Step 2: Take the IR Emitter to connect the Gnd pins commonly then Vcc pins commonly.
Step 3: Connect to the Arduino UNO board.
Step 4: Fix the buzzer in the Arduino board.
Program:
- int IRpin = A0; // IR photodiode on analog pin A0
- int IRemitter = 2; // IR emitter LED on digital pin 2
- int ambientIR; // variable to store the IR coming from the ambient
- int obstacleIR; // variable to store the IR coming from the object
- int value[10]; // variable to store the IR values
- int distance; // variable that will tell if there is an obstacle or not
- void setup()
- {
- Serial.begin(9600); // initializing Serial monitor
- pinMode(IRemitter, OUTPUT); // IR emitter LED on digital pin 2
- digitalWrite(IRemitter, LOW); // setup IR LED as off
- pinMode(11, OUTPUT); // buzzer in digital pin 11
- }
- void loop()
- {
- distance = readIR(5); // calling the function that will read the distance and passing the "accuracy" to it
- Serial.println(distance); // writing the read value on Serial monitor
- // buzzer(); // uncomment to activate the buzzer function
- }
- int readIR(int times)
- {
- for (int x = 0; x < times; x++)
- {
- digitalWrite(IRemitter, LOW); //turning the IR LEDs off to read the IR coming from the ambient
- delay(1); // minimum delay necessary to read values
- ambientIR = analogRead(IRpin); // storing IR coming from the ambient
- digitalWrite(IRemitter, HIGH); //turning the IR LEDs on to read the IR coming from the obstacle
- delay(1); // minimum delay necessary to read values
- obstacleIR = analogRead(IRpin); // storing IR coming from the obstacle
- value[x] = ambientIR - obstacleIR; // calculating changes in IR values and storing it for future average
- }
- for (int x = 0; x < times; x++) { // calculating the average based on the "accuracy"
- distance += value[x];
- }
- return (distance / times); // return the final value
- }
- void buzzer()
- {
- if (distance > 1)
- {
- if (distance > 100)
- {
- digitalWrite(11, HIGH);
- } else
- {
- digitalWrite(11, HIGH);
- delay(150 - distance); // adjust this value for your convenience
- digitalWrite(11, LOW);
- delay(150 - distance); // adjust this value for your convenience
- }
- } else
- {
- digitalWrite(11, LOW);
- }
- }
- In this article it can be used to detect the object at a particular distance.
- It can display the distance of an object in the Serial Monitor accurately.
- If they have the signal of the object it will produce the sound when it reaches the signal.
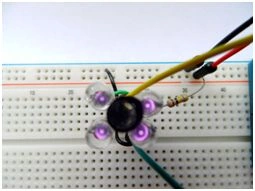 Figure 3: Output
Read more articles on Arduino:
Sr KarthigaPosted Apr 19, 2016, 7:14 AM
"thank you gowtham rajamanickam sir"
Gowtham RajamanickamPosted Apr 19, 2016, 6:42 AM
good article
Sr KarthigaPosted Feb 10, 2016, 2:38 AM
Thank you Anu Vivin sir
Anu VPosted Feb 10, 2016, 1:43 AM
Nice
Sr KarthigaPosted Feb 9, 2016, 8:48 AM
Thank you raja sir
Raja TPosted Feb 9, 2016, 8:46 AM
Nice, Thanks for sharing
Sibeesh VenuPosted Feb 8, 2016, 12:12 AM
Nice Share
Sr KarthigaPosted Feb 7, 2016, 4:32 AM
Arduino is a microcontroller based physical computing platform. Rasberry pie is microprocessor based single-board computer (SBC).
Sr KarthigaPosted Feb 7, 2016, 4:27 AM
Thank you Shubham Kumar sir
Saillesh PawarPosted Feb 7, 2016, 1:24 AM
what is the difference between Arduino and Rasberry pie?
Shubham KumarPosted Feb 6, 2016, 6:57 AM
nice
Sr KarthigaPosted Feb 5, 2016, 8:45 PM
Thank you Jaco Zwarts sir
Sr KarthigaPosted Feb 5, 2016, 8:45 PM
Thank you Pramod Thakur sir
Sr KarthigaPosted Feb 5, 2016, 8:44 PM
Thank you Mohammed sir
Sr KarthigaPosted Feb 5, 2016, 8:44 PM
Thank you santhakumar sir
Sr KarthigaPosted Feb 5, 2016, 8:42 PM
Thank you kumaresh sir
Santhakumar MunuswamyPosted Feb 5, 2016, 3:32 PM
Thanks for nice article. Keep it up
Kumaresh RajalingamPosted Feb 5, 2016, 2:19 PM
Nice share
Mohammed IbrahimPosted Feb 5, 2016, 1:12 PM
nice
Jaco ZwartsPosted Feb 5, 2016, 12:17 PM
Nice, Thank you for sharing
Pramod ThakurPosted Feb 5, 2016, 11:30 AM
thanks for sharing..