

Introduction
This article explains the Web API 2. Here I just explain the Web API 2 Controller, Model class and show how to run this application on Fiddler. We know that the Web API 2 is the second version of the Web API. So the Web API 2 contains all the features of the Web API including some new features such as:
- Attribute Routing.
- IHttpActionResult.
- Web API OData.
- Cors- Cross Origin Resource Sharing.
- OWIN
Now we see how to create an application using Web API 2 and run it using Fiddler tool.
- How we create an application using Visual Studio 2013.
- Start Visual Studio 2013.
- From the Start Window select "New Project".
- Select "Installed" -> "Templates" -> "Visual C#" -> "Web" and select ASP.NET Web Application.
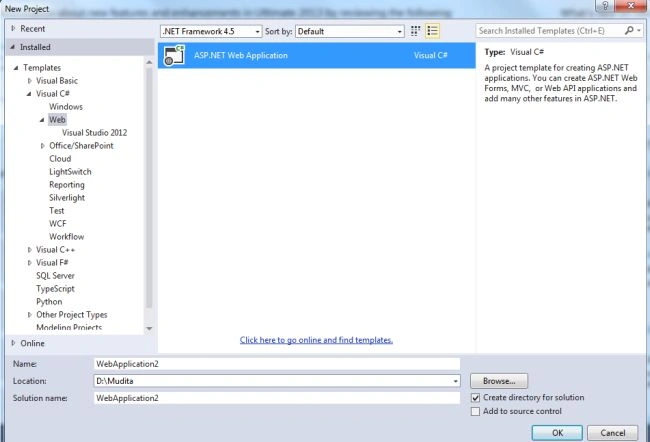
- Click on the "OK" button.
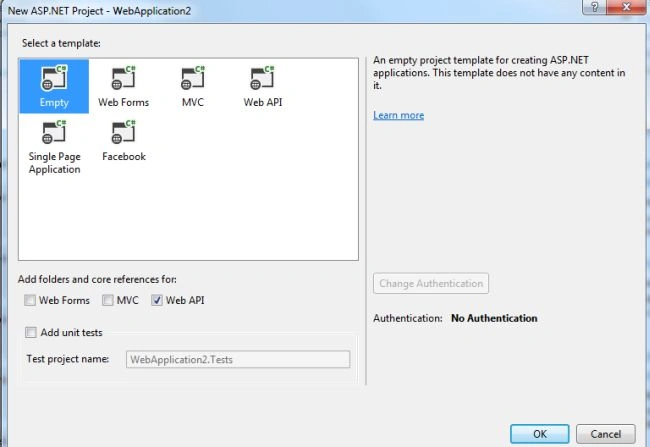
- From the ASP.Net project window select "Empty" and select the "Web API" check box.
- Click on the "Create Project" button.
- Use the following procedure to install the necessary package from the NuGet Package Manager:
- Go To the "Tools" Menu.
- Select "Library Package Manager".
- Then select "Manage NuGet Package for Solution".
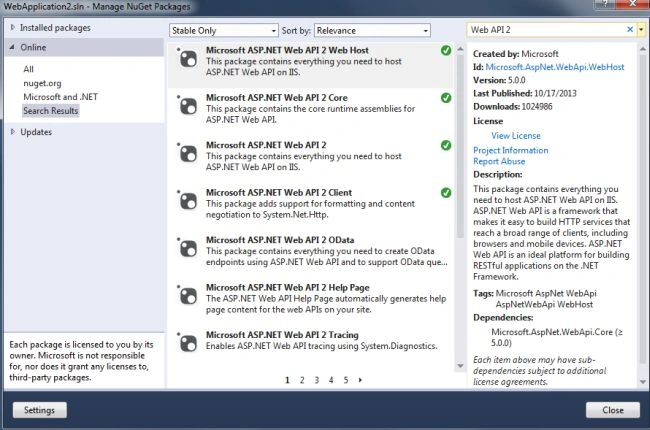
- In the search box type "Web API" and install the necessary package.
- Use the following procedure to create a Model class:
- In the "Solution Explorer".
- Right-click on the Model Folder.
- Select "Add" -> "Class".
- Select "Installed" -> "Visual C#" and select "Class".
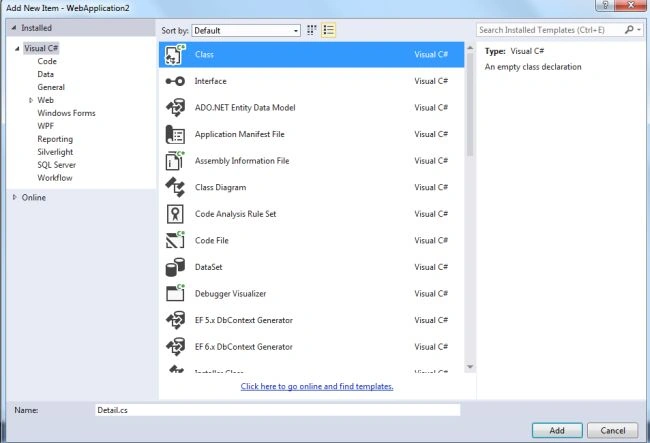
- Click on the "OK" button.
Add the following code:
- using System;
- using System.Collections.Generic;
- using System.Linq;
- using System.Web;
- namespace WebApplication2.Models
- {
- public class Detail
- {
- public int ID { get; set; }
- public string Name { get; set; }
- public string Address { get; set; }
- }
- }
- Use the following procedure to create a Web API 2 Controller:
-
In the "Solution Explorer".
-
Right-click on the "Controller" folder.
- Select the "Controller" and from the controller window select "Common" -> "Web API".
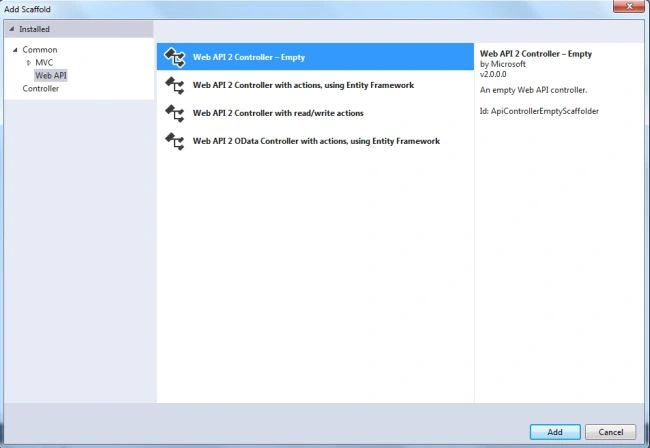
- Select the "Web API 2 Empty Controller" and click on the "Add" button.

- Change the name and click on the "Add" button.
Add the following Code:
- using System;
- using System.Collections.Generic;
- using System.Linq;
- using System.Net;
- using System.Net.Http;
- using System.Web.Http;
- using WebApplication2.Models;
- namespace WebApplication2.Controllers
- {
- public class DetailsController : ApiController
- {
- Detail[] details = new Detail[]
- {
- new Detail{ID=1, Name="Employee1", Address="Address1"},
- new Detail{ID=2, Name="Employee2", Address="Address2"},
- new Detail{ID=3, Name="Employee3", Address="Address3"},
- new Detail{ID=4, Name="Employee4", Address="Address4"},
- new Detail{ID=5, Name="Employee5", Address="Address5"},
- new Detail{ID=6, Name="Employee6", Address="Address6"}
- };
- public IEnumerable<Detail> GetAllDetail()
- {
- return details;
- }
- public IHttpActionResult GetDetailByID(int id)
- {
- var detail = details.FirstOrDefault((p) => p.ID == id);
- if(detail==null)
- {
- return NotFound();
- }
- return Ok(detail);
- }
- }
- }
-
- Execute the application and copy the URL.
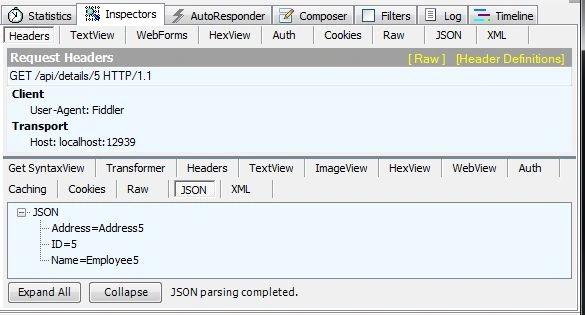
- Open Fiddler and cllick on the "Composer" tab and paste the URL. The URL is "http://localhost:12939/api/details". Click on the "Execute" button; it will then display all the details.

- For finding the details by ID change the URL to http://localhost:12939/api/details/5. It displays the details of Id 5.
Join the conversation! Your thoughts help the community grow.