

Introduction
This article provides a walkthrough of how to use MVC with Visual Studio LightSwitch. In my previous articles we saw how to get started by creating a LightSwitch application. You can get them from the following:
Now let's continue by creating the remaining.
- Step 1 Right-click on the server application and add a Global.asax file and use the following code.
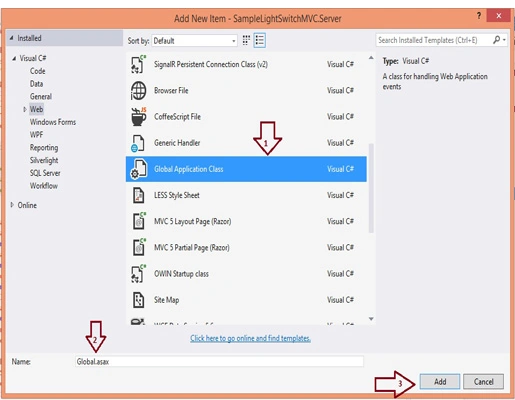
The call passes the the Routes collection of the Global RouteTable as a parameter to the RegisterRoutes method, that then populates the routes collection with pre-defined route templates for the application.
- using System.Web.Mvc;
- using System.Web.Routing;
- namespace LightSwitchApplication
- {
- public class Global : System.Web.HttpApplication
- {
- protected void Application_Start()
- {
- AreaRegistration.RegisterAllAreas();
- RouteConfig.RegisterRoutes(RouteTable.Routes);
- }
- }
- }
- Step 2: Now Let's create a MVC controller under the Conrollers folder and add the following implementation.
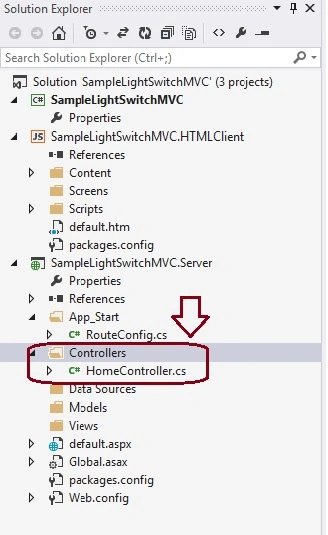
- using System.Web.Mvc;
- namespace LightSwitchApplication.Controllers
- {
- public class HomeController : Controller
- {
- public ActionResult Index()
- {
- return View();
- }
- }
- }
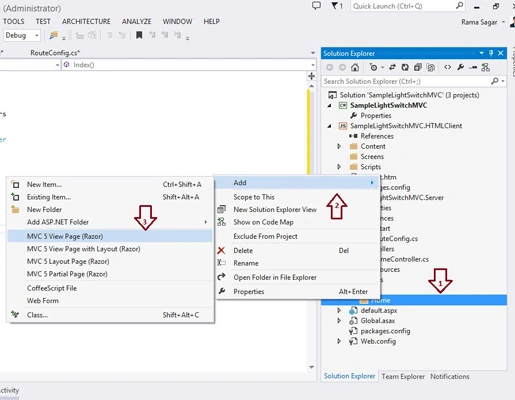
- Step 3: Let's create a MVC view under the Views folder.
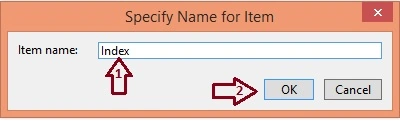
Right-click on the Views folder and add a Home Folder and create a MVC5 Razor view under it as shown below.
- @{
- Layout = null;
- }
- <!DOCTYPE html>
- <html>
- <head>
- <meta name="HandheldFriendly" content="true" />
- <meta name="viewport" content="width=device-width,
- initial-scale=1, minimum-scale=1, maximum-scale=1, user-scalable=no" />
- <title>Welcome to Lightswitch with Model View Controller</title>
- </head>
- <body>
- <div>
- <h1>Hello from MVC!</h1>
- <a href="HTMLClient">LightSwitch Application</a>
- </div>
- </body>
- </html>
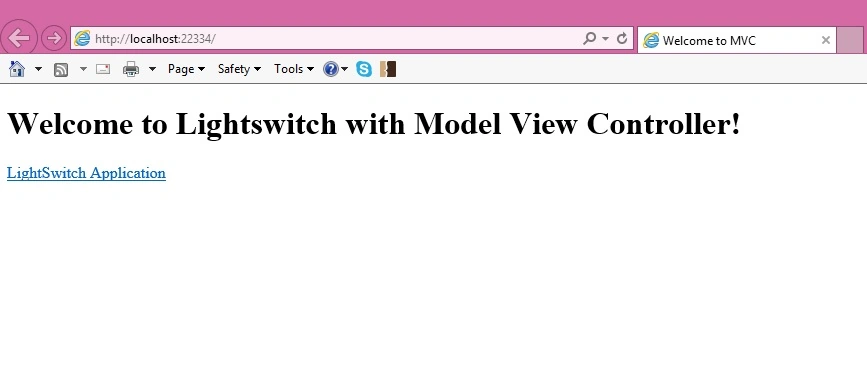
Summary
In this small article, I explained how to prepare a LightSwitch application to use MVC, so now we are able to follow the structure of MVC in Lightswitch..
Join the conversation! Your thoughts help the community grow.