

Welcome to the parallel programing series that will solely focus on the Task Programming Library (TPL) released as a part of .Net Framework 4.0 along with its support classes.
The entire series will consist of the following parts:
- Parallel Programming Part 1: Introducing Task Programming Library
- Parallel Programming Part 2: Waiting for Tasks And Exceptions Handling
- Parallel Programming Part 3: Synchronization
- Parallel Programming Part 4: Parallel Loops
- Parallel Programming Part 5: PLINQ
- Parallel Programming Part 6: Tasks Coordination
Now let's dive deeper into this truly amazing library.
Introduction To Parallel Programming
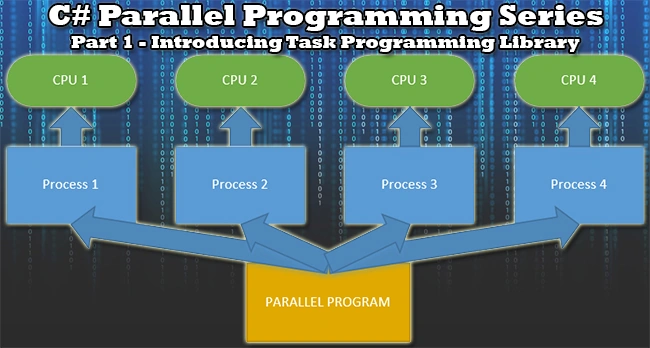
Parallel programming is a programming model wherein the execution flow of the application is broken up into pieces that will be done at the same time (concurrently) by multiple cores, processors, or computers for the sake of better performance. Spreading these pieces across them can reduce the overall time needed to complete the work and/or improve the user's experience. However, this is not always the case as there are several pitfalls you need to be aware of and we will certainly discuss them through the series.
The idea of parallelism is not new, but years ago the availability of multi-cores processors was low so only the employees of research labs were able to take advantage of it. Thankfully, the times have changed and processors have greatly evolved. The current mobile devices have more than one core and four or eight cores for PCs are pretty common.
Still, the developers are not as aware of the features of the TPL or of the advantages of parallel programming as they should be. Therefore, the main goal of this series is to introduce the new TPL library and show how easy it is to use it compared to the old classic threading model. In the end, you should be able to incorporate it into your current projects or implement it in the new ones. Of course, if needed.
When To Go Parallel
The entire parallelism concept is nothing more than just a performance play. That is its key benefit. Even though there are some scenarios where concurrent execution is a clear solution, you usually can't just automatically assume that dividing the workload over several cores will outperform the sequential execution, so a lot of measurement is usually involved. For this purpose, Stopwatch from the System.Diagnostics namespace usually meets all the requirements needed.
"Going parallel" is not a cure for everything since there are some caveats you should definitely be aware of. With these in mind, you should be able to make the proper and educated decision whether to stay sequential or dive into parallel programming.
Additional overhead: there is always some overhead involved since the TPL engine needs to manage all the features. So if you have just a small amount of work to do, running it concurrently may not outperform the sequential version.
Data coordination: if your pieces of work need to access and alter the same data or resources, you will need to add some kind of coordination. The more of it, the worse parallel performance you will achieve. However, if the pieces are independent and isolated from each other, there is nothing to worry about.
Scaling: the TPL engine will usually take care of all the scaling. Still, there are cases when you need to do it by yourself. Even though there are many options available to play with, these will usually give you uncertain results, so be ready to play the "hit or miss" game. This is due to various hardware designs and their limits. Whereas adding new cores can provide you a significant performance improvement, new cores might not be used 100% and there is a point where it won't improve the performance at all.
Beginning With Task Programming Library
The support of parallel programming within the .Net framework is not new since it is supported from its very first version 1.0. We refer to this as a classic threading model. Even though it works really well, managing all the parallel aspects is complicated, so many times the applications end with unexpected results.
On the other hand, the TPL is built on the foundation of the classic threading features and manages many aspects for you, so you will need to write less code to achieve the same behavior. Actually, the reduction of the amount of code is huge.
We start with the basics of the Task class that can be considered to be the heart of the entire library. Please note that as long as you want to rely on TPL's features, you need to reference the proper namespace in your project.
- using System.Threading.Tasks;
Creating And Starting New Task
In the simplest scenarios to create and start a task, you just need to provide its body that represents the workload you want to run in parallel by passing in a System.Action delegate. There are several ways to declare the task's body. These are listed below and demonstrated in the first example.
- Using Action delegate
- Using anonymous function
- Using lambda function
- static void HelloConsole()
- {
- Console.WriteLine("Hello Task");
- }
After creating a new instance of the Task class and passing the workload you want to perform in the constructor argument, you just need to call the instance Start() method to begin with the execution.
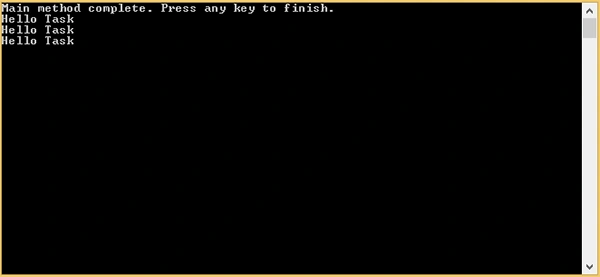
The following example shows the three options for declaring the Task object along with the console output.
- static void Main(string[] args)
- {
- //Action delegate
- Task task1 = new Task(new Action(HelloConsole));
- //anonymous function
- Task task2 = new Task(delegate
- {
- HelloConsole();
- });
- //lambda expression
- Task task3 = new Task(() => HelloConsole());
- task1.Start();
- task2.Start();
- task3.Start();
- Console.WriteLine("Main method complete. Press any key to finish.");
- Console.ReadKey();
- }
- Task.Factory.StartNew(() => {
- HelloConsole()
- });
Setting Task State
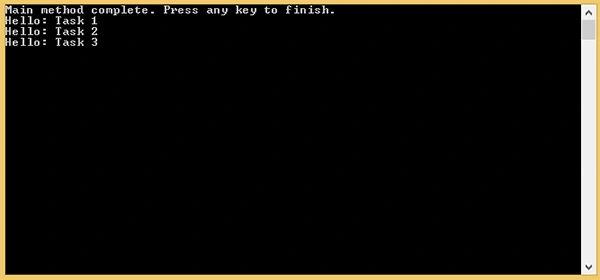
If you need to perform the same workload on a different set of data or just need to provide some parameter to the task, you need to pass in a System.Action<object> and an object representing these data/parameters. This process is very similar to supplying your console application with command line arguments. The following example shows this process by providing a simple string argument that will be printed to the console during the workload execution.- static void Main(string[] args)
- {
- //Action delegate
- Task task1 = new Task(new Action<object>(HelloConsole), "Task 1");
- //anonymous function
- Task task2 = new Task(delegate(object obj)
- {
- HelloConsole(obj);
- }, "Task 2");
- //lambda expression
- Task task3 = new Task((obj) => HelloConsole(obj), "Task 3");
- task1.Start();
- task2.Start();
- task3.Start();
- Console.WriteLine("Main method complete. Press any key to finish.");
- Console.ReadKey();
- }
We have also slightly altered the HelloConsole method that now accepts an object argument that will be printed to the console.
- static void HelloConsole(object message)
- {
- Console.WriteLine("Hello: {0}", message);
- }
Getting A Task's Result
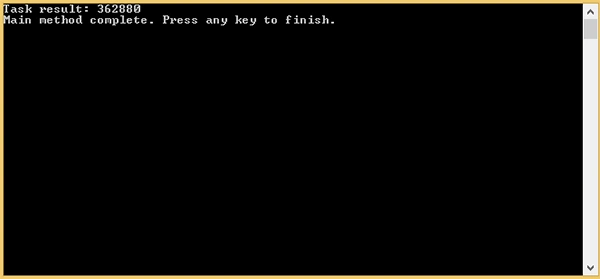
To get a result from a Task, you need to create an instance of Task<T> instead of just a pure Task. T represents the type of the result that will be returned. Returning the desired result is identical to other C# methods, so you use the "return" keyword. Finally, to fetch the result, you need to call the Result property. Note that reading this property will wait until its task has completed.
- static void Main(string[] args)
- {
- //creating the task
- Task<int> task1 = new Task<int>(() =>
- {
- int result = 1;
- for (int i = 1; i < 10; i++)
- result *= i;
- return result;
- });
- //starting the task
- task1.Start();
- //waiting for result - printing to the console
- Console.WriteLine("Task result: {0}", task1.Result);
- Console.WriteLine("Main method complete. Press any key to finish.");
- Console.ReadKey();
- }
Cancelling A Task
If we have more complex tasks that take some time to complete, we undoubtedly need a way how to cancel them before they finish if needed. For this purpose, the TPL introduced cancellation tokens that are used to cancel the given tasks. To be able to cancel a started task, we need to provide an instance of a CancellationToken in the task's constructor.
- Task task = new Task(() =>
- {
- //task's body
- }, token);
Acquiring this token is a two-step process:
- CancellationTokenSource cancellationTokenSource = new CancellationTokenSource();
Next, to get the required CancellationToken instance, we call the CancellationTokenSource.Token property:
- CancellationToken token = cancellationTokenSource.Token;
Finally, when the token is acquired and passed to the task's constructor, we simply call the Cancel() method of CancellationTokenSource to cancel it.
- cancellationTokenSource.Cancel();
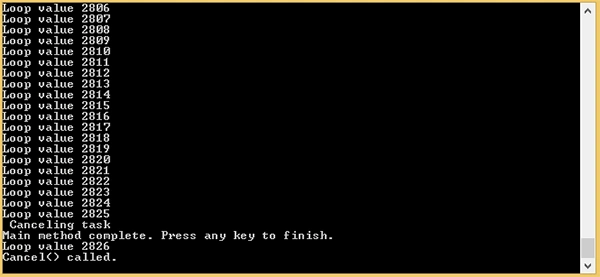
Calling the Cancel() method won't cancel the task immediately. Therefore, in the body of a given task you need to monitor the token whether a cancellation was requested by checking the token's IsCancellationRequested property. Once set to true, a cancellation was requested and you can cancel it either by calling "return" or throwing an OperationCanceledException.
The following example shows a basic use of cancellation tokens to cancel a running task.
- static void Main(string[] args)
- {
- //creating the cancelation token
- CancellationTokenSource cancellationTokenSource = new CancellationTokenSource();
- CancellationToken token = cancellationTokenSource.Token;
- //creating the task
- Task task = new Task(() =>
- {
- for (int i = 0; i < 100000; i++)
- {
- if (token.IsCancellationRequested)
- {
- Console.WriteLine("Cancel() called.");
- return;
- }
- Console.WriteLine("Loop value {0}", i);
- }
- }, token);
- Console.WriteLine("Press any key to start task");
- Console.WriteLine("Press any key again to cancel the running task");
- Console.ReadKey();
- //starting the task
- task.Start();
- //reading a console key
- Console.ReadKey();
- //canceling the task
- Console.WriteLine("Canceling task");
- cancellationTokenSource.Cancel();
- Console.WriteLine("Main method complete. Press any key to finish.");
- Console.ReadKey();
- }
Summary
The Task Programming Library is built on the classic threading model and greatly simplifies the management of concurrent workloads. As a result, it greatly reduces the amount of code we need to write thus helps to prevent typical problems that are associated with the older threading concept.
Peter GeePosted Jun 10, 2019, 8:50 AM
Hi, what has happened to part 3 to 6 - cannot access links?
Cultura, ComputadoresPosted Apr 27, 2019, 11:12 AM
Thank you Michael, for these group of tutorials.
imad deebPosted Feb 18, 2019, 5:34 AM
Hello. Great thank you. How could I open all the series from part 2 up to part 6.
Saghir AbidPosted Aug 23, 2018, 9:17 PM
Thanks, Very good article for TPL beginner.
laxmi narayanaPosted Apr 10, 2018, 8:43 AM
Good,nice,thank you
Nikunj KakadiyaPosted Dec 28, 2017, 7:17 AM
Great Article.......
Hamid KhanPosted Sep 11, 2017, 12:45 PM
Nice.................................................
jegadeesh GRPosted May 3, 2017, 5:57 AM
Thnak u so much @Michal
nk_lohaniPosted Dec 10, 2016, 9:29 PM
Good article worked well after implemented in module
Tapan DubeyPosted Aug 8, 2016, 1:03 AM
Great Explanation, thanks for sharing....
Former memberPosted May 21, 2016, 7:12 AM
Nice article
Ori EzraPosted Jun 24, 2015, 1:19 PM
AMAZING!!!! It was so clear and easy to understand
Santhakumar MunuswamyPosted Apr 16, 2015, 3:31 PM
Thanks for nice article
Srinivasan K KPosted Feb 20, 2015, 1:28 AM
Worthy to read this post.
Md. Raskinur RashidPosted Jan 19, 2015, 2:32 AM
Good explanation..
Abhishek KumarPosted Jan 18, 2015, 10:48 PM
Very Informative article...Thanks
Vithal WadjePosted Jan 18, 2015, 2:55 PM
nice michal keep it up
Manish Kumar ChoudharyPosted Jan 18, 2015, 8:22 AM
Nice one..
Gaurav Kumar AroraPosted Jan 18, 2015, 7:40 AM
nice start
Dinesh BeniwalPosted Jan 18, 2015, 7:38 AM
Great work.