

In this article, I’ll explain to you how to create Azure Search Service, using the Azure portal.
STEP 1 - Select Azure SearchGo to Azure Portal -> Create a resource -> Web-> Azure Search.

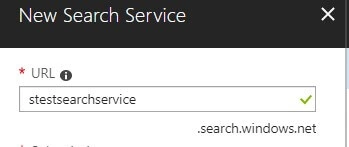
The following screen with "New Search Service" opens.

STEP 2 - Enter Service name
The service name must be unique and the name must contain the following required letters as shown -
Service name must only contain lowercase letters, digits or dashes; cannot use dash as the first two or last character; cannot contain consecutive dashes; and is limited between 2 and 60 characters in length.

I used the Service name as – stestsearchsearvice
Select the one you have or the Free subscription.

STEP 4 – Create / Select Resource Group
Resource Group – use existing OR Create a new one. I used an existing one.

STEP 5 – Select Location
Location – select the location as you prefer.

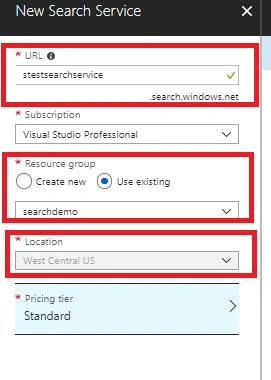
STEP 6 – Select Pricing Tier
There are six Pricing tiers in Azure Search service.
- Free(F) – no scaling
- Basic(B) – Load balancing up to 3 replicas, No Partitions
- Standard(S) – up to 12 partitions
- Standard(S2)
- Standard(S3)
- High-Density(S3) – high density enabled
- Free pricing tier has no scaling.
- Scaling starts from Basic tier onwards.
- FREE and BASIC tiers have no partitions. Partition starts with Standard(S) Pricing Tier onwards
- High density is available only in the S3 Pricing tier as name specified.

I selected the basic tier and clicked on Create.
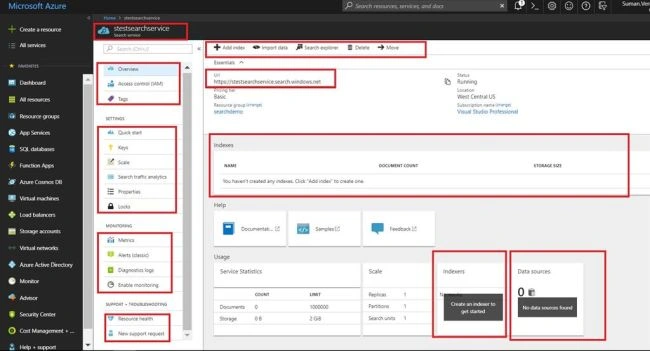
There we go -- bingo!!! Search service is created successfully, as shown on the dashboard. Click on ‘stestsearchservice’.
- Settings, monitoring and support sections
- Each section contains subsections and by selecting the one you can see the details on RHS.
SUMMARY
So in this article, we saw search service creation on the Azure portal with basic pricing tier and we saw differences among various tiers. In my next article, I’ll show you how to add indexes and creating indexers on Search service.
Happy reading.
Sumit DeshmukhPosted Aug 8, 2018, 9:57 AM
Nice share..