

In the previous article, we learned the basics of autocompletetextbox and also saw how to perform custom filtering.
There we used the ItemsSource property to fill the AutoCompleteBox with a collection of suggestions. For this to work we must have the complete list and it must be a manageable size. If we need to pull the information from somewhere else or the list is large enough that it isn't practical to load the whole thing at once, you'll need to take a different approach to filling the AutoCompleteBox.
So here in this article we will use a WCF web Service to pull the data and populate in textbox, and also apply custom filtering to populate only those data for which user is requesting.
In many scenarios, it often happens that we need a potentially time-consuming step to get the list of suggestions, such as performing a series of calculations or querying a web service. In this situation, you need to launch an asynchronous process, which we can achieve with multithreading, but some Silverlight features provide built-in asynchronous support.
So let us start writing a application to achieve this.
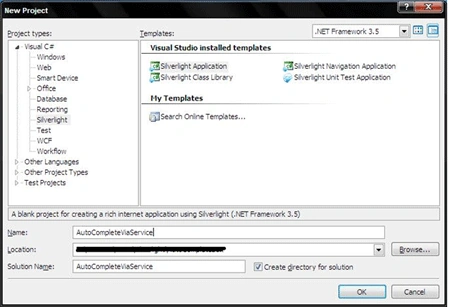
Step 1: Create a Silverlight application and name it "AutoCompleteViaService"
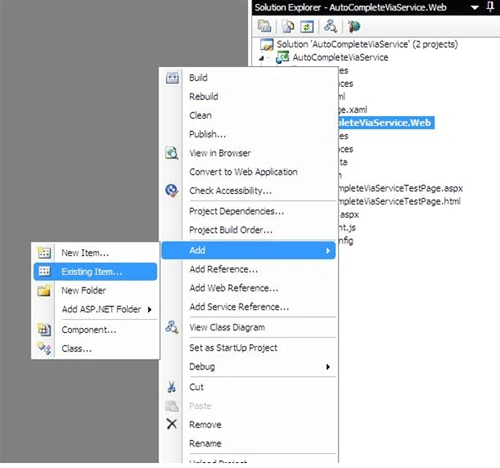
Step 2: Then we need to go to project which is hosting our Silverlight application and add a WCF service.
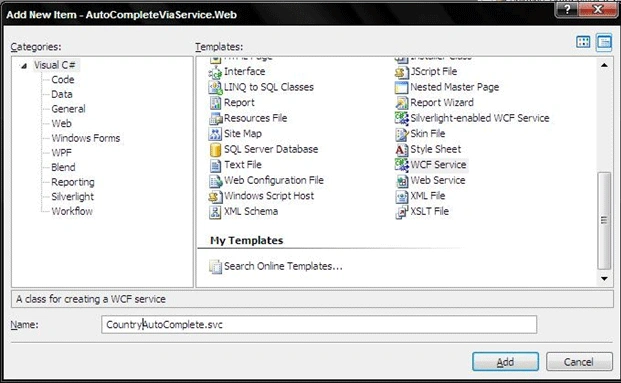
Step 3: Give a name to this WCF service.
Step 4: We will re-use the class from the last article that we created and put in CountryAutoComplete.svc. So open CountryAutoComplete.svc.cs and add country class:
[DataContract]
public class Country
{
[DataMember]
public string countryname { get; set; }
[DataMember]
public string countrycode { get; set; }
public Country(string countryName, string countryCode)
{
countryname = countryName;
countrycode = countryCode;
}
public override string ToString()
{
return countryname;
}
public Country() { }
}
Step 5: We will expose CountryAutoComplete class as service by putting [ServiceContract] on it, and define a method which will be exposed in this service contract through [OperationContract]. The following shows how our class will look.
//WCF service contract to expose out class as service
[ServiceContract]
//Although the WCF model is designed to behave consistently across hosting environments and transports,
//there are often scenarios where an application does not require this degree of flexibility.
//WCF's ASP.NET compatibility mode is suitable for scenarios that do not require the ability to host
//outside of IIS or to communicate over protocols other than HTTP, but that use all of features of the
//ASP.NET Web application platform.
[AspNetCompatibilityRequirements(RequirementsMode = AspNetCompatibilityRequirementsMode.Allowed)]
public class CountryAutoComplete
{
//Exposes our method which user will access via service.
[OperationContract]
public string[] GetCountryMatches(string inputText)
{
// Get the country (for example, from a server-side database).
Country[] Countries = GetCountry();
// Create a collection of matches.
List<string> countryMatches = new List<string>();
foreach (Country country in Countries)
{
// See if this is a match.
if ((country.countryname.StartsWith(inputText)) ||
(country.countrycode.Contains(inputText)))
countryMatches.Add(country.countryname);
}
return countryMatches.ToArray();
}
private Country[] GetCountry()
{
return new Country[]
{
new Country("Australia","111_AUS"),
new Country("America","222_US"),
new Country("Somalia","333_SOM"),
new Country("South Arfica","444_SA"),
};
}
}
Step 6: Note that we have added a using for the System.ServiceModel.Activation namespace. The reason why is that it contains the types and enumerations required to construct and modify the dynamic creation of service hosts in a managed hosting environment.
Step 7: Now it's time for configuring web.config to create service endpoints and expose metadata over wire.
-
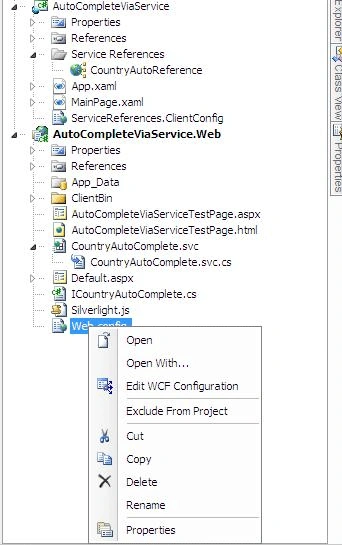
Open web.config file in WCF configuration wizard.
-
Click on create for new service and a window will open.
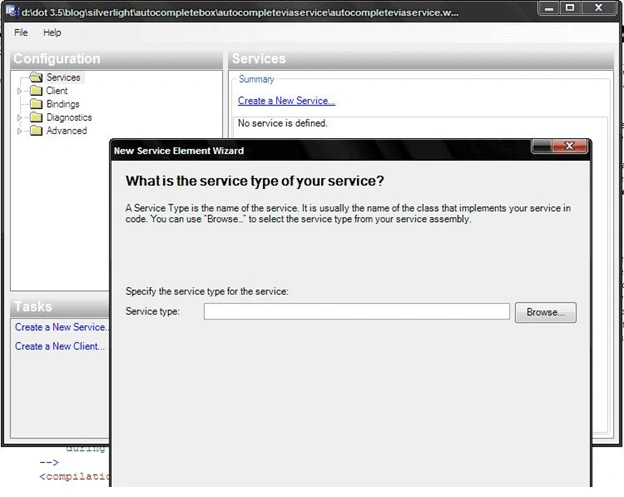
-
Browse service which lies in Bin folder of your web host project. Click OPEN and move to next window wizard.
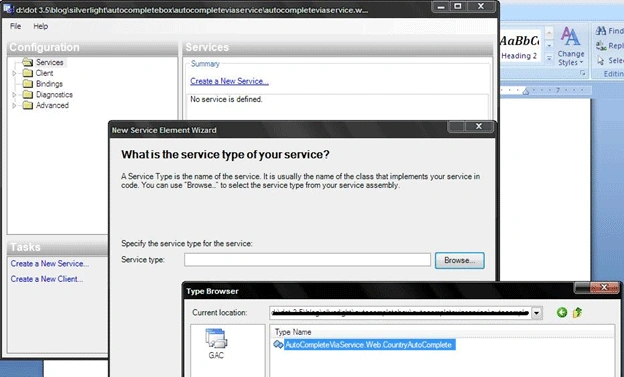
-
In the next window, it will auto pick the contract will is in this service type.
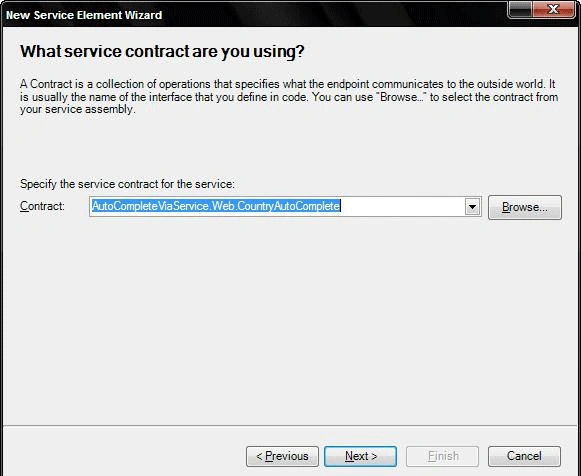
-
For the next windows, just accept default values and don't give any address, and click to FINISH in last. At last, it should look like this;
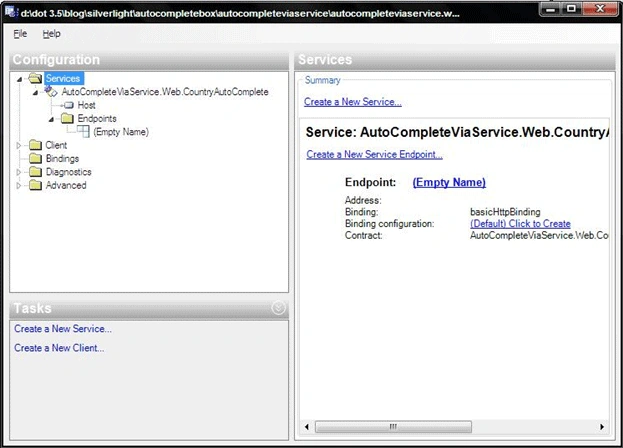
-
Now, we will create a metadata endpoint to expose service metadata.
Click on Create a New Service Endpoint.
Click on Browse, and when the window comes up, click on GAC.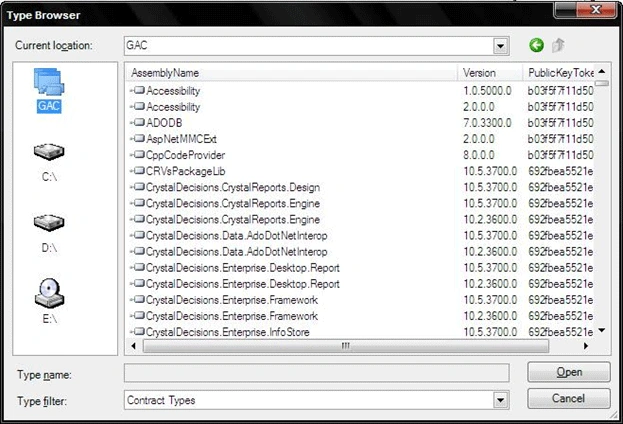
Search for System.ServiceModel and click it.
You will see IMetadatExchange; select it.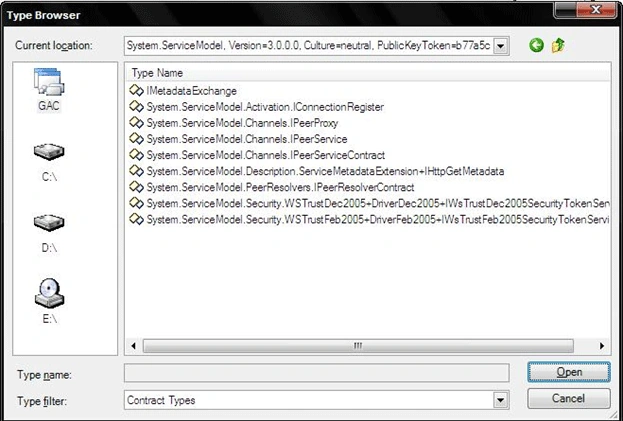
-
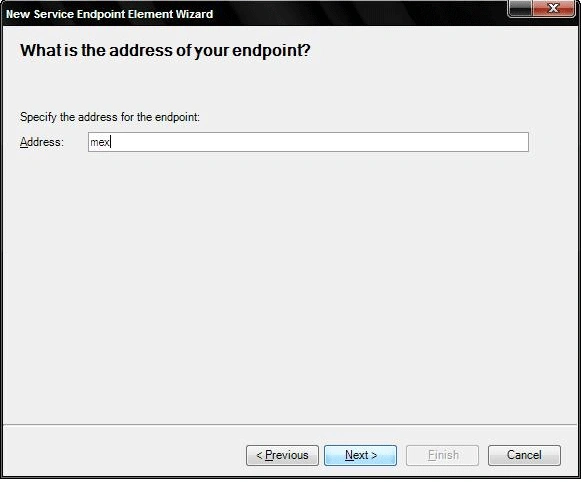
Give it an address name, mex
-
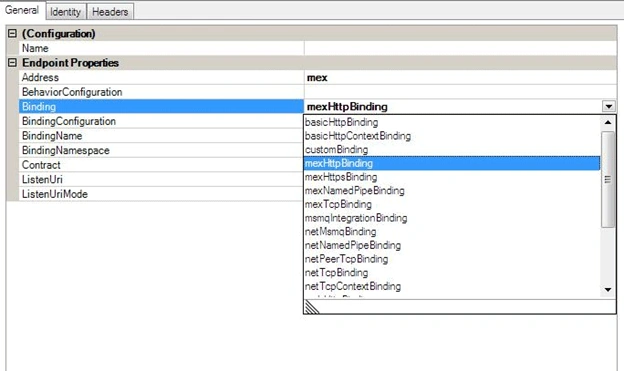
Now change the Binding of metadata exchange to mexHttpBinding.
-
Now create a new Binding configuration
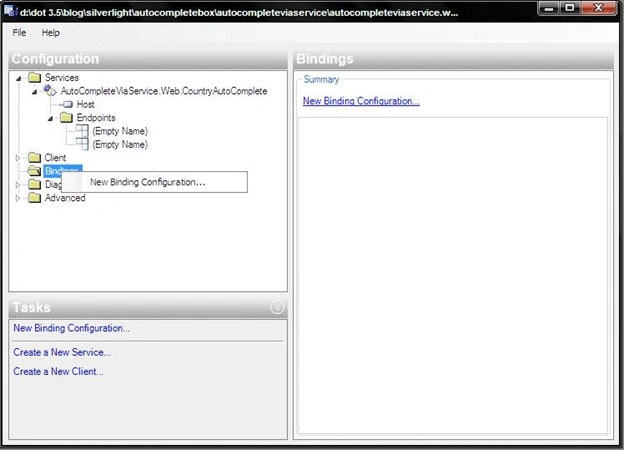
-
Select customBinding and name is as customBinding0.
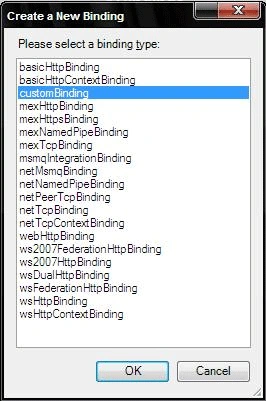
-
Now create new service behavior configuration; name it CountryAutoCompleteBehavior.
Add servicemetadata and servicedebug as element extensions
Click on servicemetadata and set it HttpGetEnabled as TRUE.
-
Now go back to endpoint and select contract, AutoCompleteViaService.Web.CountryAutoComplete endpoint, and change its binding to CustomBinding and binding configuration to our newly created custom configuration, customBinding0.
Also click on AutoCompleteViaService.Web.CountryAutoComplete service and set its behaviorConfiguration to our newly created service behavior name, CountryAutoCompleteBehavior
So the whole configuration looks like;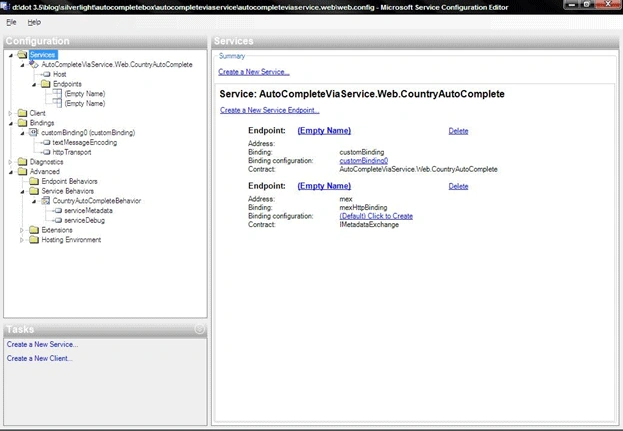
By this we have configured WCF service and it is ready to be exposed.
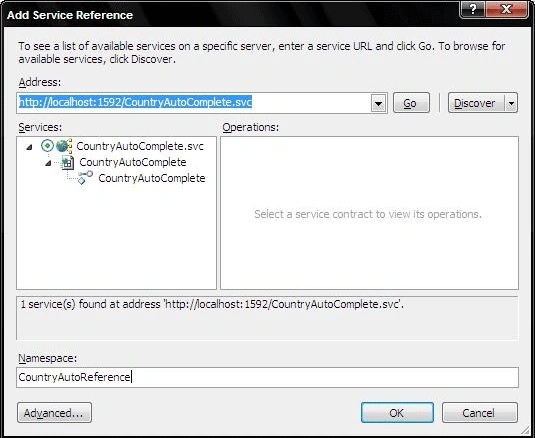

SapnaeditedPosted Feb 2, 2011, 11:05 PMEdited Feb 2, 2011, 11:05 PM
Very nice article, thanks for sharing your solution.
Dinesh BeniwalPosted Feb 2, 2011, 6:48 AM
Nice article Vishal, welcome on the C# Community.
Praveen KumarPosted Feb 2, 2011, 6:14 AM
Keep up the good work