

Table of Contents
- Table of Contents
- Introduction
- Roadmap
- Security in WebAPI
- Authentication
- Authorization
- Maintaining Session
- Basic Authentication
- Pros and Cons of Basic Authentication
- Token Based Authorization
- WebAPI with Basic Authentication and Token Based Authorization
- Creating User Service
- UserServices
- Resolve dependency of UserService
- Implementing Basic Authentication
- Step 1: Create a generic Authentication Filter
- Step 2: Create Basic Authentication Identity
- Step 3: Create a Custom Authentication Filter
- Step 4: Basic Authentication on Controller
- Running the application
- Design discrepancy
- Implementing Token-based Authorization
- Set Database
- Set Business Services
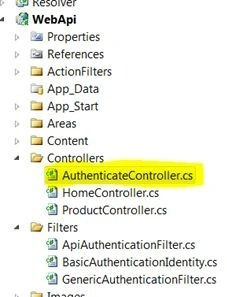
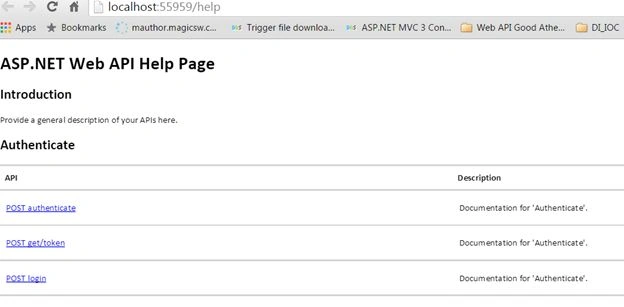
- Setup WebAPI/Controller
- AuthenticateController:
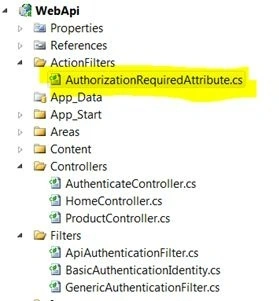
- Setup Authorization Action Filter
- Mark Controllers with Authorization filter
- Creating User Service
- Maintaining Sessions using Token
- Running the application
- Test Authentication
- Test Authorization
- Conclusion
- References
- Other Series
Introduction
Security has always been a major concern for enterprise-level applications, especially when exposing our business through services. I have already explained a lot about WebAPI in my earlier articles of the series. I explained how to create a WebAPI, how to resolve dependencies to make it a loosely coupled design, defining custom routes, and the use of attribute routing. This article will explain how to do security in a WebAPI. This article will explain how to make WebAPI secure using Basic Authentication and token-based authorization. I'll also explain how to leverage token-based authorization and Basic Authentication in WebAPI to maintain sessions in WebAPI. There is no standard way of achieving security in WebAPI. We can design our own security technique and structure that suits our application best.
Roadmap
The following is the roadmap I have set to learn WebAPI step-by-step.

- RESTful Day #1: Enterprise-level application architecture with Web APIs using Entity Framework, Generic Repository pattern, and Unit of Work.
- RESTful Day #2: Inversion of control using dependency injection in Web APIs using Unity Container and Bootstrapper.
- RESTful Day #3: Resolve dependency of dependencies using Inversion of Control and dependency injection in ASP.Net Web APIs with Unity Container and Managed Extensibility Framework (MEF).
- RESTful Day #4: Custom URL Re-Writing/Routing using Attribute Routes in MVC 4 Web APIs.
- RESTful Day #5: Basic Authentication and Token-based Custom Authorization in Web APIs using Action Filters.
- RESTful Day #6: Request logging and Exception handing/logging in Web APIs using Action Filters, Exception Filters, and NLog.
- RESTful Day #7: Unit Testing and Integration Testing in WebAPI using NUnit and Moq framework (Part 1).
- RESTful Day #8: Unit Testing and Integration Testing in WebAPI using NUnit and Moq framework (Part 2).
- RESTful Day #9: Extending OData support in ASP.NET Web APIs.
I'll intentionally use Visual Studio 2010 and .NET Framework 4.0 because there are a few implementations that are very hard to find in .NET Framework 4.0, but I'll make it easy by showing how to do it.
Security in WebAPI
Security in itself is a very complicated and tricky topic. I'll try to explain how to do it in WebAPI in my own way. When we plan to create an enterprise-level application, we especially want to take care of authentication and authorization. These are two techniques that, if used well, makes our application secure, in our case make our WebAPI more secure.

Image credit: pixabay.
Authentication
Authentication is all about the identity of the end user. It's about validating the identity of a user who is accessing our system, whether he is authenticated enough to use our resources or not. Does that end user have valid credentials to log into our system? Credentials can be in the form of a user name and word. We'll use the Basic Authentication technique to understand how to do authentication in WebAPI.
Authorization
Authorization should be considered as a second step after authentication to do security. Authorization means what all the permissions are that the authenticated user must have to access web resources. Are they allowed to access/perform an action on that resource? This could be done by setting roles and permissions for an end-user who is authenticated, or can be done by providing a secure token, using which an end user can have access to other services or resources.
Maintaining Session
RESTful services work on a stateless protocol, in other words, HTTP. We can maintain sessions in the Web API using token-based authorization techniques. An authenticated user will be allowed to access resources for a specific period of time and can re-instantiate the request with an increased session time delta to access other resource or the same resource. Websites using WebAPIs as RESTful services may need to implement login/logout for a user, to maintain sessions for the user, to provide roles and permissions to their user, all these features could be done using basic authentication and token-based authorization. I'll explain this step-by-step.
Basic Authentication
Basic authentication is a mechanism, where an end user is authenticated using our service, in other words, RESTful service, using plain credentials such as user name and word. An end user makes a request to the service for authentication with the user name and word embedded in the request header. The service receives the request checks if the credentials are valid or not and returns the response accordingly, in case of invalid credentials, the service responds with a 401 error code, in other words unauthorized. The actual credentials by which the comparison is done may lie in the database, any config file like web. config or in the code itself.
Pros and Cons of Basic Authentication
Basic authentication has its own pros and cons. It is advantageous for implementation, it is very easy to implement, it is supported by nearly all the modern browsers, and has become an authentication standard in RESTful / Web APIs. It has the disadvantage of sending user credentials in plain text, sending user credentials inside a request header, in other words prone to hacking. One must send credentials each time a service is called. No session is maintained and a user cannot log in once logged in using basic authentication. It is very prone to Cross-Site Request Forgery (CSRF).
Token Based Authorization
The authorization part comes just after authentication. Once authenticated, a service can send a token to an end user by which the user can access other resources. The token could be any encrypted key that only the server/service understands and when it fetches the token from the request made by the end user, it validates the token and authorizes the user into the system. The token generated could be stored in a database or an external file as well, in other words, we need to persist the token for future references. The token can have its own lifetime and may expire accordingly. In that case the user will need to be authenticated again into the system.
WebAPI with Basic Authentication and Token Based Authorization

Creating User Service
Just open your WebAPI project or the WebAPI project that we discussed in the last part of learning WebAPI.
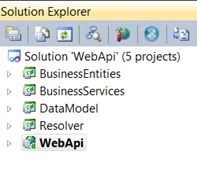
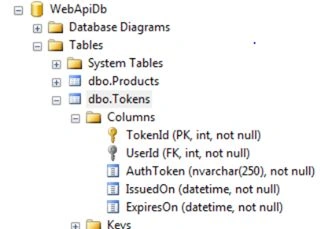
We have BusinessEntities, BusinessServices, DataModel, DependencyResolver, and a WebAPI project as well. We already have a User table in the database, or you can create your own database with a table like the User Table as shown below.
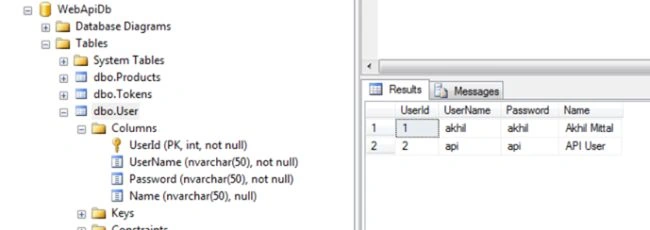
I am using a WebAPI database, I have attached the scripts for download.
UserServices
Go to the BusinessServices project and add a new interface, IUserService, and a service named UserServices
implementing that interface as in the following.

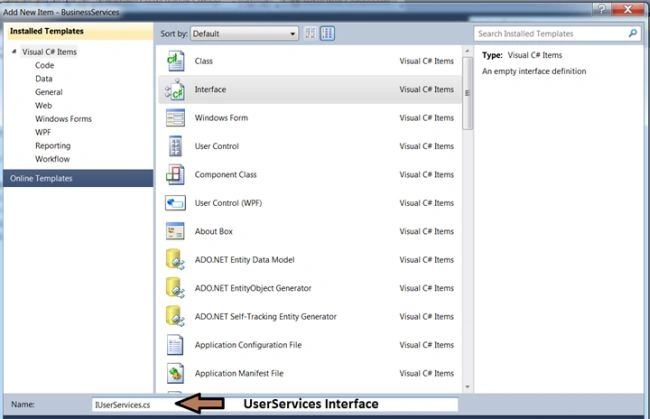
Just define one method named Authenticate in the interface.
namespace BusinessServices
{
    public interface IUserServices
    {
        int Authenticate(string userName, string word);
    }
}
This method takes username and word as a parameter and returns the specific user ID if the user is authenticated successfully.
Just implement this method in the UserServices class, just like we created services earlier in the series.
using DataModel.UnitOfWork;

namespace BusinessServices
{
    /// <summary>
    /// Offers services for user specific operations
    /// </summary>
    public class UserServices : IUserServices
    {
        private readonly UnitOfWork _unitOfWork;

        /// <summary>
        /// Public constructor.
        /// </summary>
        public UserServices(UnitOfWork unitOfWork)
        {
            _unitOfWork = unitOfWork;
        }

        /// <summary>
        /// Public method to authenticate user by user name and word.
        /// </summary>
        /// <param name="userName"></param>
        /// <param name="word"></param>
        /// <returns></returns>
        public int Authenticate(string userName, string word)
        {
            var user = _unitOfWork.UserRepository.Get(u => u.UserName == userName && u.word == word);
            if (user != null && user.UserId > 0)
            {
                return user.UserId;
            }
            return 0;
        }
    }
}
You can clearly see that the Authenticate method just checks the user credentials from the UserRepository and returns the values accordingly. The code is very self-explanatory.
Resolve dependency of UserService
Just open the DependencyResolver class in the BusinessServices project itself and add its dependency type so that we get the UserServices dependency resolved at run time, so add,
registerComponent.RegisterType<IUserServices, UserServices>();
line to the SetUP method. Our class becomes.
using System.ComponentModel.Composition;
using DataModel;
using DataModel.UnitOfWork;
using Resolver;

namespace BusinessServices
{
    [Export(typeof(IComponent))]
    public class DependencyResolver : IComponent
    {
        public void SetUp(IRegisterComponent registerComponent)
        {
            registerComponent.RegisterType<IProductServices, ProductServices>();
            registerComponent.RegisterType<IUserServices, UserServices>();
        }
    }
}
Implementing Basic Authentication
Step 1. Create a generic Authentication Filter
Add a folder named Filters to the WebAPI project and add a class named GenericAuthenticationFilter under that folder. Derive that class from AuthorizationFilterAttribute, this is a class under System.Web.Http.Filters.
I have created a generic authentication filter that will be like this.
[AttributeUsage(AttributeTargets.Class | AttributeTargets.Method, AllowMultiple = false)]
public class GenericAuthenticationFilter : AuthorizationFilterAttribute
{
    /// <summary>
    /// Public default Constructor
    /// </summary>
    public GenericAuthenticationFilter() { }

    private readonly bool _isActive = true;

    /// <summary>
    /// parameter isActive explicitly enables/disables this filter.
    /// </summary>
    /// <param name="isActive"></param>
    public GenericAuthenticationFilter(bool isActive)
    {
        _isActive = isActive;
    }

    /// <summary>
    /// Checks basic authentication request
    /// </summary>
    /// <param name="filterContext"></param>
    public override void OnAuthorization(HttpActionContext filterContext)
    {
        if (!_isActive) return;
        var identity = FetchAuthHeader(filterContext);
        if (identity == null)
        {
            ChallengeAuthRequest(filterContext);
            return;
        }
        var genericPrincipal = new GenericPrincipal(identity, null);
        Thread.CurrentPrincipal = genericPrincipal;
        if (!OnAuthorizeUser(identity.Name, identity.word, filterContext))
        {
            ChallengeAuthRequest(filterContext);
            return;
        }
        base.OnAuthorization(filterContext);
    }

    /// <summary>
    /// Virtual method.Can be overriden with the custom Authorization.
    /// </summary>
    /// <param name="user"></param>
    /// <param name=""></param>
    /// <param name="filterContext"></param>
    /// <returns></returns>
    protected virtual bool OnAuthorizeUser(string user, string , HttpActionContext filterContext)
    {
        if (string.IsNullOrEmpty(user) || string.IsNullOrEmpty("")) return false;
        return true;
    }

    /// <summary>
    /// Checks for autrhorization header in the request and parses it, creates user credentials and returns as BasicAuthenticationIdentity
    /// </summary>
    /// <param name="filterContext"></param>
    protected virtual BasicAuthenticationIdentity FetchAuthHeader(HttpActionContext filterContext)
    {
        string authHeaderValue = null;
        var authRequest = filterContext.Request.Headers.Authorization;
        if (authRequest != null && !String.IsNullOrEmpty(authRequest.Scheme) && authRequest.Scheme == "Basic") authHeaderValue = authRequest.Parameter;
        if (string.IsNullOrEmpty(authHeaderValue)) return null;
        authHeaderValue = Encoding.Default.GetString(Convert.FromBase64String(authHeaderValue));
        var credentials = authHeaderValue.Split(':');
        return credentials.Length < 2 ? null : new BasicAuthenticationIdentity(credentials[0], credentials[1]);
    }


    /// <summary>
    /// Send the Authentication Challenge request
    /// </summary>
    /// <param name="filterContext"></param>
    private static void ChallengeAuthRequest(HttpActionContext filterContext)
    {
        var dnsHost = filterContext.Request.RequestUri.DnsSafeHost;
        filterContext.Response = filterContext.Request.CreateResponse(HttpStatusCode.Unauthorized);
        filterContext.Response.Headers.Add("WWW-Authenticate", string.Format("Basic realm=\"{0}\"", dnsHost));
    }
}
Since this is an AuthorizationFilter-derived class, we need to override its methods to add our custom logic. Here the “OnAuthorization” method is overridden to add a custom logic. Whenever we get an ActionContext on OnAuthorization, we'll check for its header, since we are pushing our service to use BasicAuthentication, the request headers should contain this information. I have used FetchAuthHeader to check the scheme if it comes to be “Basic” and thereafter stores the credentials, in other words, user name and word, in the form of an object of class BasicAuthenticationIdentity, therefore creating an identity out of valid credentials.
protected virtual BasicAuthenticationIdentity FetchAuthHeader(HttpActionContext filterContext)
{
    string authHeaderValue = null;
    var authRequest = filterContext.Request.Headers.Authorization;
    if (authRequest != null && !String.IsNullOrEmpty(authRequest.Scheme) && authRequest.Scheme == "Basic")
        authHeaderValue = authRequest.Parameter;
    if (string.IsNullOrEmpty(authHeaderValue))
        return null;
    authHeaderValue = Encoding.Default.GetString(Convert.FromBase64String(authHeaderValue));
    var credentials = authHeaderValue.Split(':');
    return credentials.Length < 2 ? null : new BasicAuthenticationIdentity(credentials[0], credentials[1]);
}
I am expecting values to be encrypted using the Base64 string. You can use your own encryption mechanism as well.
Later on in the OnAuthorization method we create a generic principal with the created identity and assign it to the current Thread principal as in the following.
var genericPrincipal = new GenericPrincipal(identity, null);
Thread.CurrentPrincipal = genericPrincipal;
if (!OnAuthorizeUser(identity.Name, identity.word, filterContext))
{
    ChallengeAuthRequest(filterContext);
    return;
}
base.OnAuthorization(filterContext);
Once done, a challenge to that request is added, where we add a response and tell the Basic realm.
filterContext.Response.Headers.Add("WWW-Authenticate", string.Format("Basic realm=\"{0}\"", dnsHost));
in the ChallengeAuthRequest method.
If no credentials are provided in the request, this generic authentication filter sets the generic authentication principal to the current thread principal.
Since we understand the drawback that in basic authentication credentials are ed in plain text, it would be good if our service uses SSL for communication or messaging.
We have an overridden constructor as well that allows the default behavior of the filter to be stopped by just ing in a parameter, in other words, true or false.
public GenericAuthenticationFilter(bool isActive)
{
    _isActive = isActive;
}
We can use OnAuthorizeUser for custom authorization purposes.
Step 2. Create a Basic Authentication Identity
Before we proceed further, we also need the BasicIdentity class, that takes credentials and assigns them to the Generic Principal. So just add one more class named BasicAuthenticationIdentity deriving from GenericIdentity.
This class contains the three properties UserName, word, and UserId. I intentionally added UserId because we'll need that in the future. So our class will be like.
using System.Security.Principal;

namespace WebAPI.Filters
{
    /// <summary>
    /// Basic Authentication identity
    /// </summary>
    public class BasicAuthenticationIdentity : GenericIdentity
    {
        /// <summary>
        /// Get/Set for word
        /// </summary>
        public string word
        {
            get;
            set;
        }
        /// <summary>
        /// Get/Set for UserName
        /// </summary>
        public string UserName
        {
            get;
            set;
        }
        /// <summary>
        /// Get/Set for UserId
        /// </summary>
        public int UserId
        {
            get;
            set;
        }

        /// <summary>
        /// Basic Authentication Identity Constructor
        /// </summary>
        /// <param name="userName"></param>
        /// <param name="word"></param>
        public BasicAuthenticationIdentity(string userName, string word) : base(userName, "Basic")
        {
            word = word;
            UserName = userName;
        }
    }
}
Step 3. Create a Custom Authentication Filter
Now you are ready to use your own Custom Authentication filter. Just add one more class under that Filters project and call it APIAuthenticationFilter, this class will derive from GenericAuthenticationFilter, that we created in the first step.This class overrides the OnAuthorizeUser method to add custom logic for authenticating a request. It uses the UserService that we created earlier to check the user.
protected override bool OnAuthorizeUser(string username, string word, HttpActionContext actionContext)
{
    var provider = actionContext.ControllerContext.Configuration.DependencyResolver.GetService(typeof(IUserServices)) as IUserServices;
    if (provider != null)
    {
        var userId = provider.Authenticate(username, word);
        if (userId > 0)
        {
            var basicAuthenticationIdentity = Thread.CurrentPrincipal.Identity as BasicAuthenticationIdentity;
            if (basicAuthenticationIdentity != null) basicAuthenticationIdentity.UserId = userId;
            return true;
        }
    }
    return false;
}
Complete class
using System.Threading;
using System.Web.Http.Controllers;
using BusinessServices;

namespace WebAPI.Filters
{
    /// <summary>
    /// Custom Authentication Filter Extending basic Authentication
    /// </summary>
    public class APIAuthenticationFilter : GenericAuthenticationFilter
    {
        /// <summary>
        /// Default Authentication Constructor
        /// </summary>
        public APIAuthenticationFilter() { }

        /// <summary>
        /// AuthenticationFilter constructor with isActive parameter
        /// </summary>
        /// <param name="isActive"></param>
        public APIAuthenticationFilter(bool isActive) : base(isActive) { }

        /// <summary>
        /// Protected overriden method for authorizing user
        /// </summary>
        /// <param name="username"></param>
        /// <param name="word"></param>
        /// <param name="actionContext"></param>
        /// <returns></returns>
        protected override bool OnAuthorizeUser(string username, string word, HttpActionContext actionContext)
        {
            var provider = actionContext.ControllerContext.Configuration.DependencyResolver.GetService(typeof(IUserServices)) as IUserServices;
            if (provider != null)
            {
                var userId = provider.Authenticate(username, word);
                if (userId > 0)
                {
                    var basicAuthenticationIdentity = Thread.CurrentPrincipal.Identity as BasicAuthenticationIdentity;
                    if (basicAuthenticationIdentity != null) basicAuthenticationIdentity.UserId = userId;
                    return true;
                }
            }
            return false;
        }
    }
}
Step 4. Basic Authentication on the Controller
Since we already have our products controller as in the following.
public class ProductController : APIController
{
    #region Private variable.
    private readonly IProductServices _productServices;
    #endregion
    #region Public Constructor

    /// <summary>
    /// Public constructor to initialize product service instance
    /// </summary>
    public ProductController(IProductServices productServices)
    {
        _productServices = productServices;
    }

    #endregion

    // GET API/product
    [GET("allproducts")]
    [GET("all")]
    public HttpResponseMessage Get()
    {
        var products = _productServices.GetAllProducts();
        var productEntities = products as List<ProductEntity>? ?? products.ToList();
        if (productEntities.Any())
            return Request.CreateResponse(HttpStatusCode.OK, productEntities);
        return Request.CreateErrorResponse(HttpStatusCode.NotFound, "Products not found");
    }

    // GET API/product/5
    [GET("productid/{id?}")]
    [GET("particularproduct/{id?}")]
    [GET("myproduct/{id:range(1, 3)}")]
    public HttpResponseMessage Get(int id)
    {
        var product = _productServices.GetProductById(id);
        if (product != null)
            return Request.CreateResponse(HttpStatusCode.OK, product);
        return Request.CreateErrorResponse(HttpStatusCode.NotFound, "No product found for this id");
    }

    // POST API/product
    [POST("Create")]
    [POST("Register")]
    public int Post([FromBody] ProductEntity productEntity)
    {
        return _productServices.CreateProduct(productEntity);
    }

    // PUT API/product/5
    [PUT("Update/productid/{id}")]
    [PUT("Modify/productid/{id}")]
    public bool Put(int id, [FromBody] ProductEntity productEntity)
    {
        if (id > 0)
        {
            return _productServices.UpdateProduct(id, productEntity);
        }
        return false;
    }

    // DELETE API/product/5
    [DELETE("remove/productid/{id}")]
    [DELETE("clear/productid/{id}")]
    [PUT("delete/productid/{id}")]
    public bool Delete(int id)
    {
        if (id > 0)
            return _productServices.DeleteProduct(id);
        return false;
    }
}
There are three ways in which you can use this authentication filter.
Just apply this filter to ProductController. You can add this filter at the top of the controller, for all API requests to be validated as in the following:
[APIAuthenticationFilter]
[RoutePrefix("v1/Products/Product")]
public class ProductController : APIController
You can also globally add this in the Web API configuration file so that that filter applies to all the controllers and all the actions associated with it.
GlobalConfiguration.Configuration.Filters.Add(new APIAuthenticationFilter());
You can also apply it to the Action level if you wish to apply or not apply authentication to that action.
// GET API/product
[APIAuthenticationFilter(true)]
[GET("allproducts")]
[GET("all")]
public HttpResponseMessage Get()
{
    // Code logic here
}

// GET API/product/5
[APIAuthenticationFilter(false)]
[GET("productid/{id?}")]
[GET("particularproduct/{id?}")]
[GET("myproduct/{id:range(1, 3)}")]
public HttpResponseMessage Get(int id)
{
    // Code logic here
}
Running the application
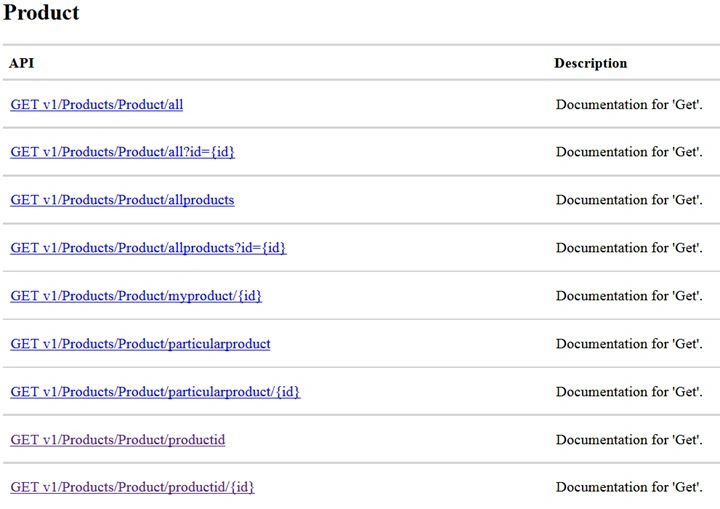
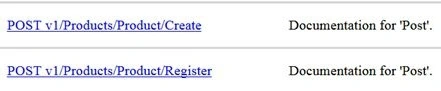
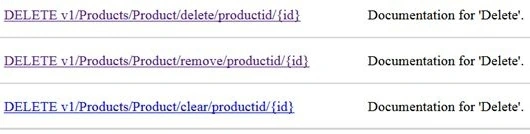
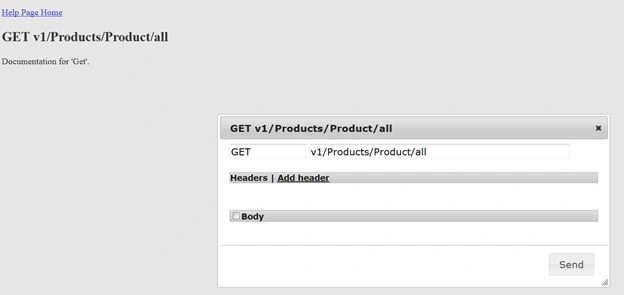
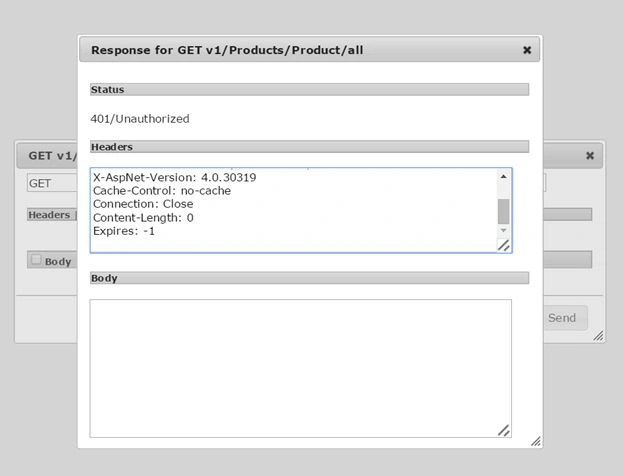
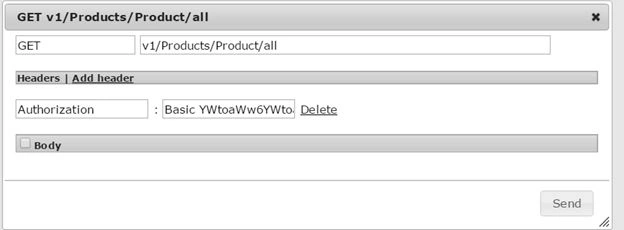
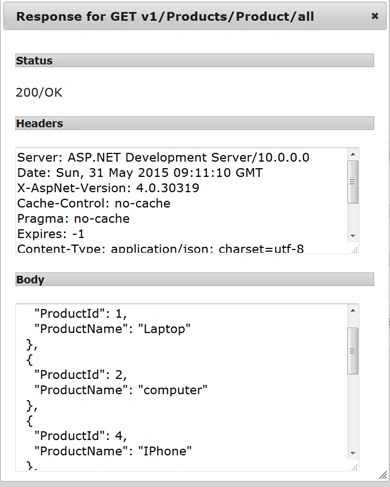
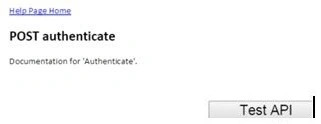
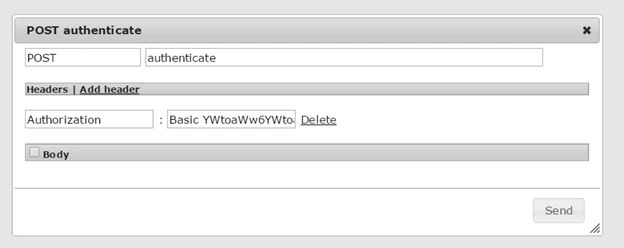
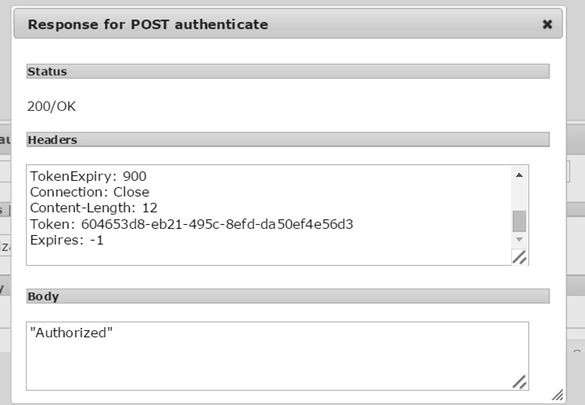
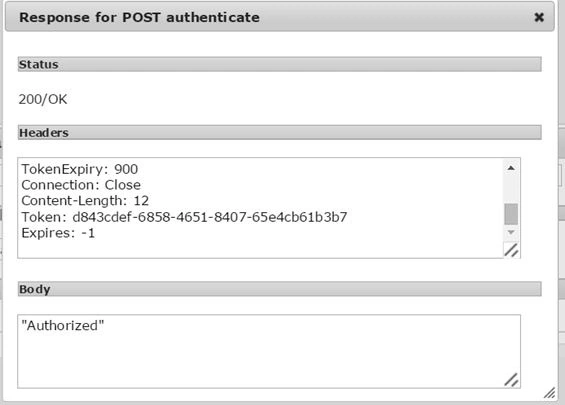
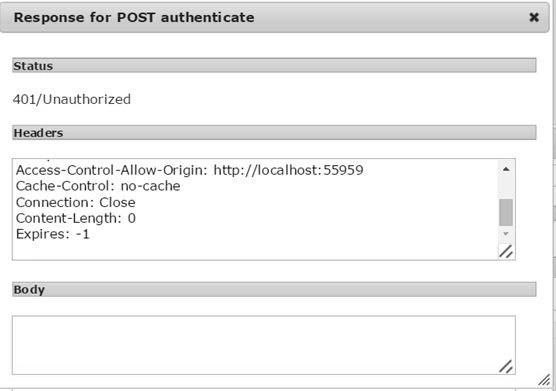
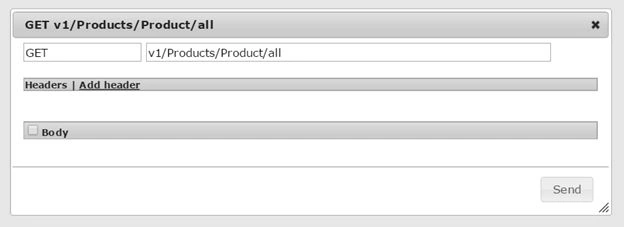
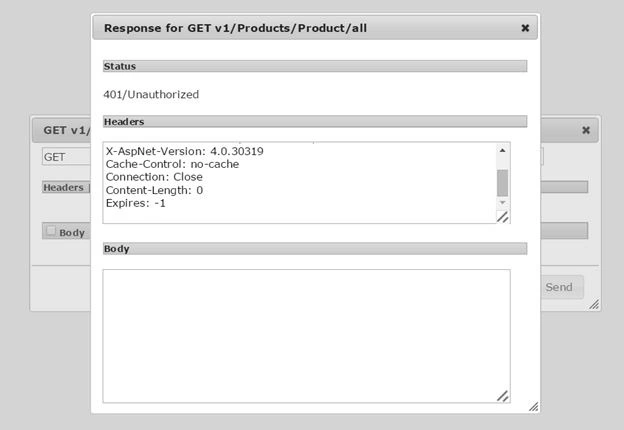
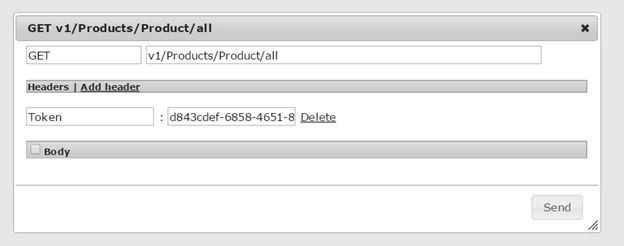
We have already implemented Basic Authentication, just try to run the application to test if it is working.
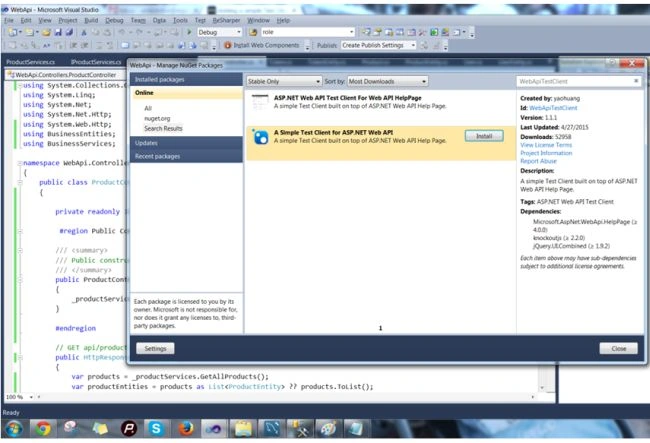
Just run the application, we get.










Sameer PatelPosted Mar 31, 2021, 9:44 PM
Great Article Sir!
Dharmandar KumarPosted May 1, 2020, 12:40 AM
Great article! Thanks!I want to do a comment if you allow me. When we plan to create an enterprise level application, we especially want to take care of authentication and authorization. These are two techniques if used well makes our application secure, in our case makes our WebAPI more secure.An application program interface (API) is a set of routines, protocols, and tools for building software applications. Basically, an API specifies how software components should interact. Additionally, APIs are used when programming graphical user interface (GUI) components. Authentication Authentication is all about the identity of an end user. It’s about validating the identity of a user who is accessing our system, that he is authenticated enough to use our resources or not. Does that end user have valid credentials to log in our system? Credentials can be in the form of a username and password. We’ll use Basic Authentication technique to understand how we can achieve authentication in WebAPI. Authorization Authorization should be considered as a second step after authentication to achieve security. Authorization means what all permissions the authenticated user has to access web resources. Is allowed to access/ perform an action on that resource? This could be achieved by setting roles and permissions for an end user who is authenticated or can be achieved through providing a secure token, using which an end user can have access to other services or resources. Maintaining Session RESTful services work on a stateless protocol i.e. HTTP. We can achieve maintaining session in Web API through token based authorization technique. An authenticated user will be allowed to access resources for a particular period of time and can re-instantiate the request with an increased session time delta to access other resource or the same resource. Websites using WebAPIs as RESTful services may need to implement login/logout for a user, to maintain sessions for the user, to provide roles and permissions to their user, all these features could be achieved using basic authentication and token based authorization. Pros and Cons of Basic Authentication Basic authentication has its own pros and cons. It is advantageous when it comes to implementation, it is very easy to implement, it is nearly supported by all modern browsers and has become an authentication standard in RESTful / Web APIs. It has disadvantages like sending user credentials in plain text, sending user credentials inside request header, i.e. prone to hack. One has to send credentials each time a service is called. No session is maintained and a user cannot log out once logged in through basic authentication. It is very prone to CSRF (Cross Site Request Forgery).
Sonukumar DubeyPosted Sep 19, 2019, 11:03 PM
Very nice article akhil bhai. I have cleared multiple concept with help of this article
syed shabber rizviPosted Aug 19, 2019, 1:35 PM
Excellent article Akhil. Keep it up ???????
CenkPosted Aug 7, 2019, 8:41 AM
I am load testing my rest API with JMeter. I got this error below when testing with 2500 users and 10 seconds ramp-up time. I wonder if there are any open connections that I can detect from SQL Server. Any ideas in order to get rid of this error? System.InvalidOperationException: Timeout expired. The timeout period elapsed prior to obtaining a connection from the pool. This may have occurred because all pooled connections were in use and max pool size was reached. The underlying provider failed on Open.
pabitra beheraPosted Jul 31, 2019, 7:02 AM
Thank you for sharing such a document and source code am just try to integrate the application in my local system
Aradhana ManiPosted Jul 10, 2019, 1:05 AM
One issue - When i try as u mention Authorization: Basic YWtoaWw6YWtoaWw= Here “YWtoaWw6YWtoaWw=” is my Base64 encoded user name and word, in other words akhil:akhil. I am still getting UnAuthorization response . Why ?any solution for this issue?
Desarrollador UnoPosted Dec 12, 2018, 2:43 PM
Excellent, all the articles have helped me a lot.
Hamid KhanPosted Nov 18, 2018, 1:33 AM
Add key in webconfig; <add key="AuthTokenExpiry" value="900" />
Hamid KhanPosted Nov 18, 2018, 12:51 AM
Get(u => u.word == word); Note : use Password is place of word in userService Get(u =u.Password == word); } return 0; }
Basudev PradhanPosted Sep 11, 2018, 6:23 AM
Thank you so much sir very nice Article and explained in detail level
ritesh sharmaPosted Jun 30, 2018, 9:57 AM
Thank you very much and Awesome Article.....
Hamid KhanPosted Dec 14, 2017, 10:21 AM
Thanks, Nice article Happy to read it...
Chirag SolankiPosted Apr 10, 2017, 2:57 PM
Thank you very much for your great help..One issue - When i try as u mention Authorization: Basic YWtoaWw6YWtoaWw= Here “YWtoaWw6YWtoaWw=” is my Base64 encoded user name and word, in other words akhil:akhil. I am still getting UnAuthorization response . Why ? I have passed data as show in your screen shot.
Aakash GPosted Mar 14, 2017, 2:43 AM
Appreciating your work in this series, great job!
Sengson RaiPosted Jul 2, 2016, 12:15 PM
Very helpful tutorial series Akhil sir
Surya MattagunjaPosted Apr 1, 2016, 6:32 AM
Hi, Nice Post. It helped me. But post action is not working, I mean sent class object is not coming to the action. I am sending this class object from angular js http post action. please help me. thank you.
Debasis SahaPosted Mar 31, 2016, 1:08 AM
Good One..
Gowtham RajamanickamPosted Mar 4, 2016, 1:38 AM
Good one..
KaustubhPosted Mar 3, 2016, 1:54 AM
superb article
Raja TPosted Mar 2, 2016, 11:14 PM
Nice,Thanks for sharing..
Vignesh ManiPosted Mar 2, 2016, 11:08 AM
Nice article..
Ratnesh SinghPosted Aug 31, 2015, 9:58 AM
really nice..
Morten KrusePosted Aug 19, 2015, 4:23 AM
In the ValidateToken I would though add the 15 minutes from now and not add 15 minutes to the existing time. token.ExpiresOn = DateTime.Now.AddSeconds(Convert.ToDouble(ConfigurationManager.AppSettings["AuthTokenExpiry"]));
Morten KrusePosted Aug 19, 2015, 4:21 AM
Great Work.
Ranjan SenapatiPosted Aug 11, 2015, 7:29 AM
Nice Article.....
Akhil MittalPosted Jul 1, 2015, 8:14 AM
Debendra Dash Thanks
Debendra DashPosted Jul 1, 2015, 7:43 AM
good one....
Sibeesh VenuPosted Jul 1, 2015, 6:38 AM
Good one.
Jaipal ReddyPosted Jul 1, 2015, 12:19 AM
Thank you. .
Gopi ChandPosted Jun 30, 2015, 11:19 PM
Rich content with nice explanation