

Introduction
This article demonstrates to Configure the Permissions to Azure Service Bus for sending messages using postman by Authorization. This article starts with introduction to configure the permission to service Bus. After that, it demonstrates how to send the message from Postman.
Configure Permissions to Service Bus
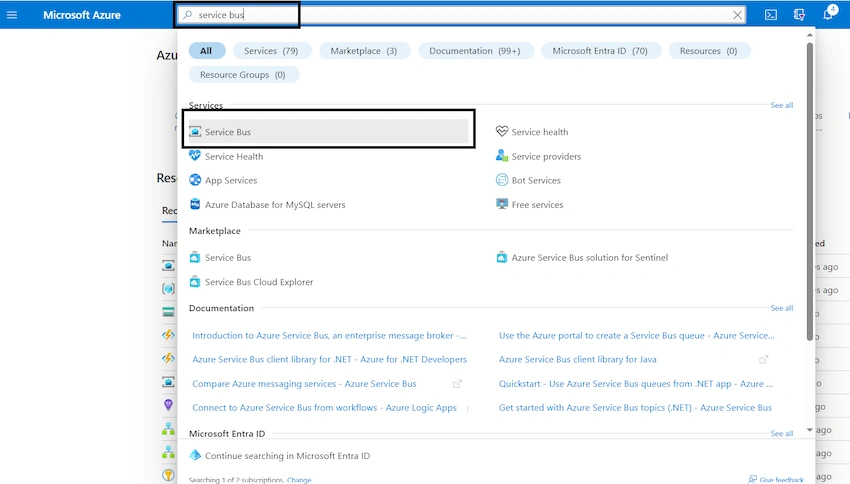
- Open the Service Bus
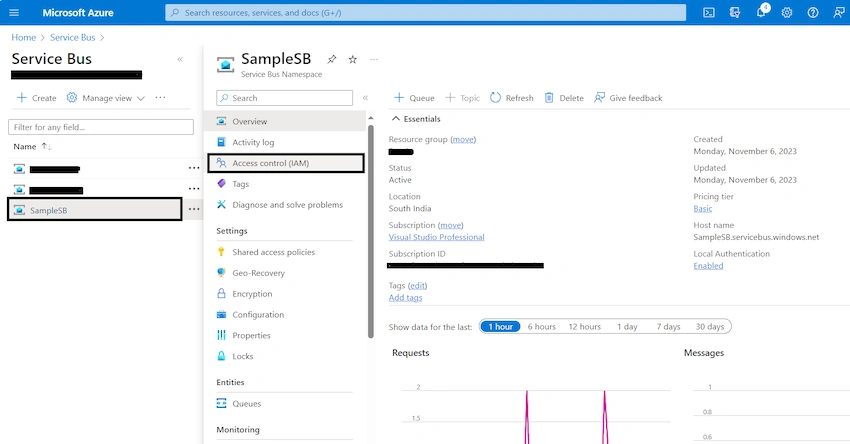
- Select the existing Service Bus

- Navigate to Access Control (IAM)
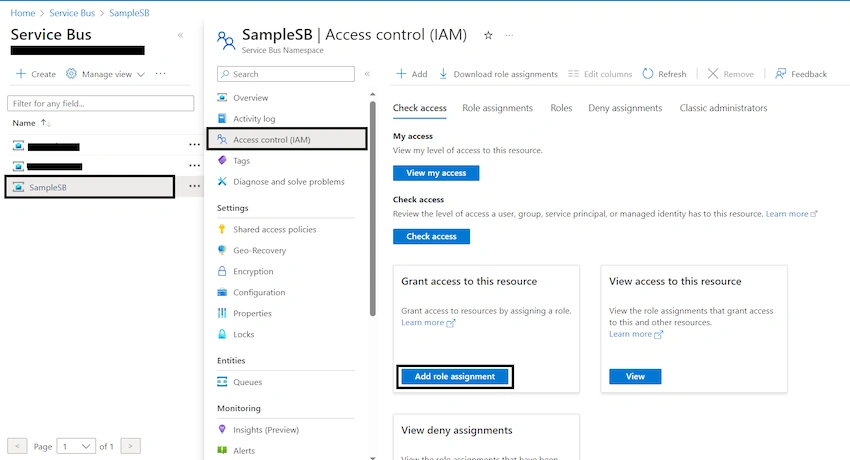
- Click on role assignment to add the role
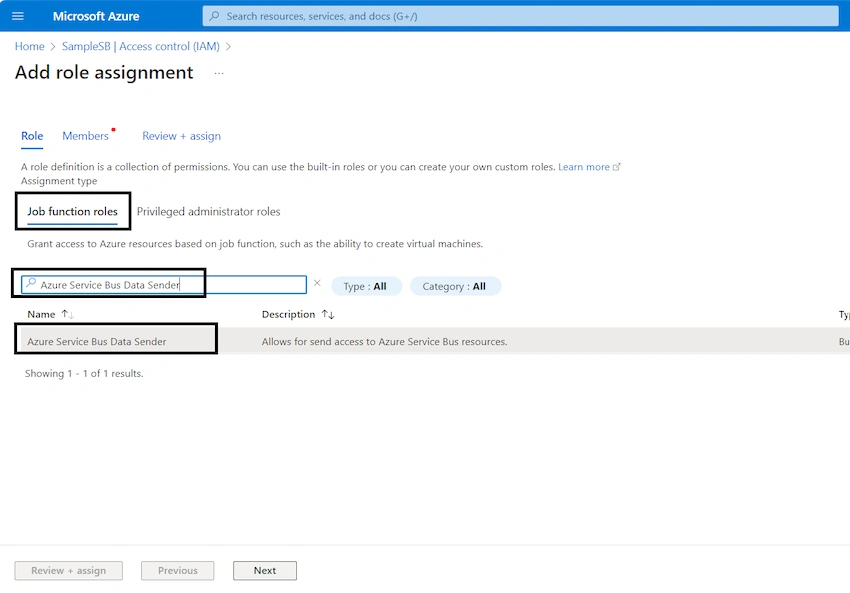
- Select “Azure Service Bus Data Sender” from the Search by role and click Next
- Click on +Select members and select your App registration and click on Select
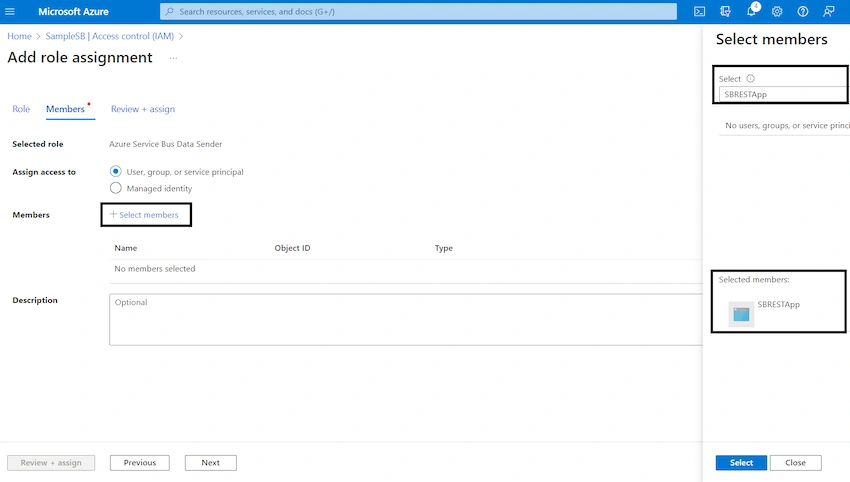
- Click on Review + assign

- Go to Role assignment and check the role is assigned or not

Configure Permissions to App Registration
- Open the existing App Registration

- Click on API Permission and Add the Permission

- Click on API’s my organization uses and select the “Microsoft.ServiceBus”

- Select user_impersonation and Click on Add Permission.

- Check the Permissions added or not

Configure Postman to Send Message
- Copy queue URL and Append “/messages”

- Add Headers as below
- Authorization : Bearer + Token
- Content-Type :"application/atom+xml;type=entry;charset=utf-8”
Note: To Access the Token please refer to the below article
Get the Azure AD token by Using the Postman

- Add Body as any Message you want to send

- Click on Send button and you will see the status as 201 Created.

Summary
In this article, I discussed how we can configure the roles to service bus, App Registration and send the messages using the Postman.
Join the conversation! Your thoughts help the community grow.