

In this article, we will learn how to perform various SharePoint Group operations like create groups, assign permissions to groups, and add users to a group in Microsoft Flow.
As there is no SharePoint connector available to perform group operations in Microsoft Flow, we will be using different REST APIs.
Step 1 - Create a flow
- Visit here
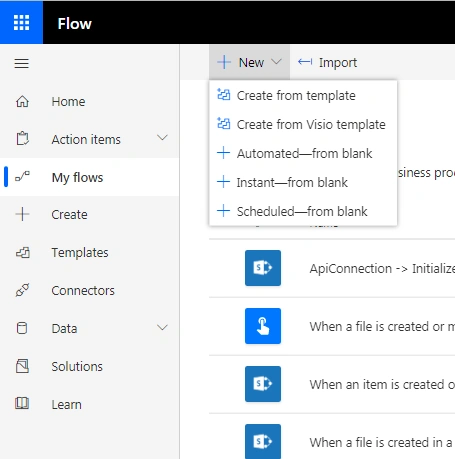
- Click My Flows from the left pane
- Click on New flow on the right blade
- Select instant blank as the template
Step 2
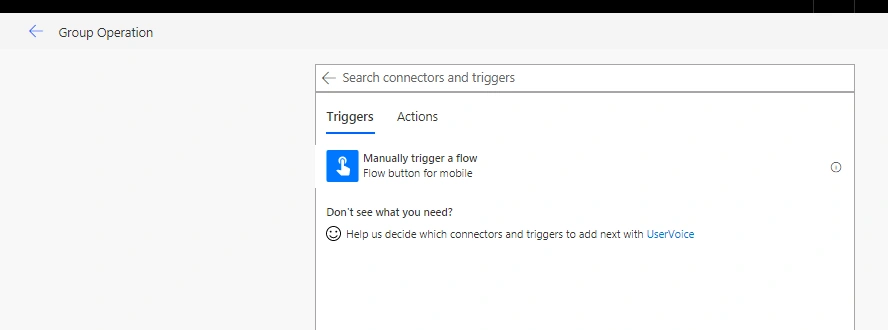
Name your flow and select trigger point as Manual trigger flow.
Step 3 - Create a group
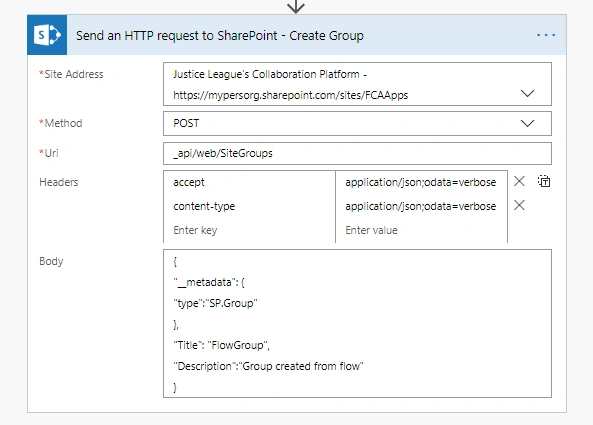
- Add action as 'Send HTTP request to SharePoint'.
- Select all configurable options as below.
URL
- _api/web/SiteGroups
Headers
1. accept
2. content-type
- application/json;odata=verbose
- {
- "__metadata": {
- "type":"SP.Group"
- },
- "Title": "FlowGroup",
- "Description":"Group created from flow"
- }
Step 4
Before going to the next step, we would apply a simple trick for using data returned from the above request. Save this Flow and Run it once. Once the workflow has run successfully, go to flow history and copy the JSON response received in the above action (refer to the screenshot below). Go to the output section of the above action and copy the JSON. Keep it copied somewhere in the notepad; we will use it in the next step.
Also make sure you delete the group created, as we won't be checking condition if group exists or not.
Step 5
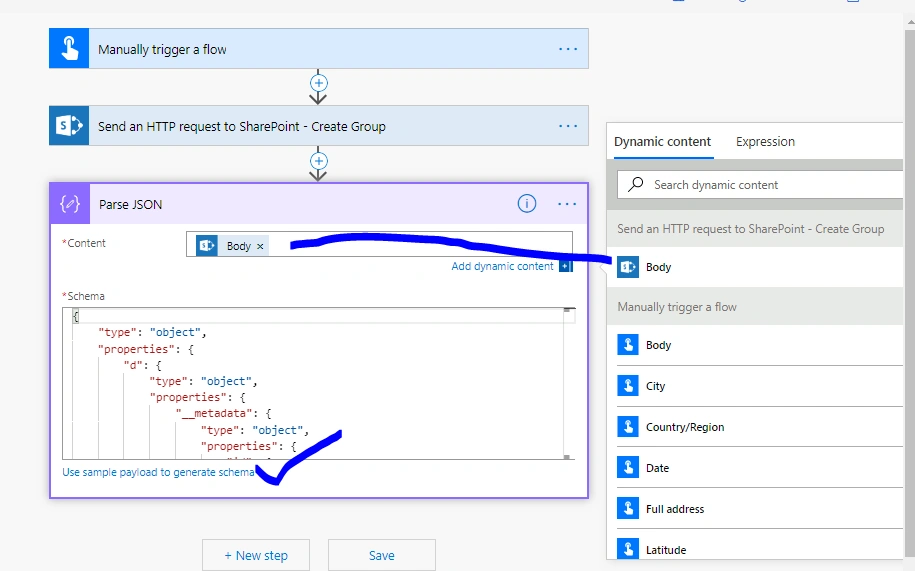
Add a new action, Parse JSON,
Content - Add body from dynamic content of above action
Schema - Click on 'Use sample payload to generate schema', paste the JSON copied in the previous step.
Step 6
Add a new action 'Send HTTP request to SharePoint' and configure the action as below.
We would be using the below REST API to assign permissions to group.
- /_api/web/roleassignments/addroleassignment(principalid=<GROUPID>, roledefid=1073741827)
roledefid for Permission Levels are as follows,
1073741829 - Full Control || 073741827 - Contribute || 1073741826 - Read
GroupID is the id of the group which we created from the step above. We will use dynamic content to form this URL by referencing group id.
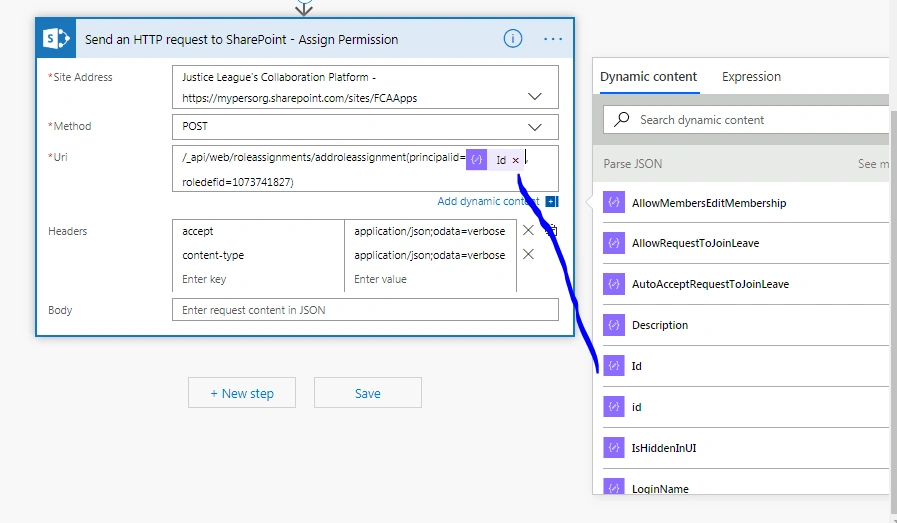
Step 7
Add a new action 'Send HTTP request to SharePoint'; configure the action as below.
URI
- _api/web/SiteGroups(<GroupID>)/users
Body
Please note that the Login name should be in the exact format as above. You can always use dynamic content attribute which holds email id of a valid user (like I did in the below screenshot). Here, I am using dynamic content user email which will hold email id of the person who has triggered flow. You can modify this based on your requirements.
- {
- "__metadata": {
- "type":"SP.User"
- },
- "LoginName":"i:0#.f|membership|[email protected]"
- }
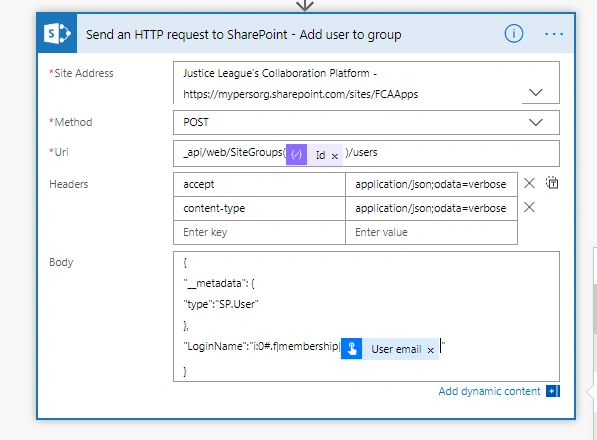
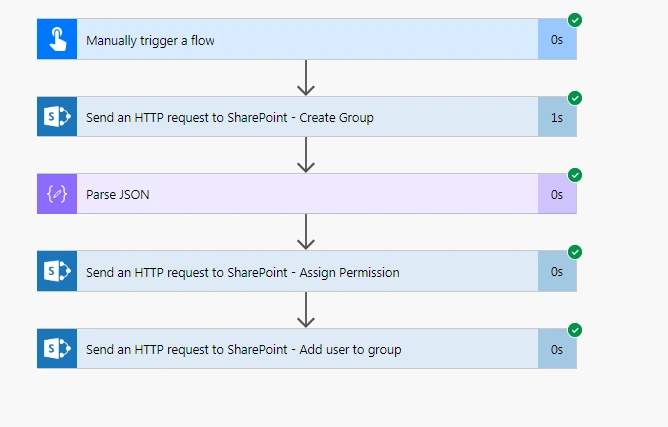
So, we are now done with our design; let us test the flow. Save it and test it from flow design.
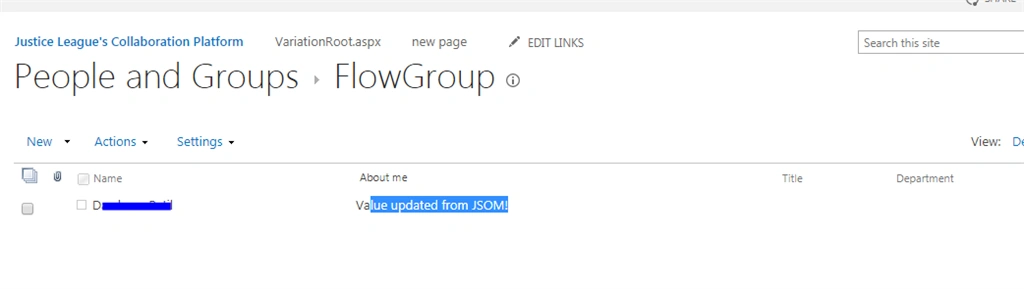
Now let us go to Site collection-> Site Settings->People and Group, we can find FlowGroup named group in list.
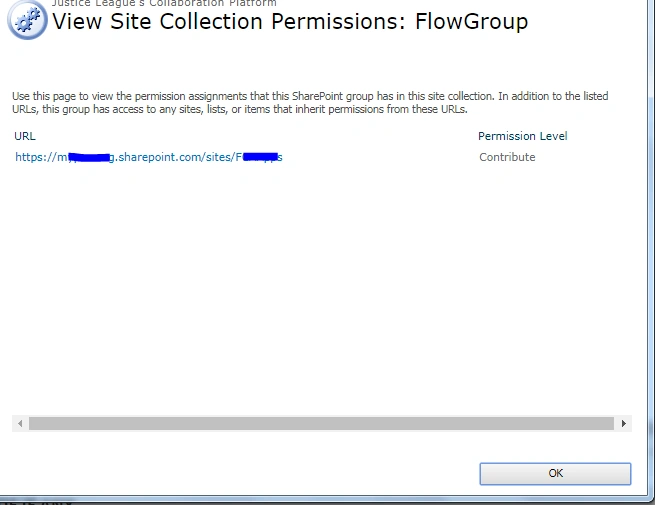
Let us check what permission is assigned to this group, Click Settings-> View Group Permission (from above page)
We can see Permission level contribute is assigned to FlowGroup.
In this article, we have learned and implemented the below 3 use cases.
Hope you enjoyed reading... Happy Coding..!!!
- Create a SharePoint Group
- Assign Permission to SharePoint Group
- Add user to SharePoint Group
TonyPosted Feb 24, 2024, 11:48 PM
How to generate the roledefid dynamically. Each time, the flow creates a new group and that group would have a new roledefid. I need to capture that id. Instead of this code: /_api/web/roleassignments/addroleassignment(principalid=<GROUPID>, roledefid=1073741827)
Anna HinojosaPosted Sep 1, 2021, 6:06 AM
Hi there! Thank you for the information, it's truly helpful. I've got a question: Is there a way to add multiple Users to the Sharepoint group in one action?. Thanks
Sajith lalPosted Jul 27, 2021, 9:47 AM
Thanks for contributing helps alot..