

PnPjs is an awesome library that providers wrappers around SharePoint REST API so that we as the developers don't have to write repetitive code and also don't have to worry about details on how to pass headers, data, etc. It is not only limited to SharePoint but we can also use it to call graph and Office 365 API. As this library comes as an npm package, it can be used for any node js and javascript based projects. You can learn more about PnP JS at this link. There are lots of packages available within this library that can be used selectively.
In this article, we will learn different user operations available and how to use them using PnP JS in React-based SPFx solutions. We will see an example of a web part but this can be used in extensions in a similar way.
Create SPFx Solution
- md pnpjsoperations
- cd pnpjsoperations
Run the below commands in sequence. Open a command prompt and create a directory for the SPFx solution and go to that directory.
Let us now create our solution:
- yo @microsoft/sharepoint
Select the below options,
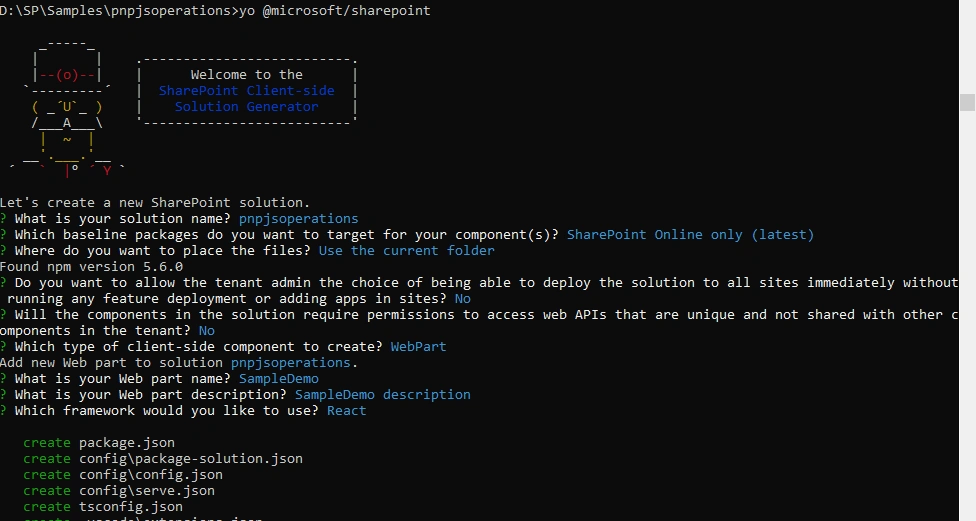
We will be using the React framework here so that we can also explore react concepts. Once you select all options in wizard one by one, it will take some time to generate the code structure. And you should see a success message once completed.
Install PnP JS Library Package/s
Now let's install the PnPJS npm packages. For this sample, we will be using @sp package so we will only install the sp package but you can install others also based on your requirement. Refer to this link to find a detailed list of packages available within the library.
Run the below command,
- npm install @pnp/sp --save
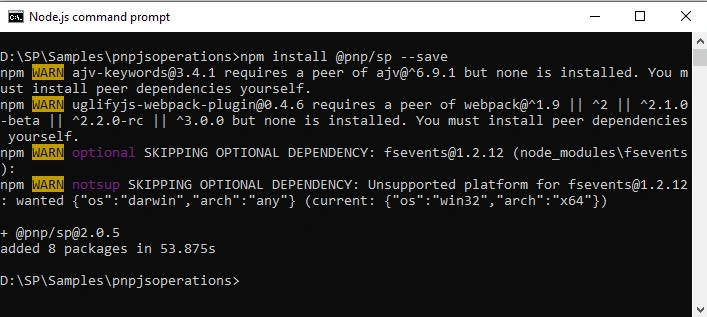
After it is completed, open the same folder in Visual Studio code (you can use any other editor as well).
Install JSON Viewer
We need this library just for this article's purpose. PnPJs will call SharePoint REST API which will return us JSON, so in order to view this JSON object we will use this React based library which displays JSON object in a nice and readable format. You can read about this package at this link.
- npm i react-json-view
Now let's modify the code to proceed with the demo. If you want to know about how to get started with React in SPFx web part, you can check my webinar on the same at this link.
Passing Web part Context to React Component
PnP JS needs a Sharepoint site context to work with, therefore we will pass it from our web part file to React components.
Open src\webparts\controls\components\ISampleDemoProps.ts
Modify the code as below.
- import { WebPartContext } from "@microsoft/sp-webpart-base";
- export interface ISampleDemoProps {
- description: string;
- spcontext:WebPartContext;
- }
Open src\webparts\controls\ControlsWebPart.ts
Modify the render method to pass the context.
- public render(): void {
- const element: React.ReactElement<ISampleDemoProps> = React.createElement(
- SampleDemo,
- {
- description: this.properties.description,
- spcontext:this.context
- }
- );
- ReactDom.render(element, this.domElement);
- }
Please note we have just added line ‘spcontext:this.context’ .
Modify React Component
Below are the high-level steps that we will do.
- Import required library; in our case we will be using pnp package and buttons from Office UI Fabric, React, and also Json-view library to display the response from pnpjs methods to display in a readable format.
- Create a state interface, the properties will be used to store JSON response from PNP js methods and will be bound to JSON view control.
- Constructor to initialize PnP JS context and state.
- The render method has been modified to add 4 buttons to demonstrate the respective use case.
- 4 methods which are called based on button selection.
- Calling PnP JS methods and changing the state variable jsonResponse.
Open src\webparts\controls\components\SampleDemo.tsx
- import * as React from 'react';
- import styles from './SampleDemo.module.scss';
- import { ISampleDemoProps } from './ISampleDemoProps';
- import { escape } from '@microsoft/sp-lodash-subset';
- //import library
- import { PrimaryButton, Stack,MessageBar, MessageBarType } from 'office-ui-fabric-react';
- import { TextField, MaskedTextField } from 'office-ui-fabric-react/lib/TextField';
- import { sp } from "@pnp/sp/presets/all";
- import ReactJson from 'react-json-view';
- //create state
- export interface ISampleDemoState {
- jsonResponse:any; //json object to hold response from pnp js methods
- Title:any; // to hold value entered in textbox
- responseOf:string; //to hold which button was clicked and show on webpart
- }
- var spObj = null;
- export default class SampleDemo extends React.Component<ISampleDemoProps, ISampleDemoState> {
- // constructor to intialize state and pnp sp object.
- constructor(props: ISampleDemoProps,state:ISampleDemoState) {
- super(props);
- this.state = {jsonResponse:null,Title:null,responseOf:""};
- sp.setup({
- spfxContext: this.props.spcontext
- });
- spObj = sp;
- }
- public render(): React.ReactElement<ISampleDemoProps> {
- return (
- <div className={ styles.sampleDemo }>
- <div className={ styles.container }>
- <div className={ styles.row }>
- <div className={ styles.column }>
- <span className={ styles.title }>Welcome to PnP JS User Operations Demo!</span>
- </div>
- </div>
- </div>
- <br></br>
- <TextField value={this.state.Title} label="Enter User ID" onChange={(e)=> this.setTitle(e.target)}/>
- <br></br>
- <Stack horizontal tokens={{childrenGap:40}}>
- <PrimaryButton text="Get Current User" onClick={()=>this.getCurrentUser()} />
- <PrimaryButton text="Get Current User Groups" onClick={()=>this.getCurrentUserGroups()} />
- </Stack>
- <br></br>
- <Stack horizontal tokens={{childrenGap:40}}>
- <PrimaryButton text="Get All Site Users" onClick={()=>this.getAllSiteUser()} />
- <PrimaryButton text="Get User by ID" onClick={()=>this.getUserById()} />
- </Stack>
- <br></br>
- <br></br>
- {this.state.jsonResponse &&
- <React.Fragment>
- <div>Respone from: {this.state.responseOf}</div>
- <br></br>
- <ReactJson src={this.state.jsonResponse} collapsed={false} displayDataTypes={false} displayObjectSize={false}/>
- </React.Fragment>
- }
- </div>
- );
- }
- // event handler to set users input to state
- private setTitle(element) {
- var val = (element as HTMLInputElement).value;
- this.setState({"Title":val});
- }
- // method to get current user
- private async getCurrentUser(){
- let user = await sp.web.currentUser.get();
- this.setState({jsonResponse:user,responseOf:"Get Current User"});
- }
- // method to get current user groups
- private async getCurrentUserGroups(){
- let groups = await sp.web.currentUser.groups();
- this.setState({jsonResponse:groups,responseOf:"Get Current User Groups"});
- console.log(groups);
- }
- //method to get all site users
- private async getAllSiteUser(){
- let groups = await sp.web.siteUsers();
- this.setState({jsonResponse:groups,responseOf:"Get All site users"});
- console.log(groups);
- }
- //method to get user by id
- private async getUserById (){
- let user = await sp.web.getUserById(parseInt(this.state.Title)).get();
- this.setState({jsonResponse:user,responseOf:"Get User by ID"});
- }
- }
For understanding purposes, I have added comments in the above code.
Testing the webpart
Let us see this web part in action. Run gulp serve
- gulp serve
- https://msbuild.com/sites/mylab/_layouts/15/workbench.aspx
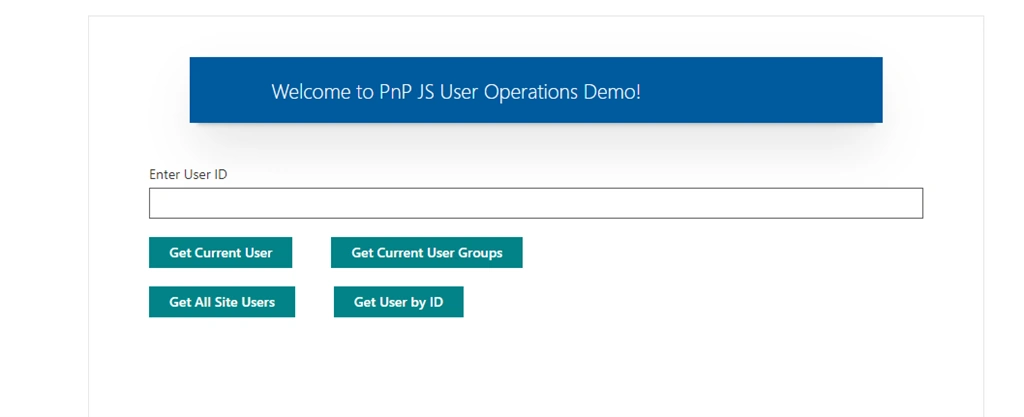
Click on Get Current User
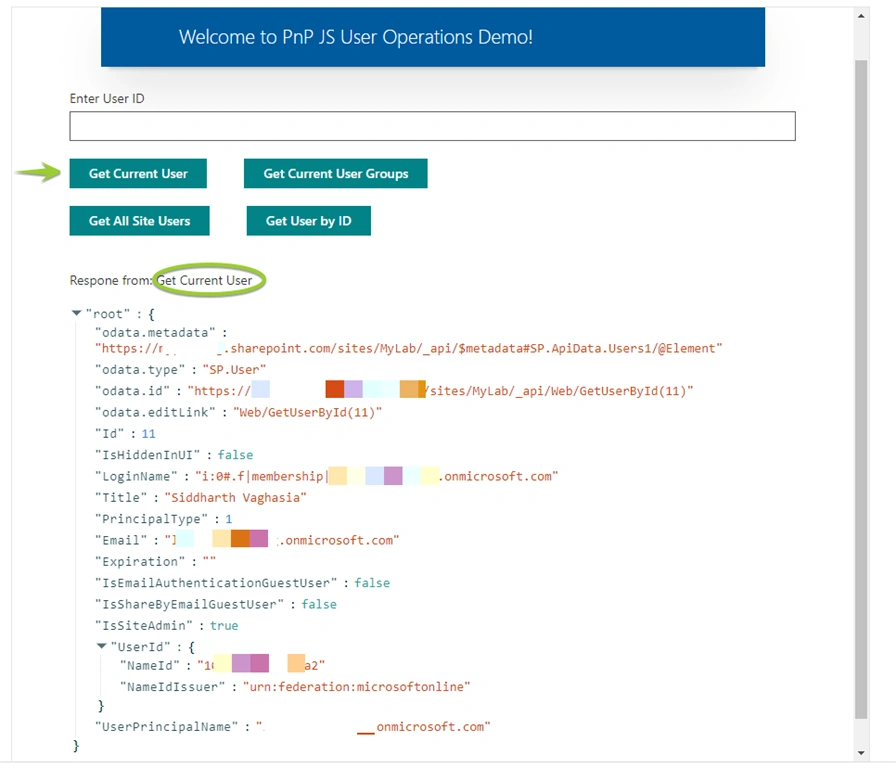
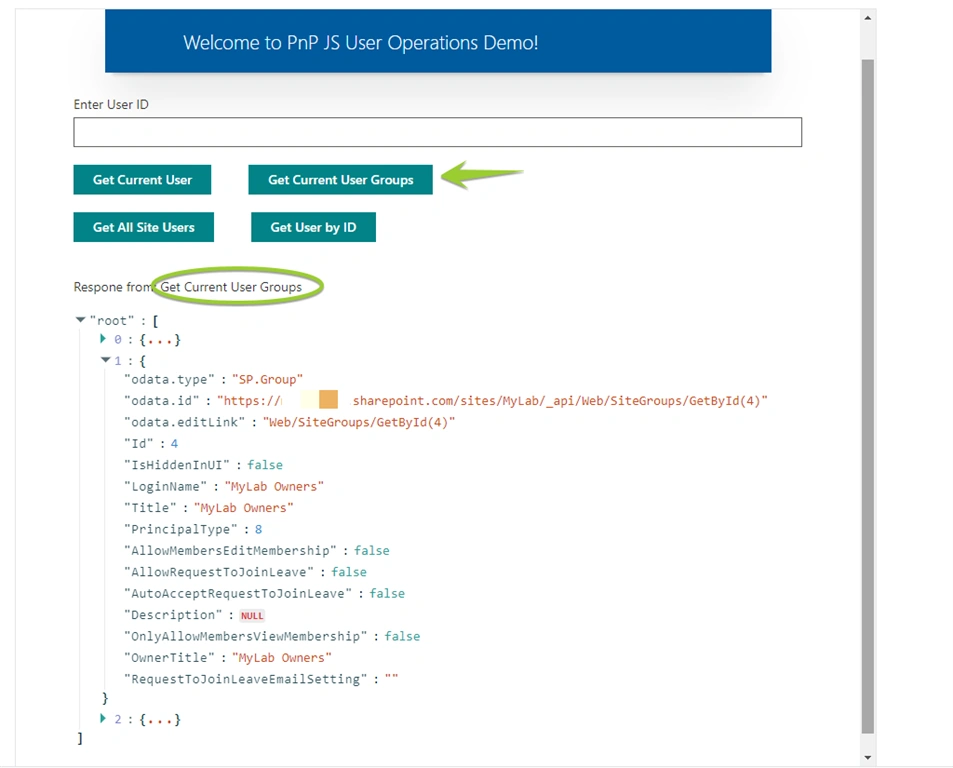
Click on Get Current User Groups
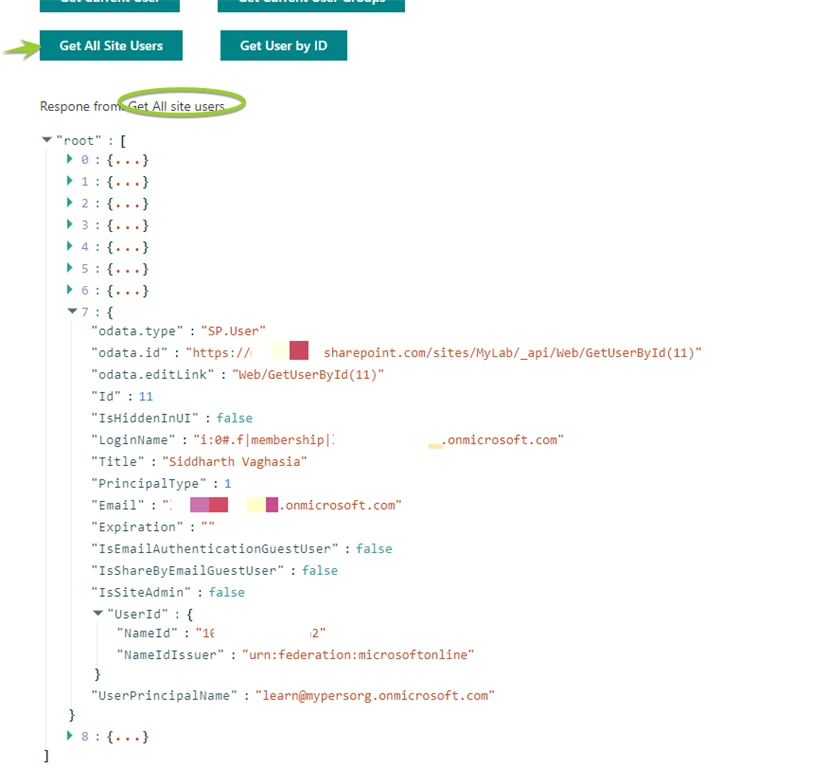
Click on Get All Site Users
This method will return all the site users including groups.
Enter User ID (in my case I am adding 13)
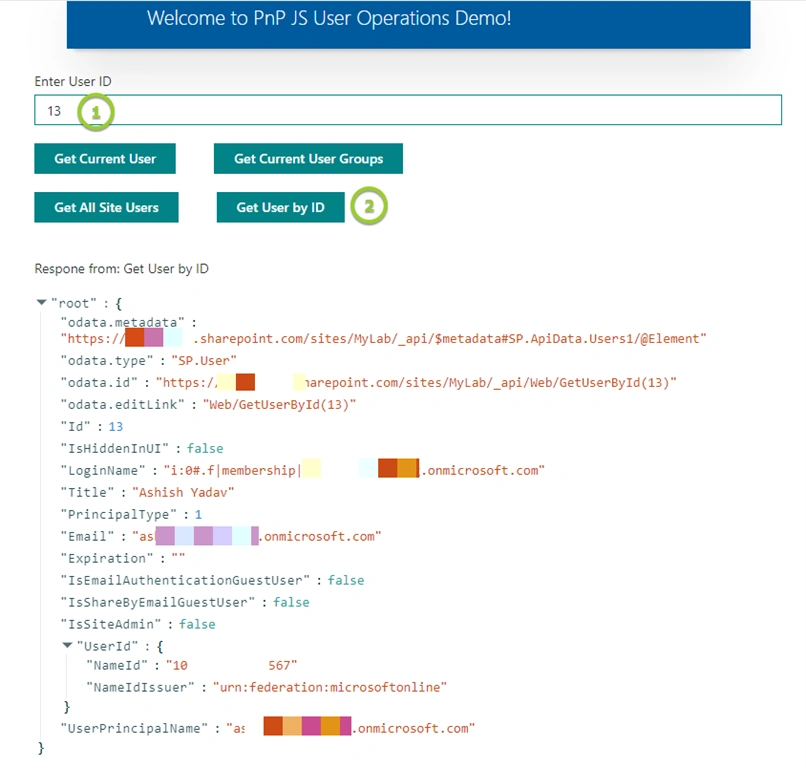
This article demonstrated how we can use some of PNP js methods related to user operations.
I hope this helps, happy coding!!!
cedric bouvePosted Jan 5, 2021, 8:31 AM
My mistake it is write under thanks you so much for this
cedric bouvePosted Jan 5, 2021, 8:29 AM
Create a state interface, the properties will be used to store JSON response from PNP js methods and will be bound to JSON view control
cedric bouvePosted Jan 5, 2021, 8:29 AM
Hi i don't understand this part