

Introduction
Before reading this article, I highly recommend reading the previous article of the series.
This article explains the following
- What is a shared data source?
- How to create shared data sources?
Shared data sources in SQL Server
- The shared source can be used by multiple reports that run on a reporting services report server.
- If any change occurs in the server name, database name, login credentials,.. etc., you can update the connection information in one place.
- Shared data sources provide an easy way to manage data source properties that often change over time.
- Shared data sources are optional for reports and subscriptions.
Create Shared Data Source
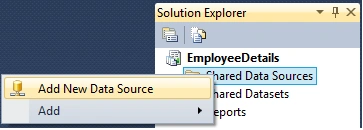
Go to Solution Explorer and right click on Shared Data Sources, and click on Add New Data Source.
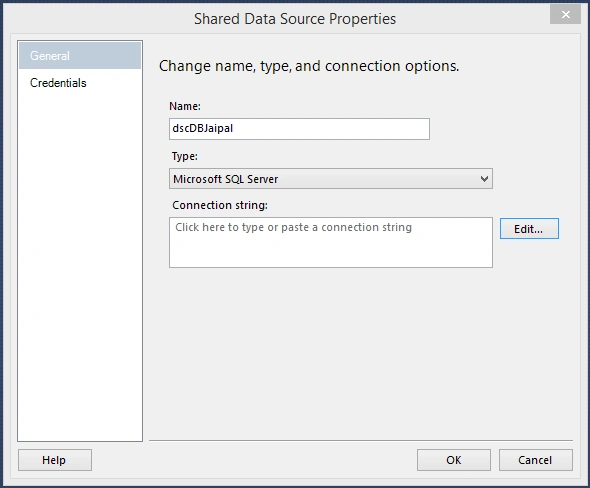
Then you will see the following wizard. Provide the data source name, and click Edit to make the connectionString.
After clicking Edit, we must provide the following Connection Properties in the next wizard.
- Provide the Server name.
- Select the "Use SQL Server Authentication" radio button.
- Enter the User name and Password in the password text box.
- Check the "Save my password" checkbox.
- Select the "Select or enter a database name:" radio button.
- Select the database to which you want to set the connection.
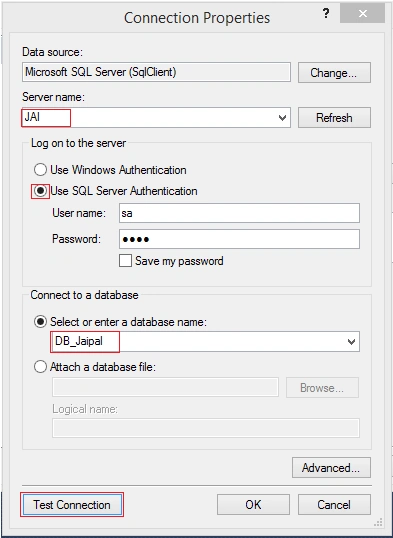
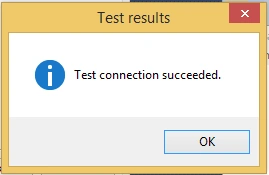
Click on the "Test Connection" button to ensure the connection can be established.
Click Ok. Then you will see the connection as follows.
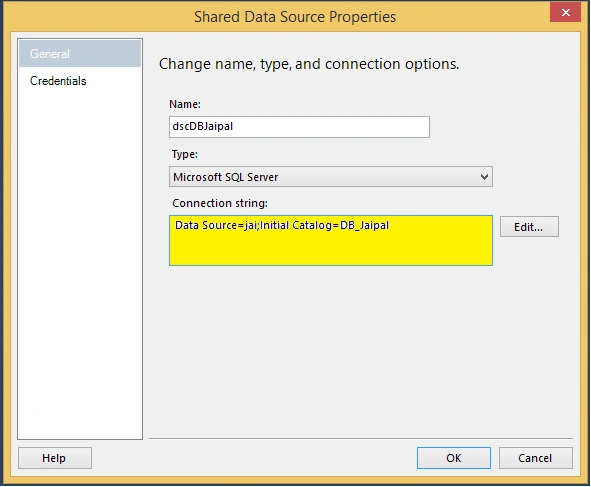
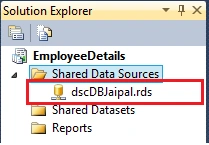
Click Ok. That's it! A shared data source was created at this point. Go to Solution explorer, where you can see the shared data source.
Conclusion
In this article, we learned about shared data source and how to create shared data sources in SQL Server.
Jaipal ReddyPosted Nov 28, 2015, 3:02 AM
Thank you sir.
Santhakumar MunuswamyPosted Nov 28, 2015, 2:30 AM
Nice share
Jaipal ReddyPosted Nov 23, 2015, 8:11 AM
Thank you Debasis Saha Sir.
Debasis SahaPosted Nov 23, 2015, 7:08 AM
Good One..
Jaipal ReddyPosted Nov 23, 2015, 5:17 AM
Thank you Sibeesh Sir.
Sibeesh VenuPosted Nov 23, 2015, 4:08 AM
Nice Share
Jaipal ReddyPosted Nov 23, 2015, 3:21 AM
Thank you Harshad.
Harshad PansuriyaPosted Nov 23, 2015, 2:51 AM
Nice one