

Introduction
In this article, you will learn about queues in Microsoft Azure and how to manage queues using Powershell.
In the world of computers and data structures, the queue is a collection of entities. This collection is maintained in a sequence, this sequence can be modified by adding entities on one end and removing them from the other. The sequence where the elements are added is called back, tail, or rear of the queue. Head or front of the queue is called to the point from where elements are removed.
What is Queue in a layman’s language?
From a perspective of a developer, the queue is basically a data structure used to store data in a manner that follows the First-in First-out rule. Data can be added to the tail while it is deleted from the front. The process of adding to the rear is called enqueue, and removing from the front is called dequeue.
Queue And Microsoft Azure
Azure queues use a similar concept to store messages in a queue. The process followed by Azure in message queue service is,
- Firstly, a sender sends the message which is received by the client and processes them. This message might have some attributes attached to it.
- Once the client has processed the message it deletes it. What Azure does is its service store the message for 7 days and deletes it automatically after it if it is not done by the client.
Sometimes, there is one sender and one client or one sender and many clients. Many senders and many clients are also one of the scenarios.
Decoupling the segments is one of the benefits of message queue services. It runs in an offbeat climate where messages can be sent among the various parts of an application. In this manner, it gives a productive answer for overseeing work processes and undertakings. For instance, a message to finish an undertaking is sent from the frontend of the application and is gotten by a backend laborer, who at that point finishes the assignment and erases the message.
Note
The Message does not duplicate anywhere. This means that there only one copy of your message. The maximum number of messages is 20,000 whereas the size limit is 64kb.
How to Create a Queue Using Azure Portal
To create a queue, you must have a resource group and storage account. I have already written an article on how to create a storage account.
Below are some simple steps that you need to follow to create a queue.
- Login on Portal.azure.com
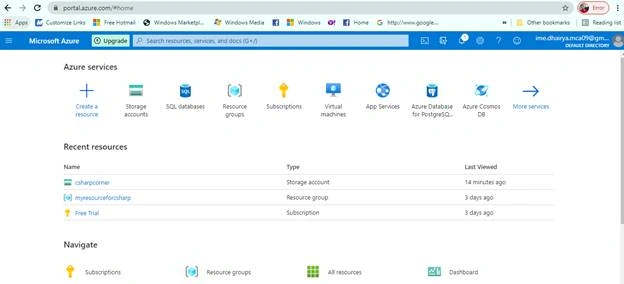
- Click on the storage account to open it. You can directly click on your storage account from 'recent resources'.
- Scroll down to go 'Queue services' and click on Queues'. To create a new queue, click on '+Queue' at the top.
- After click on '+Queue', a new window will be open for 'Add Queue'. Write the name of the queue in the text box and click on 'Ok'.
Your queue has now been created.
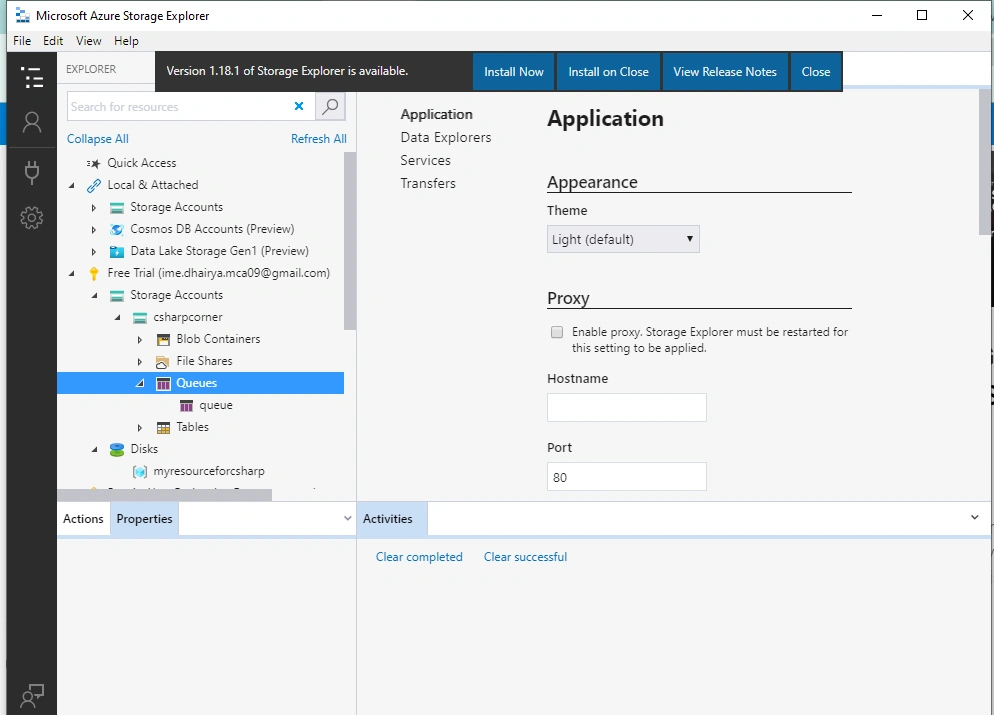
You can see it in azure storage explorer. that I have shown at the end of the article.
How to Manage Queues using PowerShell?
Create a Queue
Step 1
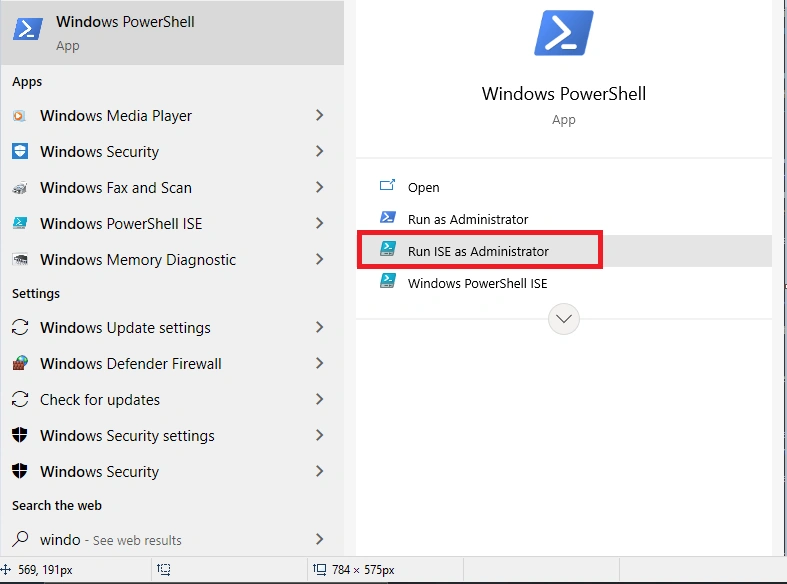
Right-click on Windows PowerShell in the taskbar. Choose ‘Run ISE as administrator’.
Step 2
Run the following command to access your account. Please replace the highlighted part for your account.
- $context = New-AzureStorageContext -StorageAccountName csharpcorner StorageAccountKey ****************
Step 3
Specify the storage account in which you want to create a queue.
- Set-AzureSubscription –SubscriptionName "Free Trial" -CurrentStorageAccount csharpcorner
Step 4
Create a Queue.
- $QueueName = "queue" $Queue = New-AzureStorageQueue –Name $QueueName -Context $Ctx
Retrieve a Queue
- $QueueName = "queue" $Queue = Get-AzureStorageQueue –Name $QueueName –Context $Ctx
Delete a Queue
- $QueueName = "queue" Remove-AzureStorageQueue –Name $QueueName –Context $Ctx
Insert a Message into a Queue
Step 1
Login to your account.
- $context = New-AzureStorageContext -StorageAccountName csharpcorner StorageAccountKey *************
Step 2
Specify the storage account you want to use.
- Set-AzureSubscription –SubscriptionName "Free Trial" -CurrentStorageAccount csharpcorner
Step 3
Retrieve the queue and then insert the message.
- $QueueName = "queue"
- $Queue = Get - AzureStorageQueue - Name $QueueName - Context $ctx
- if ($Queue - ne $null) {
- $QueueMessage = New - Object - TypeName Microsoft.WindowsAzure.Storage.Queue.CloudQueueMessage - ArgumentList "this is my message"
- $Queue.CloudQueue.AddMessage($QueueMessage)
- }
The ‘if’ condition in the script above checks if the queue specified exists or not.
Dequeue Next Message from Queue
Step 1
Connect the account and specify the storage account, by running the commands as shown in the above steps.
Step 2
Retrieve the queue.
- $QueueName = "myqueue" $Queue = Get-AzureStorageQueue -Name $QueueName -Context $ctx $InvisibleTimeout = [System.TimeSpan]::FromSeconds(10)
Step 3
Dequeue the next message.
- $QueueMessage = $Queue.CloudQueue.GetMessage($InvisibleTimeout)
Step 4
Delete the dequeued message.
- $Queue.CloudQueue.DeleteMessage($QueueMessage)
Managing Queues using Azure Storage Explorer
- From the drop-down menu from the top right select the storage account. Account will be displayed that were added before. If not, you can add an account and continue using Azure Storage Explorer.
- Add queue by selecting ‘Queues' from the left panel and tap on new.
- Enter the name.
- Add and delete the messages from selecting the queue in the left panel.
What are the most common uses of the azure storage queue?
- Azure Storage Queue basically used for assured delivery of system messages between and within applications.
- The Azure Storage Queue empowers in storing messages until the system is available to process queues further.
- Azure Queue storage permits application components to communicate with each other in the cloud, on the desktop, on-premises, or on mobile devices by decoupling system segments.
- Azure Storage provides a number of client libraries that interact with Azure Storage Queues to provide support for application component failures.
What is the message size limit in an azure storage queue?
Azure queue storage is used to store a large number of messages. It allows you to access messages from anywhere in the world via authenticated calls using HTTP and HTTPS. The maximum size of the message can be 64kb. A queue can have millions of messages, up to the maximum capacity limit of a storage account.
Summary
In this article, we discussed azure queues and how to retrieve, delete, Azure queues. Any suggestions or feedback or query related to this article are most welcome.
You can also check about the azure queue in the below articles,
Join the conversation! Your thoughts help the community grow.