

- Open Windows Azure SDK Command Prompt as an administrator from Start -> All Programs -> Windows Azure SDK v1.x
- At command prompt execute the following command
csupload Add-VMImage -Connection "SubscriptionId=<YOUR-SUBSCRIPTION-ID>; CertificateThumbprint=<YOUR-CERTIFICATE-THUMBPRINT>" -Description "Base image Windows Server 2008 R2" -LiteralPath "<PATH-TO-VHD-FILE>" -Name baseimage.vhd -Location <HOSTED-SERVICE-LOCATION>
Where
- <YOUR-SUBSCRIPTION-ID> is your subscription Id
- <YOUR-CERTIFICATE-THUMBPRINT> is the thumbprint of the certificate on the management portal.
- Set the description as Base image Windows Server 2008 R2
- <PATH-TO-VHD-FILE> is the full path of the .vhd file.
- Set the name of the image as baseimage.vhd. So, that the name of the image on portal will be baseimage.vhd
- <HOSTED-SERVICE-LOCATION> set the location where the hosted service will be deployed. The location can be “East Asia”, “North Central US”, “North Europe”, “South Central US”, “Southeast Asia”, “West Europe”.
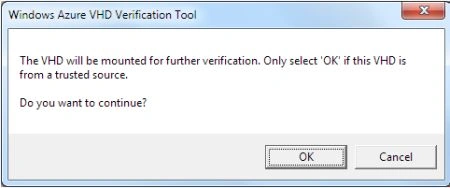
- In the Windows Azure VHD Verification Tool dialog, click OK to allow the VHD to be mounted.
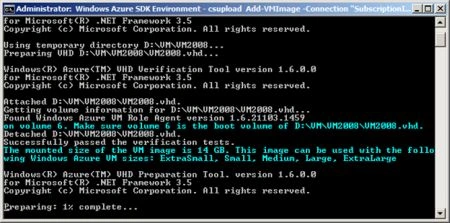
- Now it mounts the .vhd file and verifies it. In this process it generates a compressed file (.preped file) in the same folder as the original image file.
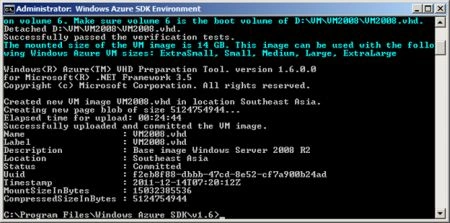
- After that it creates a new blob for uploading the image file and starts uploading the compressed image to the azure account. It will take significant amount of time. After completion it shows the details.
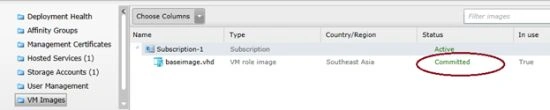
- Once the image is uploaded successfully it shows the status of the image as Committed.
Join the conversation! Your thoughts help the community grow.