

Introduction
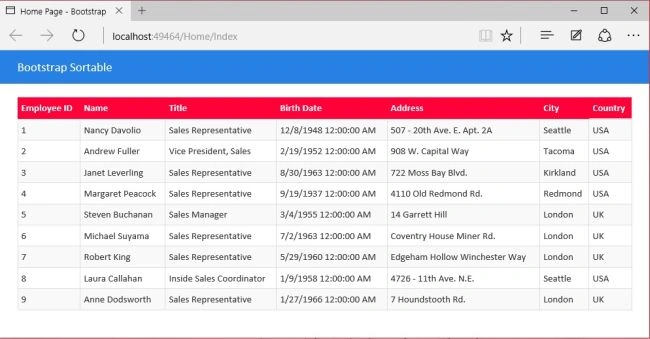
Bootstrap Sortable is a jQuery extension for Bootstrap that adds the capability of sorting rows of your Bootstrap tables.
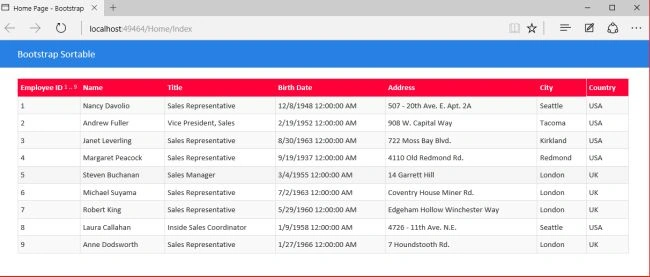
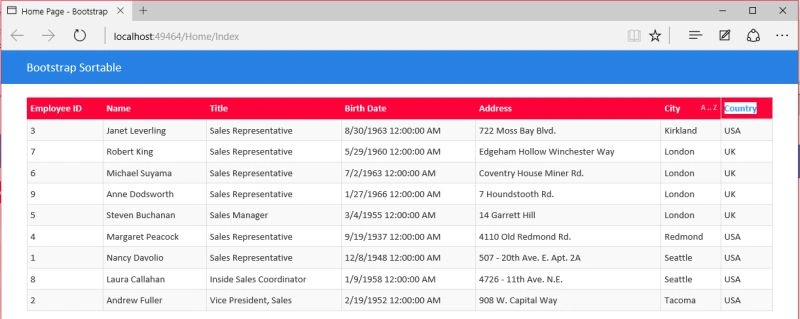
- Sorts table data alphabetically.
- Sorts table data by numbers.
- Sorts table data by dates. (Requires Momont.js).
- Allows to disable sorting for a specific table column.
Create a new project using "File", "New", then "Project". Select Web, then "ASP.NET Web Application". Name it “BootstrapSortableApplication".
 You can see New ASP.NET Project dialog for ASP.NET 4.6 templates. Select a template, MVC, then click OK.
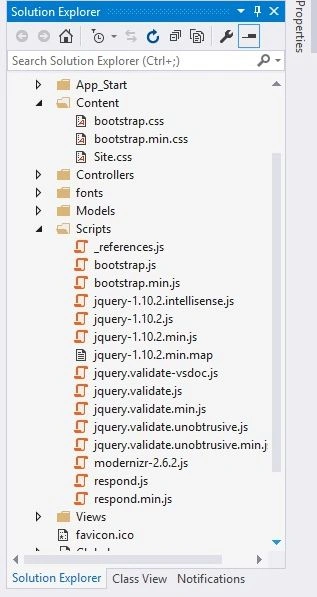
 Now, view Solution Explorer, Content and Scripts.
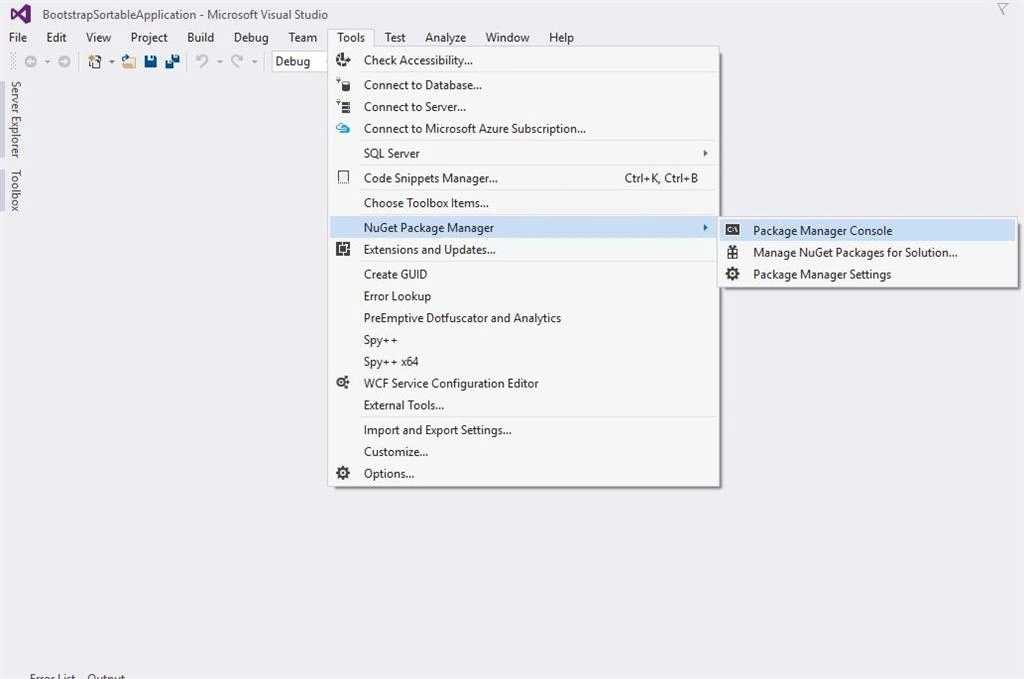
 Now, Tools click on the Nuget Package Manager > Package Manager Console.
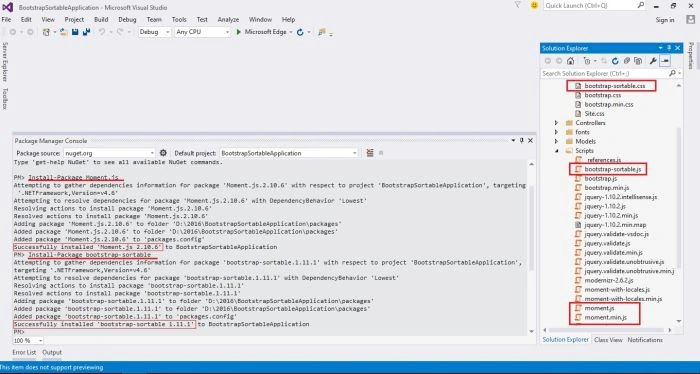
 To install bootstrap-sortable, run the following command in the Package Manager Console.
- Install-Package bootstrap-sortable.
To install Moment.js, run the following command in the Package Manager Console.
- Install-Package Moment.js.

- bundles.Add(new ScriptBundle("~/bundles/bootstrap").Include(
- "~/Scripts/bootstrap.js",
- "~/Scripts/bootstrap.min.js",
- "~/Scripts/moment.min.js",
- "~/Scripts/bootstrap-sortable.js",
- "~/Scripts/respond.js"));
- bundles.Add(new StyleBundle("~/Content/css").Include(
- "~/Content/bootstrap.min.css",
- "~/Content/bootstrap-sortable.css",
- "~/Content/site.css"));
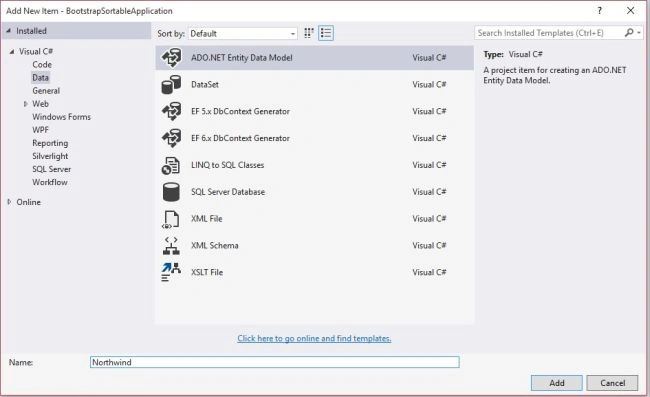

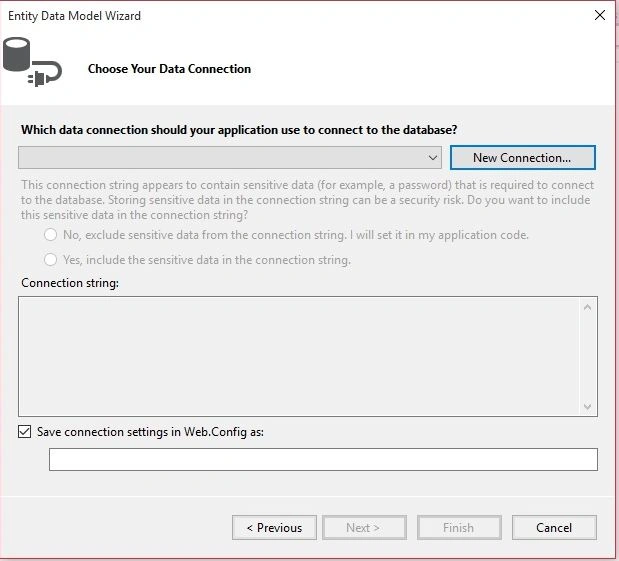
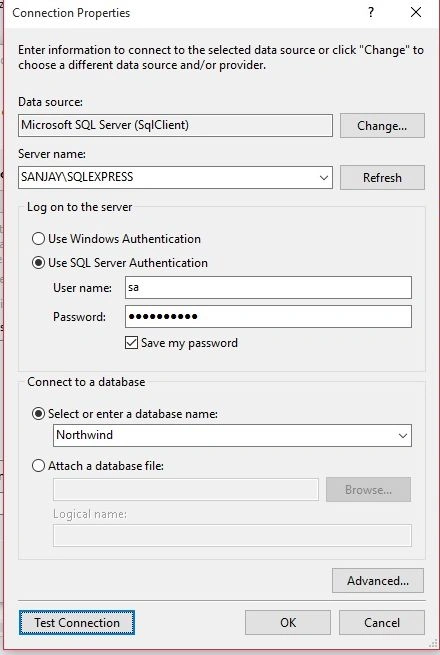
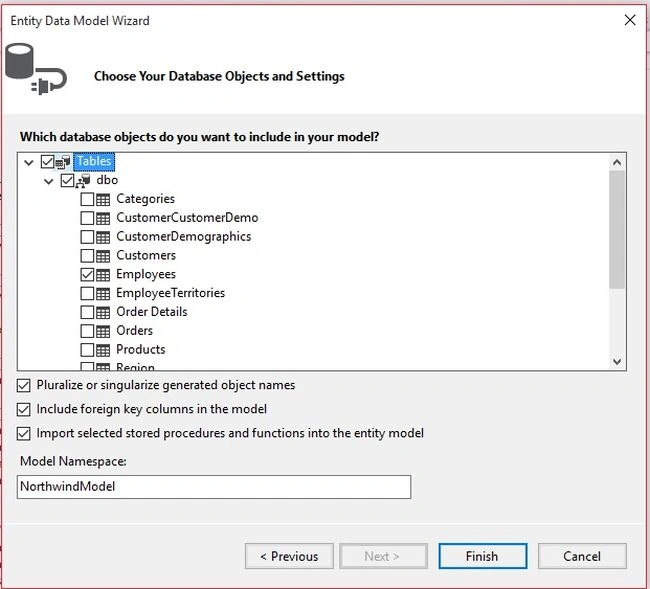
In the next step click on the “New Connection” button and then select “Microsoft SQL Server SqlClient” as the data source and then click Next. You should see this dialog below:


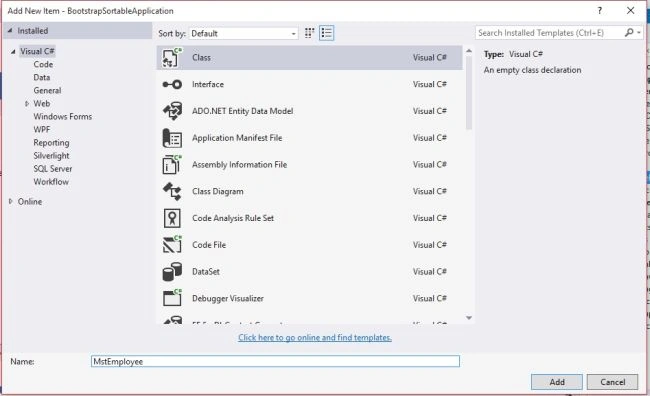
- using System;
- using System.Collections.Generic;
- using System.Linq;
- using System.Web;
- namespace BootstrapSortableApplication.Models
- {
- public class MstEmployee
- {
- public int EmployeeID
- {
- get;
- set;
- }
- public string LastName
- {
- get;
- set;
- }
- public string FirstName
- {
- get;
- set;
- }
- public string Name
- {
- get;
- set;
- }
- public string Title
- {
- get;
- set;
- }
- public DateTime ? BirthDate
- {
- get;
- set;
- }
- public DateTime ? HireDate
- {
- get;
- set;
- }
- public string Address
- {
- get;
- set;
- }
- public string City
- {
- get;
- set;
- }
- public string Region
- {
- get;
- set;
- }
- public string PostalCode
- {
- get;
- set;
- }
- public string Country
- {
- get;
- set;
- }
- }
- }
- using System;
- using System.Collections.Generic;
- using System.Linq;
- using System.Web;
- using System.Web.Mvc;
- using BootstrapSortableApplication.Models;
- namespace BootstrapSortableApplication.Controllers
- {
- public class HomeController: Controller
- {
- public ActionResult Index()
- {
- List < MstEmployee > qry = new List < MstEmployee > ();
- using(NorthwindEntities dc = new NorthwindEntities())
- {
- qry = (from s in dc.Employees select new MstEmployee
- {
- EmployeeID = s.EmployeeID,
- Name = s.FirstName + " " + s.LastName,
- Title = s.Title,
- BirthDate = s.BirthDate,
- HireDate = s.HireDate,
- Address = s.Address,
- City = s.City,
- Region = s.Region,
- PostalCode = s.PostalCode,
- Country = s.Country,
- }).ToList();
- }
- return View(qry);
- }
- }
- }
- @model IEnumerable<BootstrapSortableApplication.Models.MstEmployee>
- @{
- ViewBag.Title = "Home Page";
- }
- <br />
- <div class="table-responsive">
- <table class="table table-bordered table-condensed table-striped table-hover sortable">
- @if (Model.Count() == 0)
- {
- <tr>
- <td colspan="10">No Record's found.</td>
- </tr>
- }
- else
- {
- <thead>
- <tr class="danger">
- <th data-defaultsign="_19"> Employee ID</th>
- <th data-defaultsign="AZ">Name</th>
- <th data-defaultsign="AZ">Title</th>
- <th data-defaultsign="month">Birth Date</th>
- <th data-firstsort="desc">Address</th>
- <th data-defaultsign="AZ">City</th>
- <th data-defaultsort="disabled">Country</th>
- </tr>
- </thead>
- foreach (var item in Model)
- {
- <tr>
- <td>@item.EmployeeID</td>
- <td>@item.Name</td>
- <td>@item.Title</td>
- <td>@item.BirthDate</td>
- <td>@item.Address</td>
- <td>@item.City</td>
- <td>@item.Country</td>
- </tr>
- }
- }
- </table>
- </div>


Rayman BacchusPosted May 19, 2021, 12:20 AM
I followed the instructions above letter by letter. I only connected to a different database. I am on Framework 6.00 and get this error - System.NotSupportedException: 'The entity or complex type <Model> cannot be constructed in a LINQ to Entities query.'
Asad NaeemPosted Jan 17, 2018, 12:57 AM
Date columns sorting is not working properly. Any solution for that....
susilkumar beheraPosted Nov 28, 2017, 8:28 AM
Nice....Bro:)Thanks 4 the Article.
Beefy DawgPosted Nov 17, 2017, 2:08 AM
Sorting by date month is incorrect, unfortunately. December should be last not after January (it's actually sorting by the first digit of the month, not the month).
Sourabh SomaniPosted Apr 8, 2016, 4:50 AM
Nice Article :)
Uday Bhan SinghPosted Feb 3, 2016, 6:11 AM
Thank you for nice Article
Santhakumar MunuswamyPosted Jan 5, 2016, 11:27 PM
Thanks for nice article
sreenivasa kPosted Jan 4, 2016, 8:07 PM
good
Muhammad Aqib ShehzadPosted Jan 4, 2016, 11:46 AM
good one
ROHAN THAKURPosted Jan 4, 2016, 11:23 AM
nice article...
Shridhar SharmaPosted Jan 4, 2016, 6:23 AM
nice share
Ankit BansalPosted Jan 4, 2016, 6:22 AM
Nice one..
Raja TPosted Jan 3, 2016, 11:50 PM
Nice, Thanks for sharing