Introduction
One of the big challenges I had to overcome this week was how to launch an application with arguements from a hyperlink in the WebBrowser Control. You would think this would be fairly easy, but underneath the workings of the WebBrowser Control is security-heavy Internet Explorer. I guess one of Microsoft's ongoing challenges is to balance the amount of security IE needs against viruses and wormbots and to make the control useable for developers. It seems to me, when it comes to automating IE, Microsoft has lately been leaning on making life more secure for the consumer and more painful for developers. I guess my mistake was to think I could use the WebBrowser Control as a Reporting Tool and extend it beyond simple reporting. Still, it would be REALLY nice if there was a way to turn off the security for the WebBrowser control when you are developing it to be used as an application on a local machine.
Anyway, after three days of research and some hard learning experience, I managed to figure out how you could launch an application from a hyperlink in HTML. The trick is to write javascript into your HTML report that will create an ActiveX control that will in turn call the application you wish to launch.
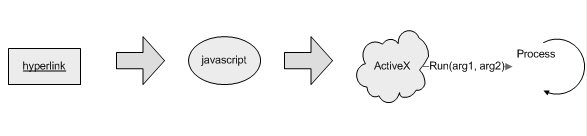
Figure 1 - Steps for running an executable from a hyperlink in IE
Javascript from a Hyperlink
Did you know that you can launch javascript from a hyperlink using the following syntax?
| <a href = "javascript:alert('hello')"> post alert</a> |
You can try it yourself by just typing
| javascript:alert('hello') |
into your browser, which brings up figure 2:
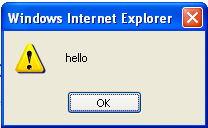
Figure 2 - Result of javascript command in browser edit window
The same technique can be used to call your own javascript function called launch, that will eventually launch your local machine process:
| <a href = "javascript:launch('name', 'date')">launch it!</a> |
In my current project, I needed to generate the line above for a report using xsl. If you are generating the hyperlink above from xsl, your xslt for this might look like the following (xsl gives you the flexibility of populating the parameters in your javascript call with data from an xml file.)
Listing 1 - XSL for generating a hyperlink that calls javascript
<A>
<xsl:attribute name="HREF">
javascript:launch('<xsl:value-of select ="$name"/>', '<xsl:value-of select ="$date"/>')
</xsl:attribute>
<xsl:value-of select ="$title"/>
</A> |
So what does the javascript launch code look like? The javascript just gives us a conduit to an ActiveX control which we can call with the parameters name and date. We simply use the javascript to create the ActiveX COM object and dispatch a Run call from the object.
Listing 2 - javascript for creating and calling an ActiveX Object
<script type="text/javascript">
function launch(name, date)
{
var myLauncher = new ActiveXObject('HyperLinkLauncher.Launcher');
alert ("name:" + name + " date:" + date);
myLauncher.Run(name, date);
}
</script> |
If we want to include the javascript in our xsl generation script, we can just stick the javascript all in a CDATA block so xsl won't get confused by the javascript symbols and characters:
Listing 3 - xsl for generating the javascript in listing 2
<script type="text/javascript">
<![CDATA[
function launch(name, date)
{
var myLauncher = new ActiveXObject('HyperLinkLauncher.Launcher');
alert ("name:" + name + " date:" + date);
myLauncher.Run(name, date);
}
]]>
</script> |
Creating an COM Callable Wrapper (CCW) in .NET
Now we have all the pieces in our HTML to call an ActiveX Control with parameters from HTML. The next step is to create the ActiveX control that will launch a process on our local machine. Microsoft gives us an easy way to create ActiveX controls in .NET using the COM Callable Wrapper. By just placing a few attributes in our classes and interfaces, we can add automation directly into a .NET program or library. (It sure beats the old way using ATL!!)
So let's review what we are trying to do. We are trying to launch a process from the hyperlink and pass it parameters. In order to launch the process we need to create an ActiveX Control called HyperLinkLauncher.Launcher. The first step to creating are ActiveX COM callable wrapper is just to create a new project of type library. ActiveX controls don't need to be executables, we just need to be able to create them and use their an interface to access their methods and properties. Go to the File->New->Project menu and choose a Class Library project as shown in figure 2.
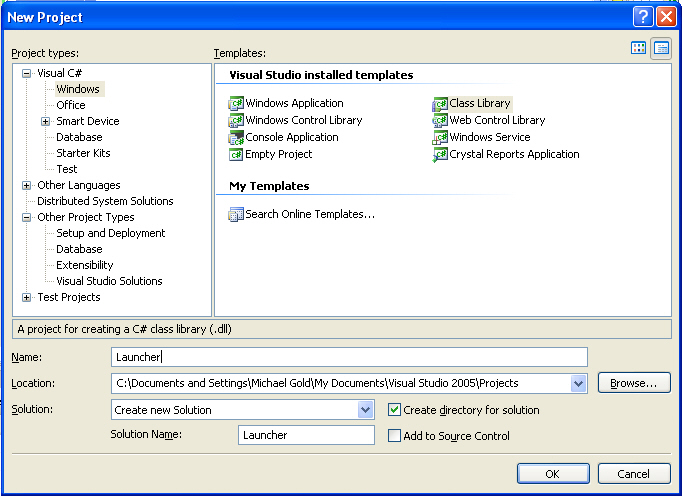
Figure 2 - Creating a C# Project of Type Library
Next we open up the Launcher class and add a ProgId attribute to the class named "HyperLinkLauncher.Launcher". Adding this attribute will allow us to create a COM object with this name using javascript. Also we want to add a Run method to run our command line application. The Run method uses the System.Diagnostics.Process.Start method to launch our commandline process with the name and date parameters.
Listing 4 - Adding the ProgId attribute
|
[ProgId("HyperLinkLauncher.Launcher")]
[ClassInterface(ClassInterfaceType.None)]
public class Launcher : ILauncher
{
public void Run(string name, string date)
{
string commandString;
commandString = string.Format("/N {0} /D {1}", name, date);
Process.Start(@"C:\Program Files\Microgold\Apps\MyApp.exe",
commandString);
}
} |
In order to access our run method through COM, we need to add an interface. This interface will be used to create our dispatch interface which will expose our COM methods and properties. The interface is shown in listing 5. The InterfaceType attribute and the DispID attribute adds the plumbing to create the necessary COM functionality: Also you need a GUID (unique id) attribute, to distinguish your ActiveX controls from all the other activex controls on your computer system. You can generate the GUID from the VS.NET menu under Tools->Create GUID and then paste the GUID into the Guid attribute above your interface.
Listing 5 - Adding the ProgId attribute
|
[Guid("D1E4C49A-FA4B-424a-8D61-0F5CE8B6F2FB")]
[InterfaceType(ComInterfaceType.InterfaceIsIDispatch)]
public interface ILauncher
{
[DispId(1)]
void Run(string name, string date);
} |
The full code for your the CCW is shown in Listing 6. Note that there really isn't that much coding necessary to turn your .NET class into a COM object.
Listing 6- A COM Callable Wrapper for Launching a Process with Arguements
|
using System;
using System.Collections.Generic;
using System.Text;
using System.Windows.Forms;
using System.Diagnostics;
using System.Runtime.InteropServices;
namespace HyperLinkLauncher
{
[Guid("D1E4C49A-FA4B-424a-8D61-0F5CE8B6F2FB")]
[InterfaceType(ComInterfaceType.InterfaceIsIDispatch)]
public interface ILauncher
{
[DispId(1)]
void Run(string name, string date);
}
[ProgId("HyperLinkLauncher.Launcher")]
[ClassInterface(ClassInterfaceType.None)]
public class Launcher : ILauncher
{
public void Run(string name, string date)
{
string commandString;
commandString = string.Format("/N {0} /D {1}", name, date);
Process.Start(@"C:\Program Files\Microgold\Apps\MyApp.exe",
commandString);
}
} } |
Installing the COM Callable Wrapper
It's not enough to build the CCW and celebrate your successful hack. In order to get your COM callable wrapper to work properly, three things need to happen (1) Your CCW must be strong named (2) you need put your library assembly into the GAC. (3) You need to register your Active X control as a COM object.
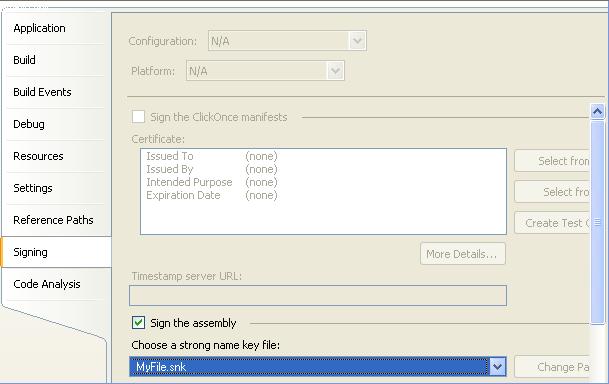
In order to create a strong name for your assembly, go to your project properties in Visual Studio, pick the signing tab, and check Sign the assembly. Also, you will need to provide a strong name key file name.
Now we need to place the signed assembly in the GAC. The easiest way to stick the CCW into the GAC is to open up c:\windows\assembly under file explorer and drag your compiled dll into the directory. Of course, you could also use the command line tool gacutil.exe.
gacutil.exe /i Launcher.dll
To register your COM callable wrapper with your system, you'll need to use regasm (regsvr32.exe won't work on a .NET CCW). Upon running regasm, the utility will indicate if your dll was registered successfully. You can also use visual studio 6.0 tools such as OLE View to look at the contents of Launcher.tlb after it is generated to make sure that your COM interface was created properly. The command line for regasm is (including type lib generation) is shown below:
regasm /tlb:Launcher.tlb Launcher.dll
Once you've successfully registered your COM object, you can test your javascript code to make sure it launches your app properly. You may want to add a MessageBox.Show (you'll need to include System.Windows.Forms.dll in your library references.) in your Run method to make sure your ActiveX Run command is being accessed.
Conclusion
Creating COM callable objects is a snap using the attributes provided with the .NET framework. One of the great uses for these CCW's (along with javascript) is to allow you to launch applications from the WebBrowser control. Unfortunately, you will still initially see the warning in the WebBrowser control that says, "An active x control might be unsafe...". I have not yet figured out how to get rid of this annoying message. If you have any suggestions, feel free to contact me and I'll add it to this article. Fortunately, the message disappears once you say Yes, but will come back next time you run the application.
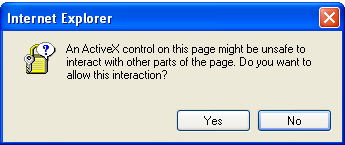
Figure 3 - Warning that comes up in the WebBrowser Control
Anyway, hopes this help you utilize the WebBrowser control as a more interactive part of your .NET arsenal. Remember, if you have any COMments, please feel free to share them here on C# Corner.