Introduction:
Windows Workflow Foundation (WF) is a programming model, engine and tools for quickly building workflow enabled applications on Windows. It consists of .NET classes, an in-process workflow engine, and designers for Visual Studio 2008.
WF allows for two types of workflows. Sequential workflow is one that executes a series of steps in a defined sequence.
State machine workflow represents an ongoing project, in which a system continually transitions from one state to another. In this case, activities are not attached to a state.
Getting Started:
Workflow projects are created in the same way as other projects types in Visual Studio 2008.
After starting Visual Studio 2008, you select File >> New Project. In the left side pane you select Visual Basic or Visual C# >> Workflow and in the right side you select a template type.
In this example I am choosing Sequential Workflow Console Application template as you can see in Figure 1.
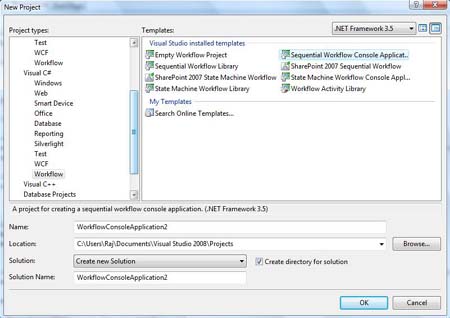
Figure 1.
This is the initial view of the visual workflow designer in Figure 2.
An activity represents a step in the workflow and is the fundamental building block of all WF workflows. All activities either directly or indirectly derive from the base class System.Workflow.ComponentModelActivity class.
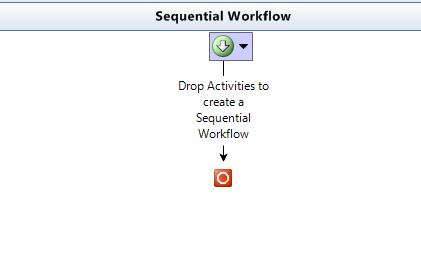
Figure 2.
The Solution Explorer is shown like this.
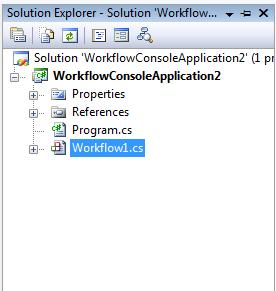
Figure 3.
These are the standard activities are available in Visual Studio 2008. If you look at the Tookbox as in Figure 4, you will see many activities. To add that to your project, you simply have to drag and drop the activity.
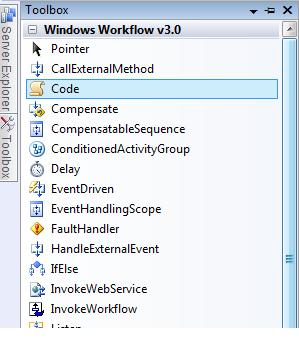
Figure 4.
Just drag and drop Code activity onto the workflow. The Code activity is a simple way to execute any code that you want as a step in the workflow. See Figure 5.
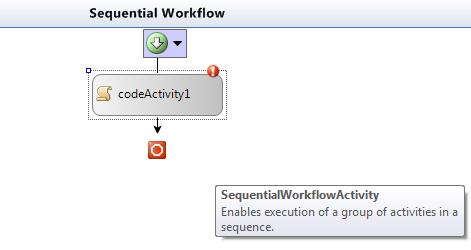
Figure 5.
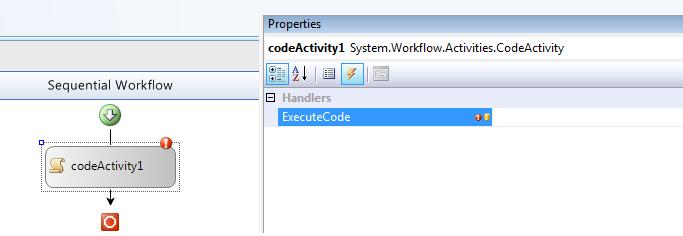
Figure 6.
Now there is an event and on ExecuteCode event, I write the following:
private void codeActivity1_ExecuteCode(object sender, EventArgs e)
{
Console.WriteLine("Hello Raj Beniwal!! Welcome to WF!");
}
Now let's build and run the application. The output looks like Figure 7.
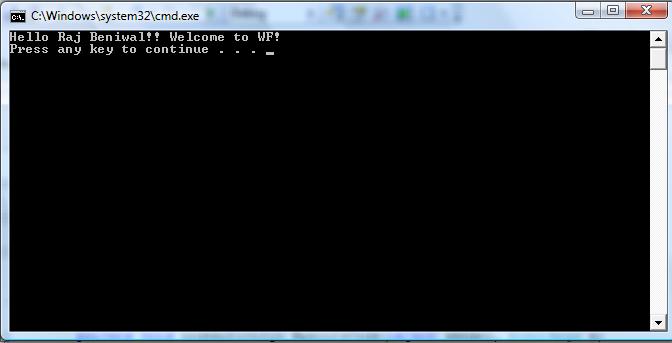
Figure 7.
When workflow has been implemented it adds new file Program.cs, which has following code.
using System;
using System.Collections.Generic;
using System.Linq;
using System.Text;
using System.Threading;
using System.Workflow.Runtime;
using System.Workflow.Runtime.Hosting;
namespace GettingStartedWF
{
class Program
{
static void Main(string[] args)
{
using(WorkflowRuntime workflowRuntime = new WorkflowRuntime())
{
AutoResetEvent waitHandle = new AutoResetEvent(false);
workflowRuntime.WorkflowCompleted += delegate(object sender,
WorkflowCompletedEventArgs e) {waitHandle.Set();};
workflowRuntime.WorkflowTerminated += delegate(object sender, WorkflowTerminatedEventArgs e)
{
Console.WriteLine(e.Exception.Message);
waitHandle.Set();
};
WorkflowInstance instance =
workflowRuntime.CreateWorkflow(typeof(GettingStartedWF.Workflow1));
instance.Start();
waitHandle.WaitOne();
}
}
}
}
Now I am showing how to pass parameters in workflow. In WF parameters will be passed directly from the host console application.
private void codeActivity1_ExecuteCode(object sender, EventArgs e)
{
Console.WriteLine("Hello {0}, {1}", Name, Message);
}
public string Name
{
get;
set;
}
public string Message
{
get;
set;
}
static void Main(string[] args)
{
using(WorkflowRuntime workflowRuntime = new WorkflowRuntime())
{
AutoResetEvent waitHandle = new AutoResetEvent(false);
workflowRuntime.WorkflowCompleted += delegate(object sender,
WorkflowCompletedEventArgs e) {waitHandle.Set();};
workflowRuntime.WorkflowTerminated += delegate(object sender,
WorkflowTerminatedEventArgs e)
{
Console.WriteLine(e.Exception.Message);
waitHandle.Set();
};
Dictionary<string, object="">wfArguments = new Dictionary<string,
object="">();
wfArguments.Add("Name", "RAJ!");
wfArguments.Add("Message", "How you doing???");
WorkflowInstance instance =
workflowRuntime.CreateWorkflow(typeof(GettingStartedWF.Workflow1),
wfArguments);
instance.Start();
waitHandle.WaitOne();
Console.WriteLine("Press any key to exit");
Console.ReadKey();
}
}
For more information see attached application.
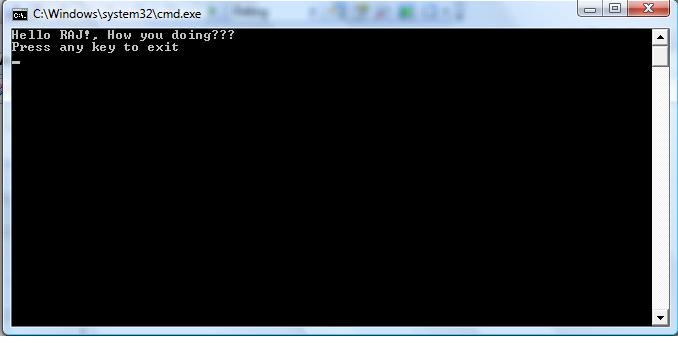
Figure 8.
Summary:
In this example you saw how to start working with WF step by step.