

Introduction
Imagine you have a number of images and you want to show one image at a time. To do that we will implement an image slide show in a Windows Phone 7 application. We will implement quite simply using a pivot control; a Windows Phone pivot application provides a quick way to manage views or pages. It can be used for filtering large datasets, viewing multiple data sets, or switching application views. For example, flicking or panning left to right on the page advances to the next page of content. At the base of an application is a pivot control that is essentially a container for a secondary control called a PivotItem control. The PivotItem controls contain individual page content such as controls, grids, or links inside each page.
The Pivot control comes with built-in support for touch interaction and navigation. You do not have to implement any special gesture functionality in your application because it is enabled by default. The pivot control supports the following gestures and navigational effects:
- Horizontal pan (tap and drag left/right)
- Horizontal flick (tap and swipe quickly left/right)
- Navigating hosted controls, for example, links can be tapped and lists can be scrolled
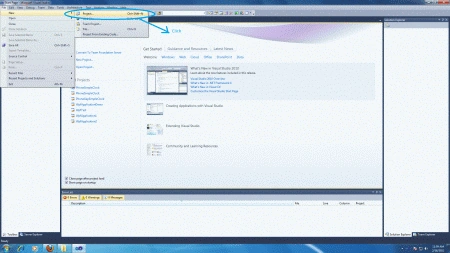
- Select new -> project
- Select your preferred language
- Select Silverlight for Windows Phone Pivot application
- Name the project
- Now name of project is "PivotApplication2"
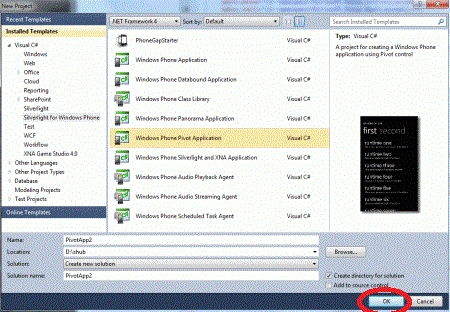
Step 2 : Add images to the project as needed:
- right-click on the project
- select add New Item
- browse the location of images
- select and click add to add in project
Step 3 : Now customize the MainPage.xaml code according to our need; the code is given below.
Code
<controls:Pivot Title="Album" Visibility="Visible">
<controls:Pivot.Background>
<LinearGradientBrush EndPoint="1,0.5" StartPoint="0,0.5">
<GradientStop Color="White" Offset="0.192" />
<GradientStop Color="Black" Offset="0.92400000244379044" />
</LinearGradientBrush>
</controls:Pivot.Background>
<controls:PivotItem Header=">>Image1 " FontSize="8" Height="Auto" >
<Image Source="/PivotApp2;component/Images/images1.jpg"></Image>
</controls:PivotItem>
<controls:PivotItem Header=">>Image2 " FontSize="8">
<Image Source="/PivotApp2;component/Images/dreamhome.jpg"></Image>
</controls:PivotItem>
<controls:PivotItem Header=">>Image3 " FontSize="8">
<Image Source="/PivotApp2;component/Images/image2.jpg"></Image>
</controls:PivotItem>
<controls:PivotItem Header=">>Image4 " FontSize="8">
<Image Source="/PivotApp2;component/Images/Lighthouse.jpg"></Image>
</controls:PivotItem>
<controls:PivotItem Header=">>Image5 " FontSize="8">
<Image Source="/PivotApp2;component/Images/Chrysanthemum.jpg"></Image>
</controls:PivotItem>
<controls:PivotItem Header=">>Image6 " FontSize="8">
<Image Source="/PivotApp2;component/Images/Tulips.jpg"></Image>
</controls:PivotItem>
</controls:Pivot>
Step 4 : The whole code of the MainPage.xaml page is:
Code
<phone:PhoneApplicationPage
x:Class="PivotApp2.MainPage"
xmlns="http://schemas.microsoft.com/winfx/2006/xaml/presentation"
xmlns:x="http://schemas.microsoft.com/winfx/2006/xaml"
xmlns:phone="clr-namespace:Microsoft.Phone.Controls;assembly=Microsoft.Phone"
xmlns:shell="clr-namespace:Microsoft.Phone.Shell;assembly=Microsoft.Phone"
xmlns:controls="clrnamespace:Microsoft.Phone.Controls;assembly=Microsoft.Phone.Controls"
xmlns:d="http://schemas.microsoft.com/expression/blend/2008"
xmlns:mc="http://schemas.openxmlformats.org/markup-compatibility/2006"
mc:Ignorable="d" d:DesignWidth="480" d:DesignHeight="768"
d:DataContext="{d:DesignData SampleData/MainViewModelSampleData.xaml}"
FontFamily="{StaticResource PhoneFontFamilyNormal}"
FontSize="{StaticResource PhoneFontSizeNormal}"
Foreground="{StaticResource PhoneForegroundBrush}"
SupportedOrientations="Portrait" Orientation="Portrait"
shell:SystemTray.IsVisible="True">
<!--LayoutRoot is the root grid where all page content is placed-->
<controls:Pivot Title="Album" Visibility="Visible">
<controls:Pivot.Background>
<LinearGradientBrush EndPoint="1,0.5" StartPoint="0,0.5">
<GradientStop Color="White" Offset="0.192" />
<GradientStop Color="Black" Offset="0.92400000244379044" />
</LinearGradientBrush>
</controls:Pivot.Background>
<controls:PivotItem Header=">>Image1 " FontSize="8" Height="Auto" >
<Image Source="/PivotApp2;component/Images/images1.jpg"></Image>
</controls:PivotItem>
<controls:PivotItem Header=">>Image2 " FontSize="8">
<Image Source="/PivotApp2;component/Images/dreamhome.jpg"></Image>
</controls:PivotItem>
<controls:PivotItem Header=">>Image3 " FontSize="8">
<Image Source="/PivotApp2;component/Images/image2.jpg"></Image>
</controls:PivotItem>
<controls:PivotItem Header=">>Image4 " FontSize="8">
<Image Source="/PivotApp2;component/Images/Lighthouse.jpg"></Image>
</controls:PivotItem>
<controls:PivotItem Header=">>Image5 " FontSize="8">
<Image Source="/PivotApp2;component/Images/Chrysanthemum.jpg"></Image>
</controls:PivotItem>
<controls:PivotItem Header=">>Image6 " FontSize="8">
<Image Source="/PivotApp2;component/Images/Tulips.jpg"></Image>
</controls:PivotItem>
</controls:Pivot>
</phone:PhoneApplicationPage>
-
At design time the application wil look like:
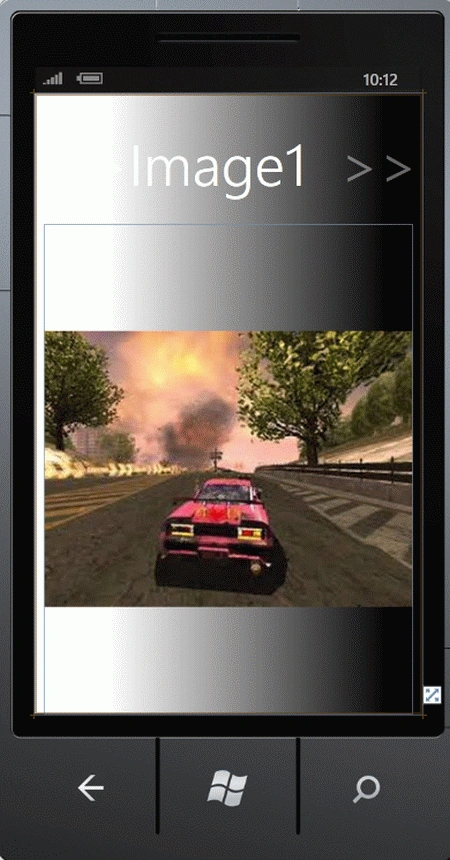
Step 5 : Press F5 to run the application.
Output
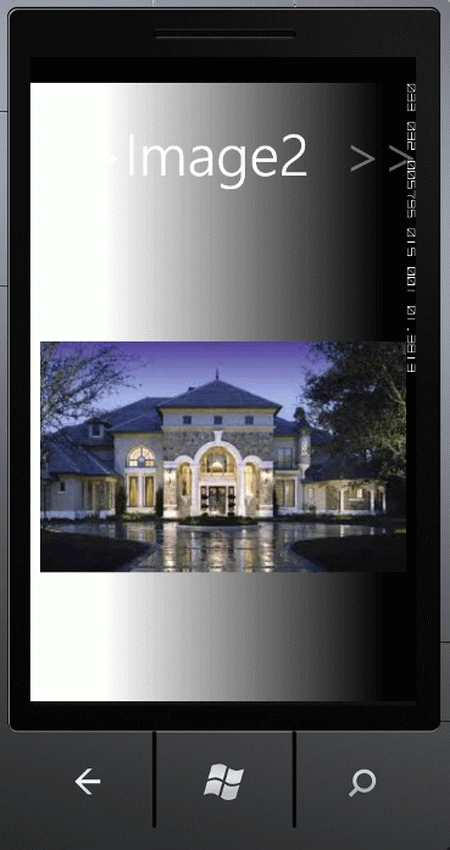
- Click on the ">>" symbol to see the next image from the image gallery:

Resources
Sliding Effect in Windows Form Application
System Tray ProgressIndicator in Windows Phone 7.5 / Mango phone
ASP.NET Web Control for Showing Image Slides
Zooming Functionality in Windows Phone 7
Justin MarkwellPosted Aug 14, 2013, 11:52 AM
thefirstBitMapLoaded.SetSource(e.ChosenPhoto); now how would you pan to load the next in line.
Justin MarkwellPosted Aug 14, 2013, 11:44 AM
Great example of putting a few pictures into a panning effect. What drew me to this post was looking to do a large number of photos like panning images from the skydrive album or the saved to phone album? How would you pan to next image in the album after you have loaded the first Image? Just as it does on the device when viewing a album?