

Introduction
Prerequisites
- Arduino Uno
- Analog sensor TMP36
- Alphanumeric LCD based on HD44780 controller
- Basis on which to perform wiring components
- A resistor 220 ohm
- Coulometer 65 for electrical connections
- Potentiometer adjustable resistance value
I remember that all the components listed above are included in the Starter Kit, available at any electronics retail center, also available in the numerous sites selling online.
Description of all components
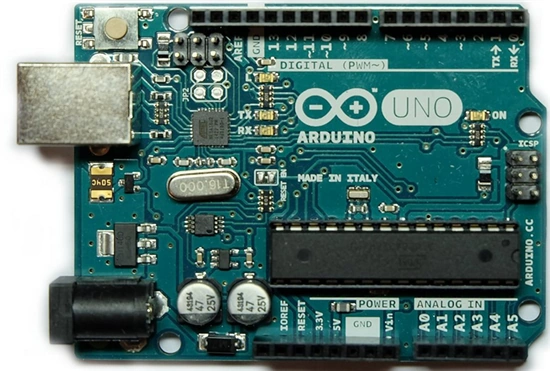 We will use the Arduino Uno to perform the management of the temperature sensor and the display. This is the basic model features in hardware to a microcontroller Atmega 328 16 MHz, 32 KB flash memory, a memory of SRAM 2K bytes.
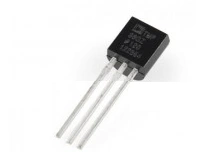 It is an analog temperature sensor that supplies a voltage value of 10mV for degrees directly proportional to the temperature value that is detected. It has a reading range that goes from -40 ° c to 125 ° c.
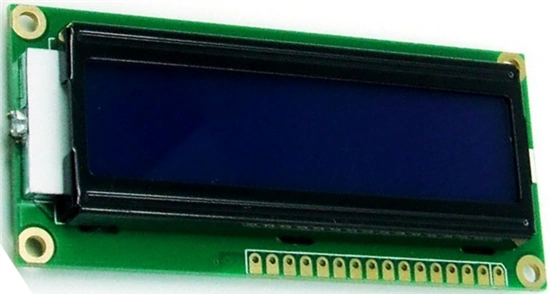 Two-line display with 16 characters, backlight. The operation requires an electric voltage of 5v DC and a series of links that we will see in the article.
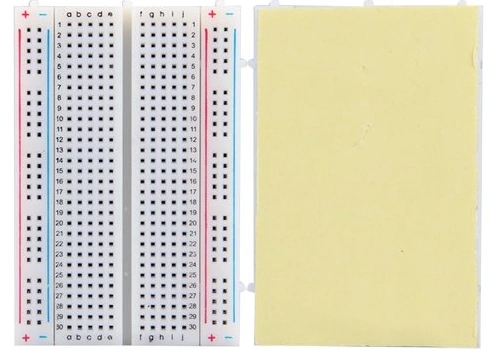 This is the basis of where we're going to run the wiring of the electric circuit of all the components necessary to implement our example.
 It is necessary to protect the pin 15 of the display backlight, exactly pin LED +.
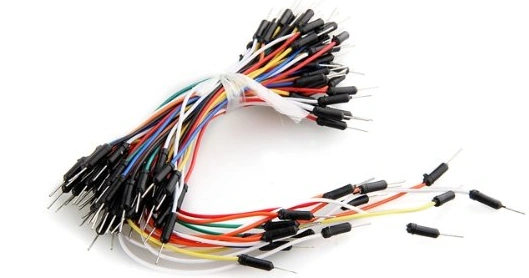 The jumpers are pre-wired, with which we will put in communication all the components that will be the basis, so as to be able to perform all the electrical connections.
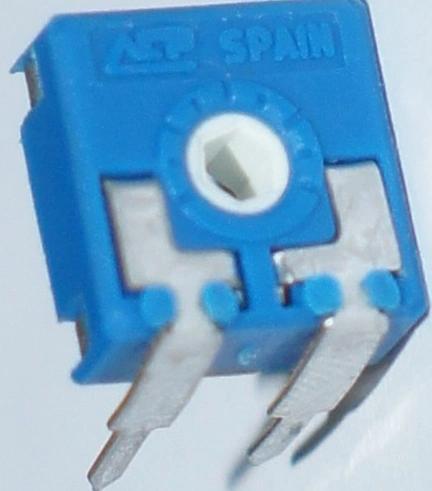 The Potentiometer for adjusting the resistance, required for adjusting the contrast on the display.
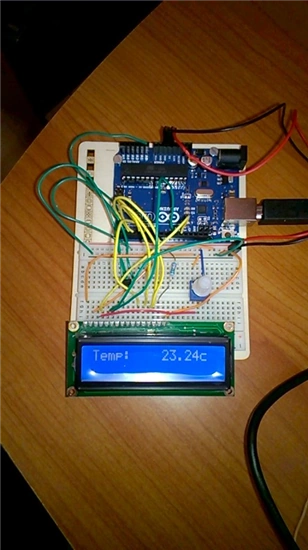
Electronic scheme and preview the circuit.
We now have everything related to the hardware, we just need to start our work of electrical wiring. First, we need to get the wiring diagram. If you also want to devote to the design of the circuit, there are free and paid software that allows the creation of a scheme electrical/electronic, because without it we can't expect to get down to business for the linking phase. One good free software I found is at this link. I leave the outline of connection with the software indicated in the previous link.
The Potentiometer for adjusting the resistance, required for adjusting the contrast on the display.
Electronic scheme and preview the circuit.
We now have everything related to the hardware, we just need to start our work of electrical wiring. First, we need to get the wiring diagram. If you also want to devote to the design of the circuit, there are free and paid software that allows the creation of a scheme electrical/electronic, because without it we can't expect to get down to business for the linking phase. One good free software I found is at this link. I leave the outline of connection with the software indicated in the previous link.
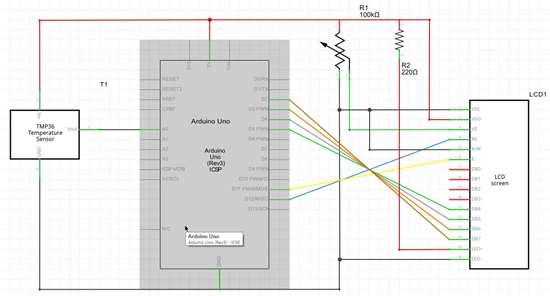
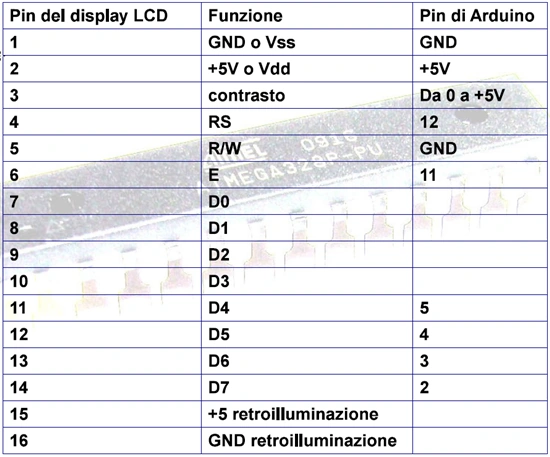
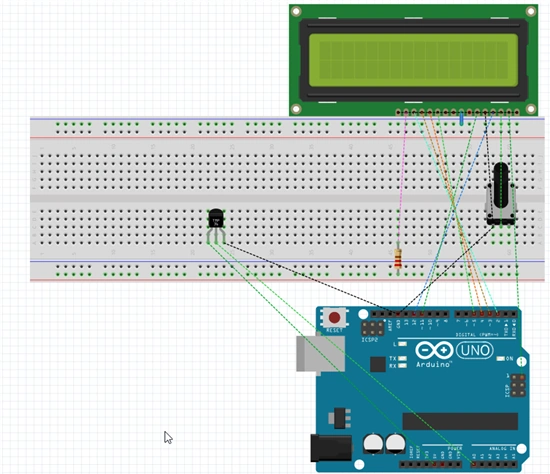 For completeness, I also leave the pin for the easy connection of the display.
 Create Sketch code
After creating the schema and making the connections of all the components it is time to move from the hardware to the software. The Arduino board to be properly programmed, has a basic IDE development tool that you can find at this link. Currently, the version is 1.6.4 and it was also released by Visual Micro. It is a plug-in for Visual Studio, with which we can easily program any form of the family of Arduino directly from Visual Studio. However, there are constraints on it or are not supported by, versions Express and installed from version 2008 to 2013, not yet available for the current version in 2015. My advice is to download the community version of Visual Studio 2013, the equivalent of a Professional version so be sure to install it. More information about Visual Micro can be found in the link left previously. For programming the sketch of the code, we will use in this article the Arduino IDE. Once installed, double-click on the screen and this and that we will find initially.
Create Sketch code
After creating the schema and making the connections of all the components it is time to move from the hardware to the software. The Arduino board to be properly programmed, has a basic IDE development tool that you can find at this link. Currently, the version is 1.6.4 and it was also released by Visual Micro. It is a plug-in for Visual Studio, with which we can easily program any form of the family of Arduino directly from Visual Studio. However, there are constraints on it or are not supported by, versions Express and installed from version 2008 to 2013, not yet available for the current version in 2015. My advice is to download the community version of Visual Studio 2013, the equivalent of a Professional version so be sure to install it. More information about Visual Micro can be found in the link left previously. For programming the sketch of the code, we will use in this article the Arduino IDE. Once installed, double-click on the screen and this and that we will find initially.
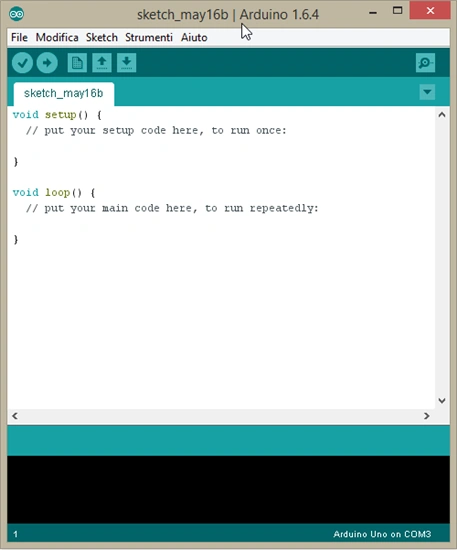 We see that they have two methods, the first called setup() and the second loop(). He said briefly, in the setup() method, we need to provide everything about the initialization required for the operation of the project since it is done only once. All of the remaining code goes in the method loop(), that is executed repeatedly. Another thing is to define the variables globally, in other words, make them visible everywhere and we must declare them to the outside of both methods. First, click with the mouse on the "File", after "Salva con nome", call the project "Temperature Test". After doing that, we paste in the following C++ code.
- // Andiamo a includere nel progetto il file LiquidCrystal
- #include < LiquidCrystal.h>
- // Inizializzazione dei pin RS,E,D4,D5,D6,D7 del display
- LiquidCrystal lcd(12, 11, 5, 4, 3, 2);
- // la costante analogicInputSensor avrà il valore analogico dell'ingresso A0 sulla scheda Arduino Uno
- const int analogicInputSensor = A0;
- /*In questo metodo viene eseguita l'inizializzazione delle variabili o altro
- che necessita di essere impostato una sola volta, poiché il metodo setup viene
- eseguito una sola volta*/
- void setup()
- {
- /* add setup code here */
- // Inizializzazione dei pin GND retroilluminzione e il pin +5V
- lcd.begin(16, 2);
- }
- /*All'interno di questo metodo va inserita tutta la parte di codice, trattandosi
- di un loop infinito il codice sarà eseguito in maniera sequenziale dalla prima
- all'ultima istruzione*/
- void loop()
- {
- /* add main program code here */
- // Questa variabile sarà aggiornata con il valore analogico di analogicInputSensor
- int sensorInpunaVal = analogRead(analogicInputSensor);
- // Otteniamo il voltaggio dato dal valore della variabile sensorInpunaVal diviso 1024.0, moltiplicato per 5.0
- float voltage = (sensorInpunaVal / 1024.0)* 5.0;
- // Otteniamo il valore di temperatura dal voltaggio -.5 * 100
- float actualTemperature = (voltage - .5) * 100;
- // Cancelliamo il contenuto attuale sul display
- lcd.clear();
- // Scrivo il valore Temp sul display
- lcd.print("Temp:");
- // Richiamo il metodo CheckTemperature
- CheckTemperature(actualTemperature);
- }
- // Metodo CheckTemperature
- void CheckTemperature(float value)
- {
- // Imposto la posizione del cursore alla posizone 9 e parto con il nuovo valore subuto dopo
- lcd.setCursor(9, 0);
- // Scrivo il valore della variabile value, che corrisponde alla temperatura attuale
- lcd.print(value);
- // Scrivo il valore c sul display
- lcd.print("c");
- // Imposto un ritardo di 2 secondi prima della scansione successiva
- delay(2000);
- }
Juan Baudazio SanchezPosted Jun 28, 2017, 2:03 AM
En asp.net MVC en c# tendras un ejemplo de sensores
Shankar GuravPosted May 18, 2015, 8:25 AM
Great article, your sketch is short and simple. Thanks. I had written something on same line for the beginner one like me. https://shankargurav.wordpress.com/2015/04/01/arduino-iot-getting-started/
Akhil GargPosted May 18, 2015, 7:47 AM
Nice. .. :)
Dinesh BeniwalPosted May 18, 2015, 4:49 AM
Great start, thanks for sharing CARMELO LA MONICA
Sibeesh VenuPosted May 18, 2015, 1:30 AM
Informative
NitinPosted May 17, 2015, 2:13 PM
great!!
Emiliano MussoPosted May 17, 2015, 12:38 PM
Great article, congratulations Carmelo!
Pooja BaraskarPosted May 17, 2015, 4:49 AM
Cool
Abhishek JaiswalPosted May 17, 2015, 3:16 AM
Ooh cool! I did the same along with my friends using PIR sensor and Arduino UNO. :)